Porsche 935 K3 Wynn´s
Sometimes the works come up after a long time thinking about them, long projects with a lot of preparation work, documentation of the car, study of the techniques.... And others simply come up by chance. This job is one of them.
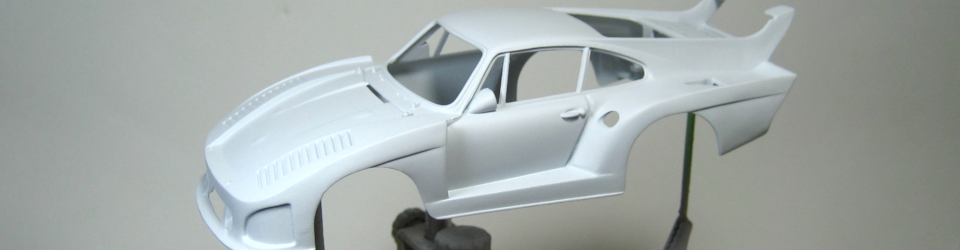
I had saved a Altaya´s "Duelos Míticos" collection Porsche 935 K3 body without knowing what to do with it, which for those who don't know this body is the same mold as the EXIN Porsche 935, which is a 1983 model. Despite being a mold with so many years the bodywork is a very good reproduction, logically surpassed by current products but we must not forget that it is a reproduction from almost 40 years ago, which gives us an idea of the category that the modellers of EXIN had, perhaps some current slot car manufacturer should review these works before doing certain things.
On the other hand, I bought a Porsche 935 from Sideways and looking at both cars I realized that the Sideways chassis fit the Altaya body shape very well. Undoubtedly, as these are two reproductions of models derived from the 911, the wheelbase is practically the same, but in this case even the shape of the chassis fit very well with the Altaya bodywork, which required minimal modifications. Starting from that base I thought "why not to make a competitive car?" After all, the Sideways chassis is very good and allows the fitting of an anglewinder motor and I know that the 935 from that manufacturer is a car that performs very well on the speed track so I approached the job somewhat differently than I usually do.
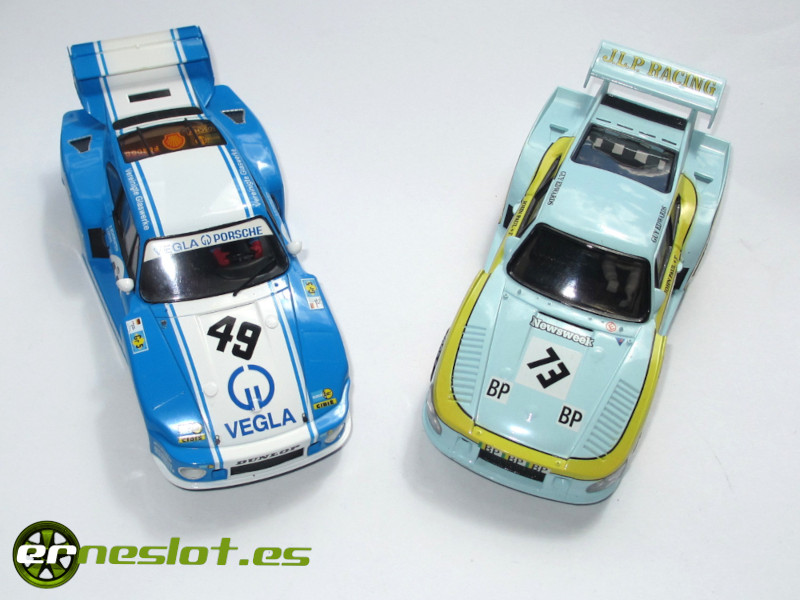
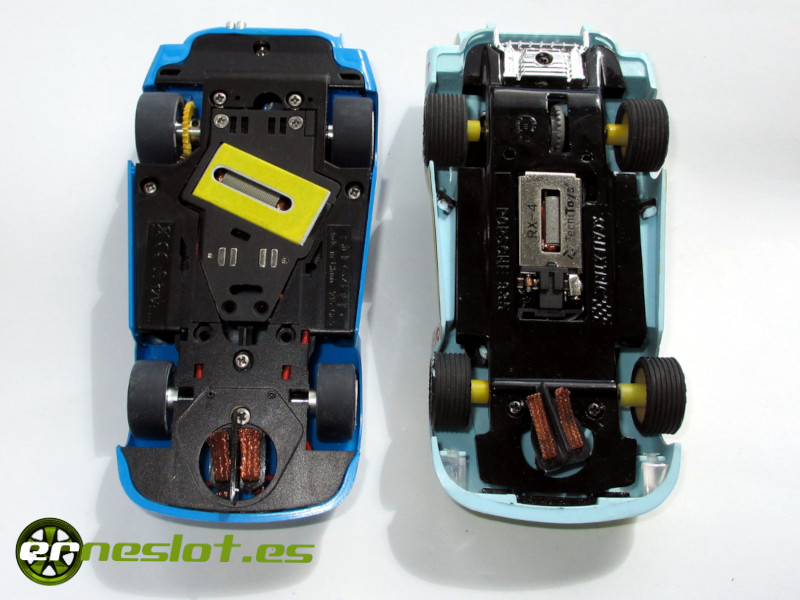
To date, the mobility of the slot cars I make had been a secondary issue, but in this case I wanted to try to make a car that, with its limitations, would be as competitive as possible, so that the modifications would be focused on behavior of the car on track and not in its aesthetics, which is not to say that I was not interested in making a beautiful car.
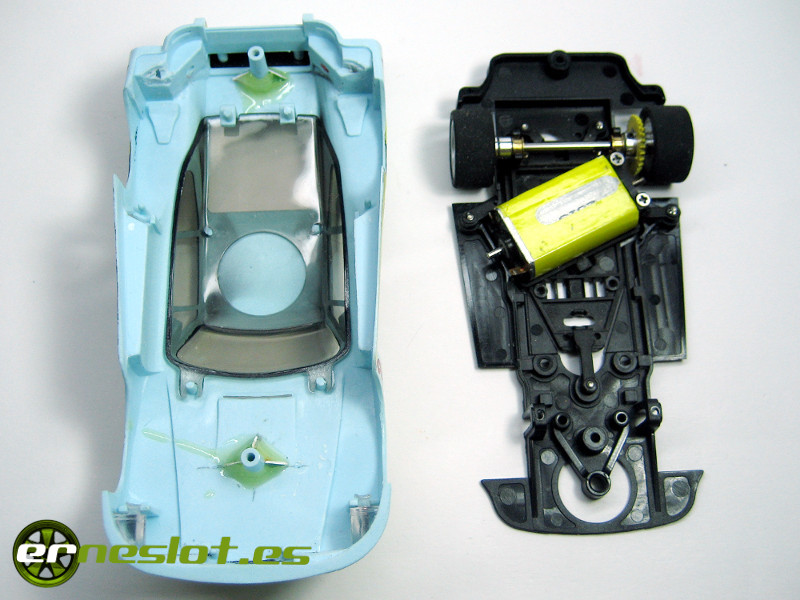
The first thing I did, instead of stripping the bodywork, was to adjust the chassis to the bodywork. The wheelbase was the same on both models and the chassis was an almost perfect fit. I removed the 3 body posts that hold the chassis to the body and glued only two, matching them with the holes of the chassis for the screws. The posts were well attached to the bodywork with epoxy glue (Araldit). In this operation I only had to take special care that the height and position of the chassis with respect to the body was correct.
The chassis was a bit hold by the body on the sides and since I didn´t want to change it in any way I thinned the body sides until the chassis fit without being pinched. In addition, this lightened the body a bit since it is a fairly heavy body (36 grams) since it is made of very thick plastic.
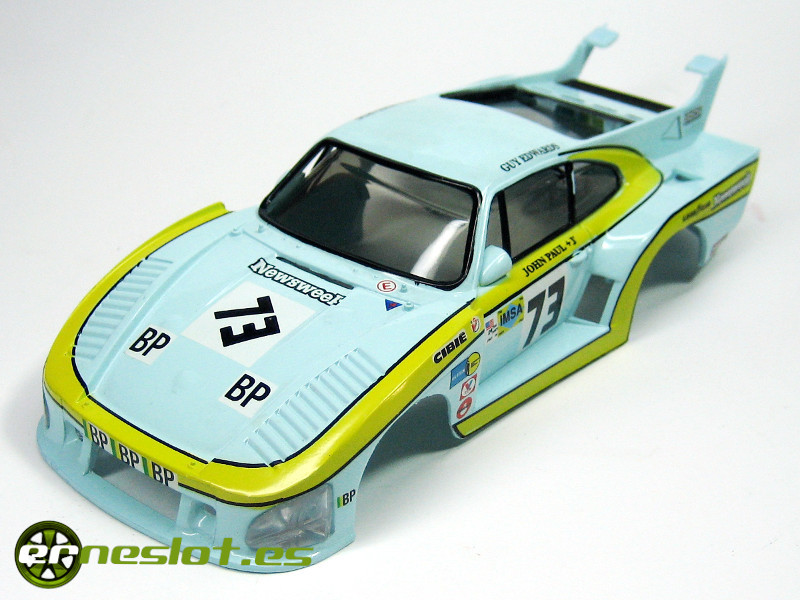
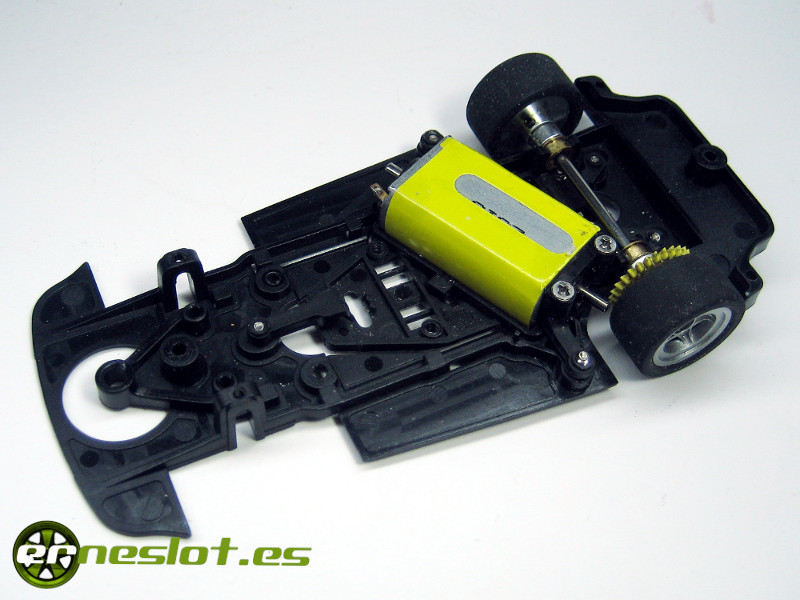
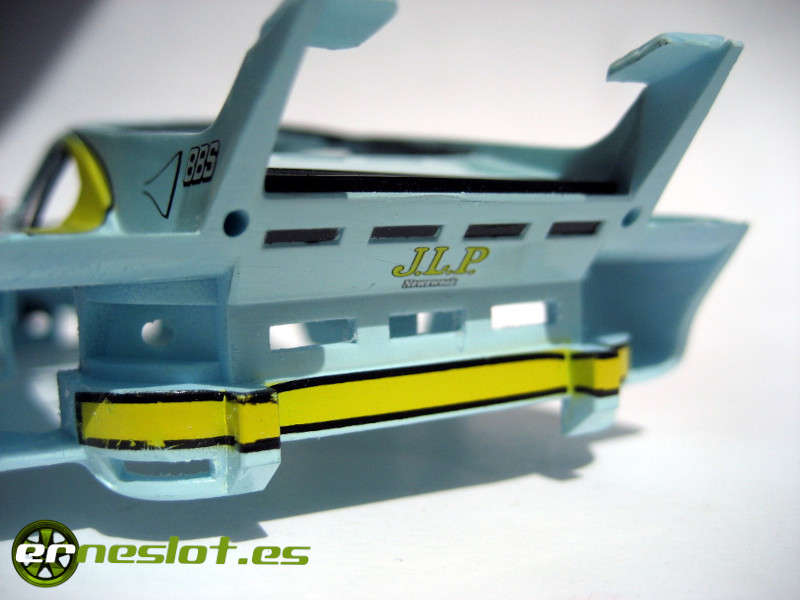
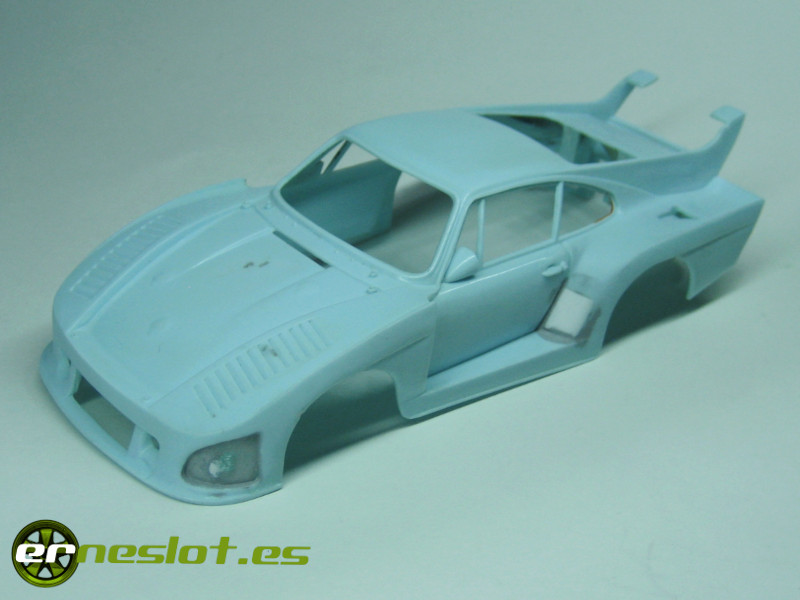
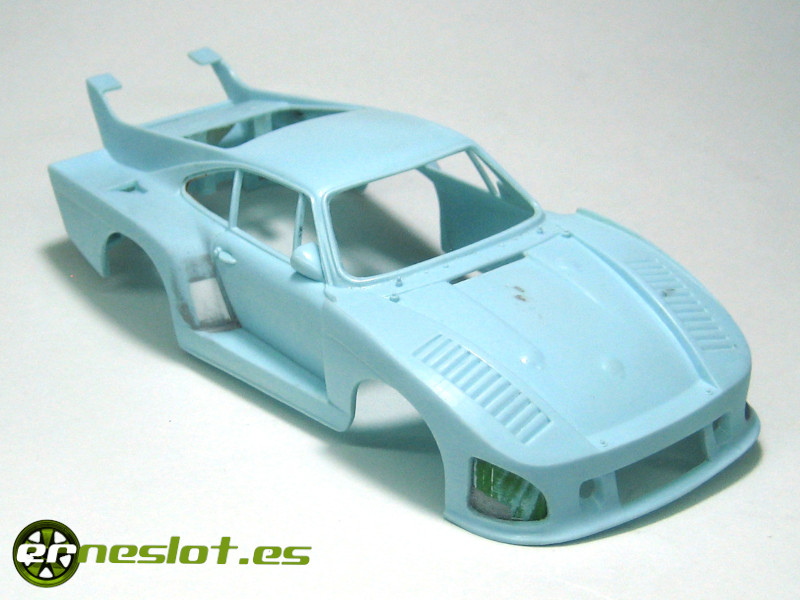
To continue with the weight reduction of the bodywork, I decided to open as many holes as possible in the bodywork, since many of them are blind. So I proceeded to make the openings in the rear of the car, both in the wheel arches and the rear wing support...
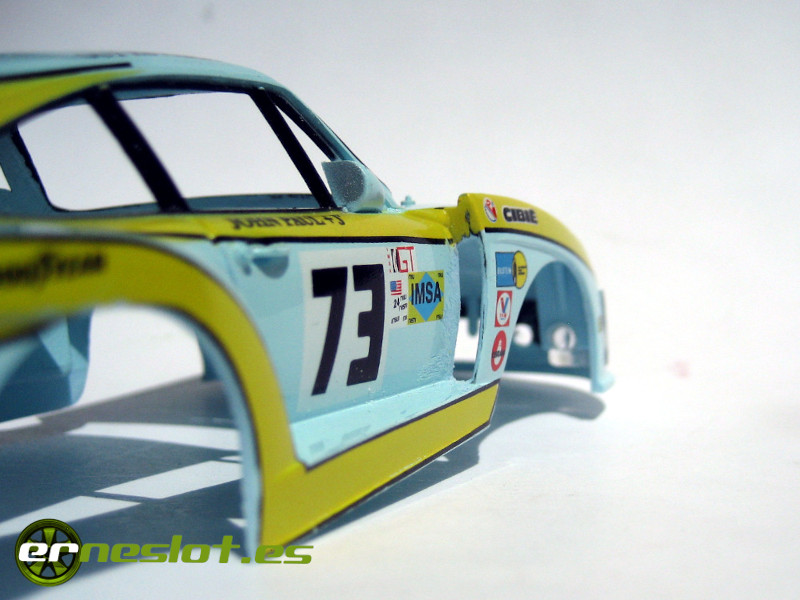
...as in the air outlet of the front wheel arches:
With all the openings made, I disassembled the bodywork and stripped it by immersing it in 96° alcohol and in just over half an hour it was completely clean. After the cleaning process, I covered the side air intakes to change their shape and position, placing them a little higher and with a round shape. I also covered the holes where the headlights are housed, covering them from the inside with some plastic pieces on which I will put other pieces with the same shape as the lights, simulating the headlights covered with plastic as was done in the endurance races of the 60s and 70s.
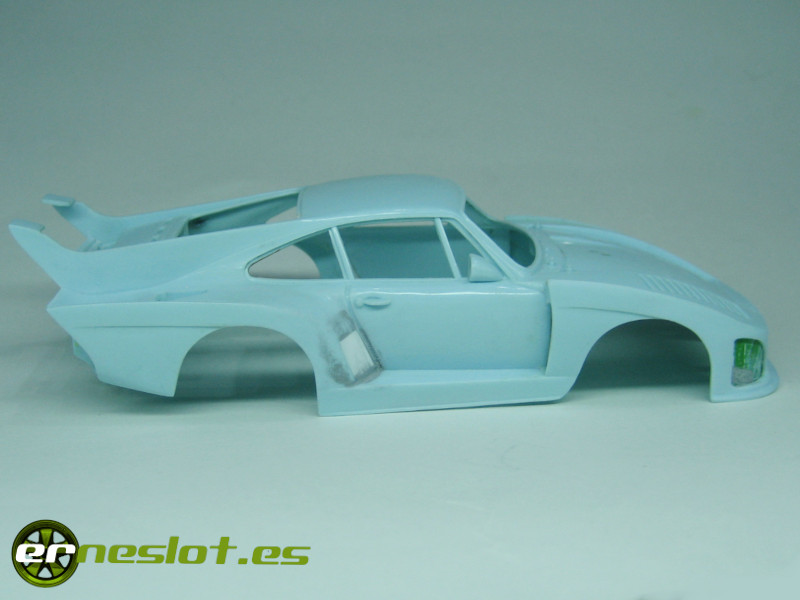
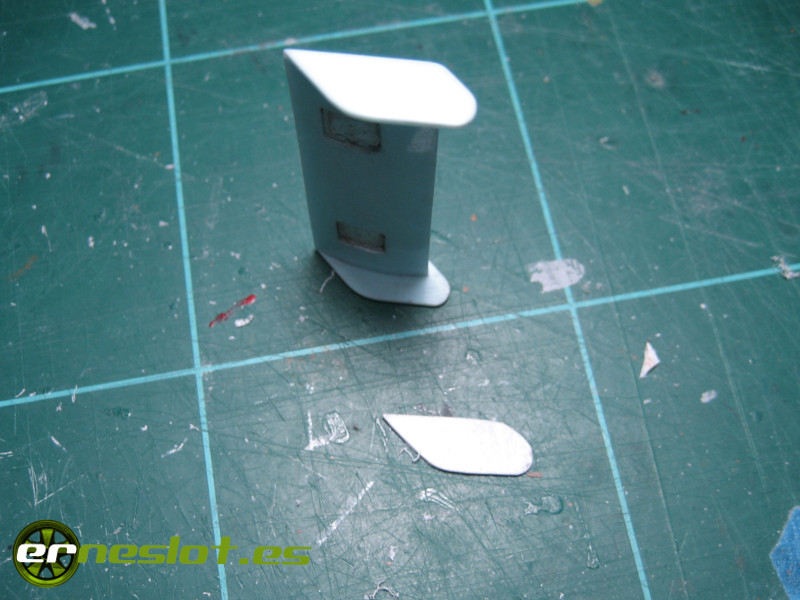
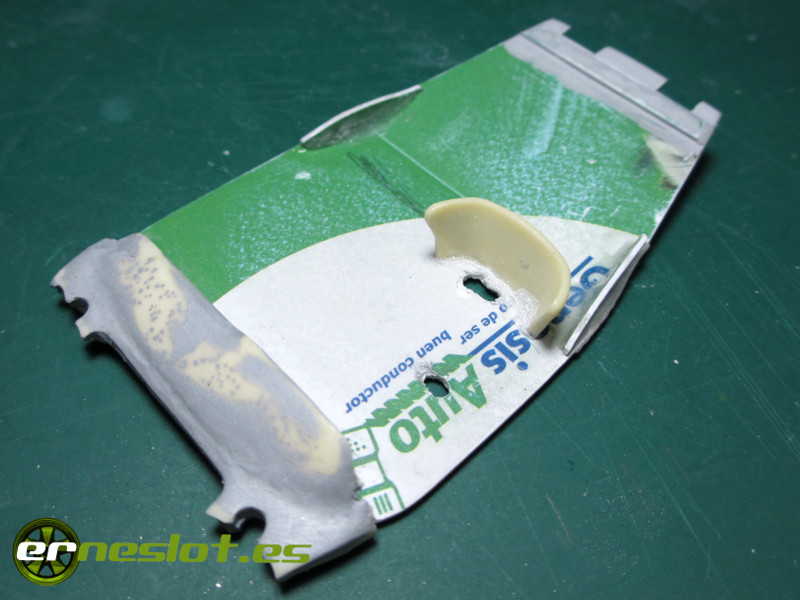
The rear wing of this car is a separate piece and with a very successful shape in general. But I didn't like the shape of the end plates so I modified it. First I made a template with a strip of plastic with the original shape of the end plates of the spoiler which I modified to give it a drop shape to my liking. Using that modified template I marked the outline on the spoiler and shaped it by sanding smooth. Unfortunately, to illustrate the process I only have the image of the spoiler with the template in its original form, I don't know what I have done with the rest of the images I took.
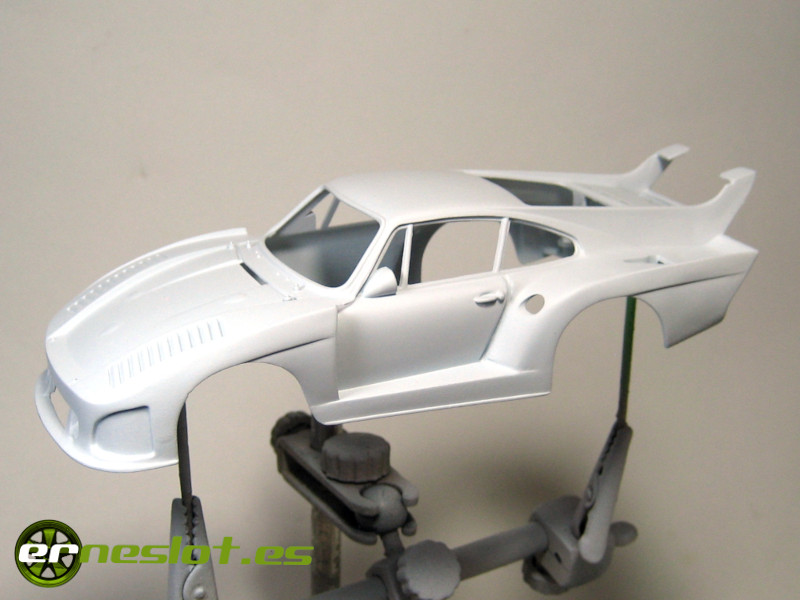
After all the work on the bodywork, I applied a Duplicolor gray spray primer coat to match the entire surface and check for any flaws that were practically non-existent. in the following image you can see the bodywork with the primer coat and the new shape and position of the side air intakes.
For the interior, I discard using the original drivers tray and changed it for one of my own making based on a plastic card to which I glued a dashboard urethane casted from an ARII model that I have used in many of my works because it reproduces the perfection the dashboard of the Porsche 911 and derivatives up to the 993 series, and a bucket seat also made of resin casted from the one I made for the Porsche RSR Turbo.
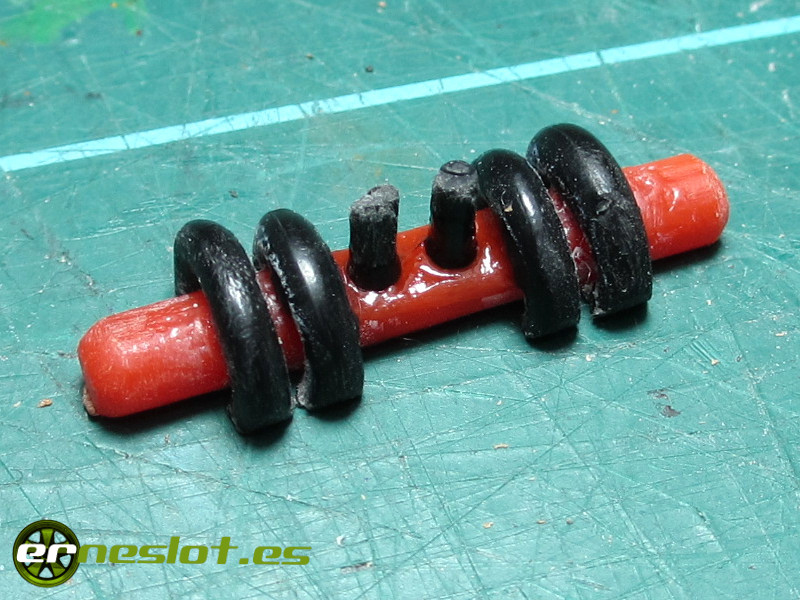
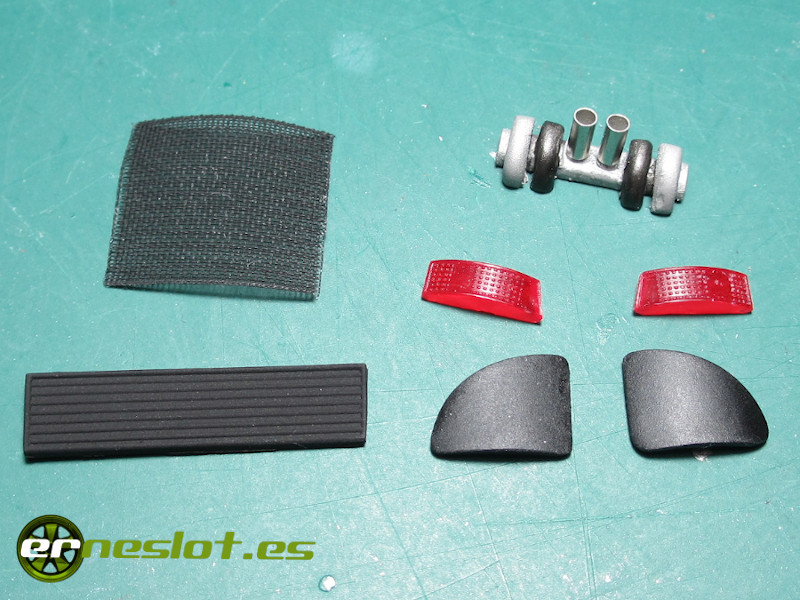
Finally, I made a piece that once finished I will glue to the chassis to simulate the exhaust pipes and turbochargers of the Porsche 935 K3. On a round rod from a sprue, I glued other rods of the same origin that I curved with the help of the heat of a candle to simulate the shape of the turbos. In the center I glued two 1 mm. in diameter carbon fiber rods where the exhaust pipes would come out:
I placed the carbon fiber rods to be able to glue two electrical ferrule connectors more securely, which will be the ones that simulate the exhaust pipes:
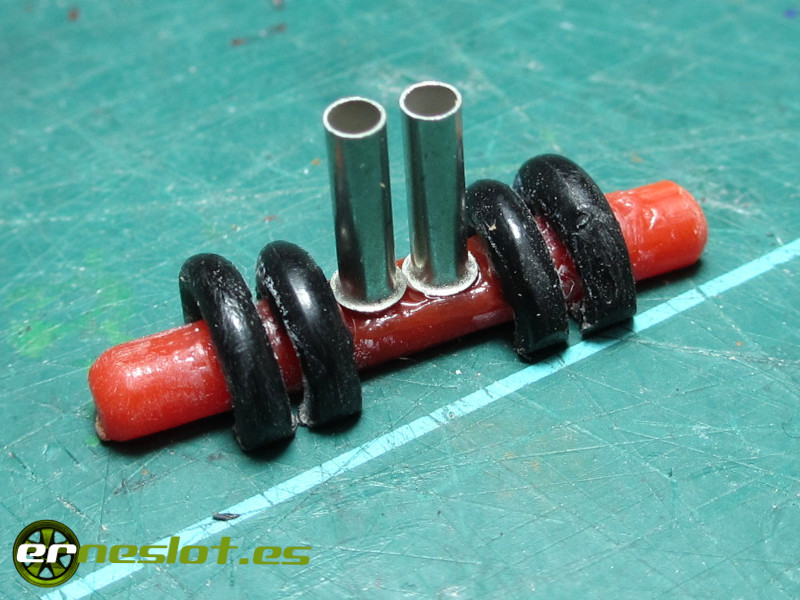
And with this last piece, I finished most of the pieces that would make up my 935 K3.
To finish the car, only the painting phase remained. I was debating whether to paint it yellow like the Whittington Bros Porsche 935 K3, a model shown in the following image taken from the website automedia.revsinstitute.org/porsche-935-k3, which, along with many other images, tells the story of that particular 935.
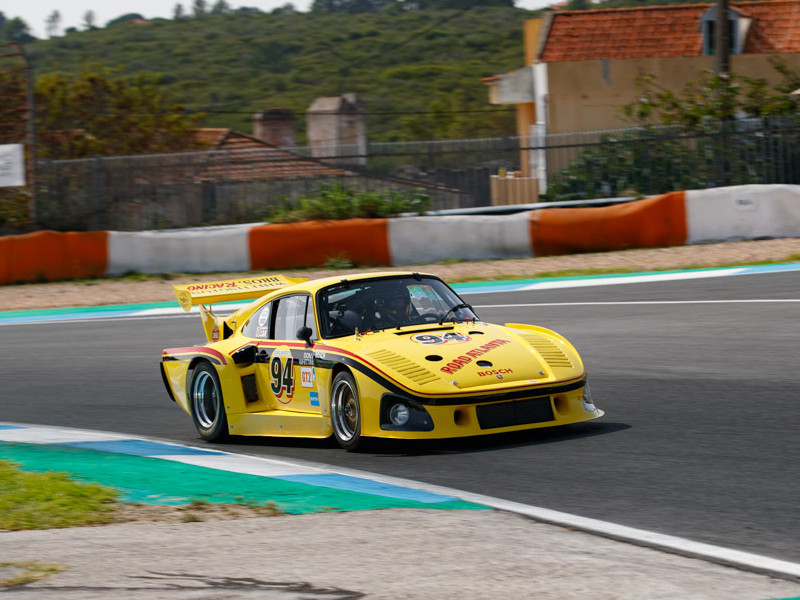
But since I didn't want to get bogged down with developing waterslide decals, I chose a much simpler livery: the livery of the Porsche 962 that Hotchkins Racing raced in the 1986 IMSA championship, sponsored by the engine additive company Wynn's.
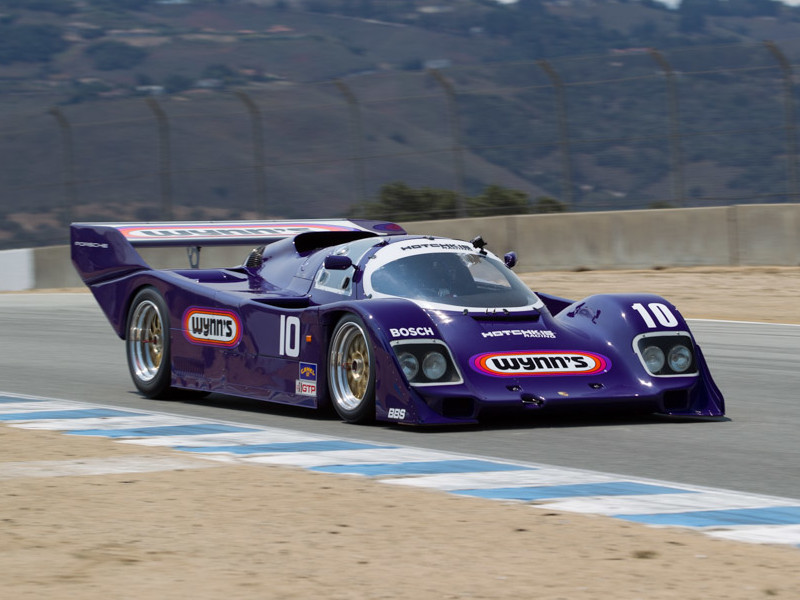
The previous image is from the website ultimatecarpage.com, which you probably already know. And if you haven't already, I encourage you to visit the site because the quantity and quality of the images of racing cars from all eras is enormous, and extremely useful for our works.
Yes, it's true that the Porsche 935 already raced at Le Mans sponsored by Wynn's in 1979 and 1980, entered by Dick Barbour's team, but in both cases they were white cars covered in sponsor stickers, and I wanted to do something different, well, maybe not that different. Searching online, I found images of the purple Porsche 962 in Wynn's livery, and I thought it was very simple and eye-catching, so that's the one I chose for my car. It's true that it's a more modern livery than the car I was building, not by much, just under 10 years, but nothing prevents me from adapting a modern livery to a classic car. After all, it's a car for me, and I liked that livery, so it all worked out.
The chosen color was Tamiya X-16 acrylic purple, applied with an airbrush. For the first coat, I used some leftover blue paint in a similar shade that I had saved from some mixes I made a while ago. Since I wasn't going to use it all, I used it for the first layer, which usually needs some touch-ups, as it did. The final coat was applied with the chosen color.
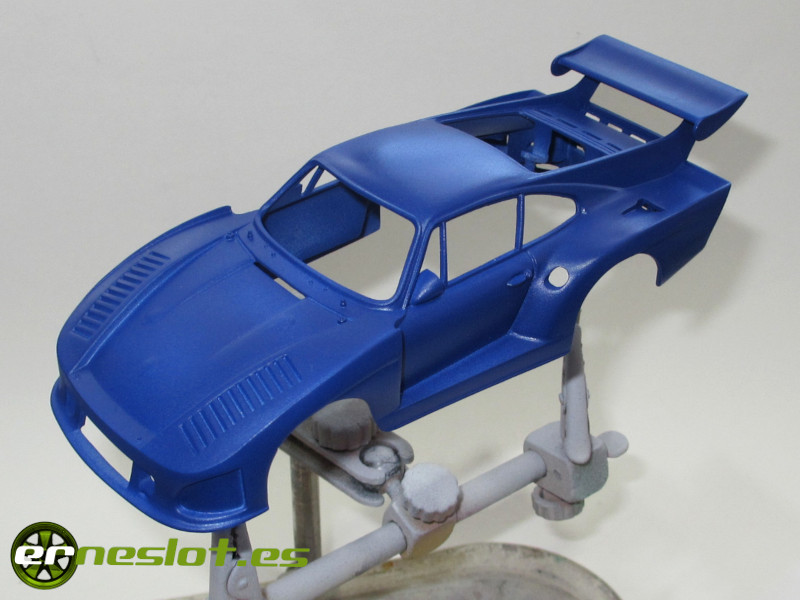
When I applied the first coat, I realized that I hadn't painted the rear wing surface white like the Porsche 962, and I also didn't like how the wing was attached to the mount. So, I made a couple of rivets with small pieces of carbon fiber rod to achieve a much stronger connection than simply gluing the wing to the car's mount.
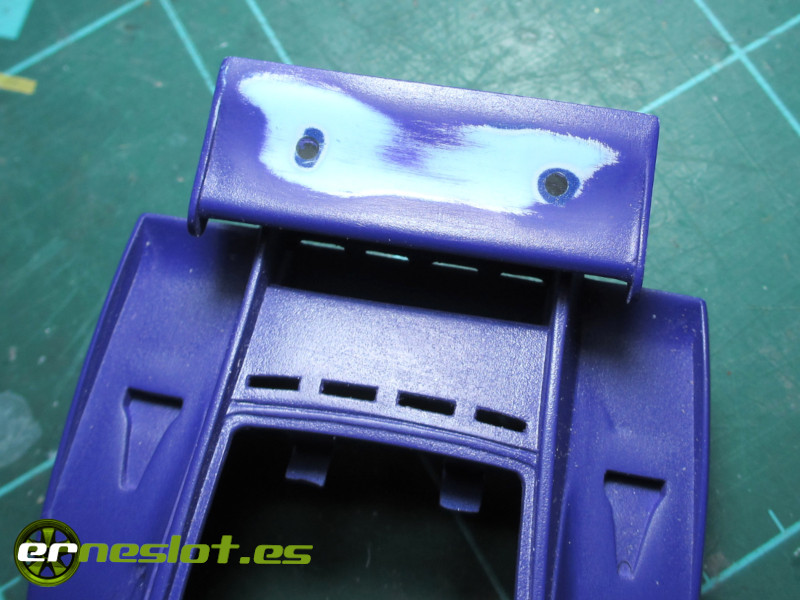
After ensuring the junction was properly aligned and the surface well sanded, I painted it white with Tamiya Gloss White acrylic paint (reference X-2). After masking the surface, I painted the entire car purple. A single coat was enough to achieve this result:

I also painted the car's interior and roll bars with Humbrol Metallic Gray enamel and the dashboard with Tamiya Matte Black (XF-1), both applied with an airbrush, and the driver figure with various Vallejo acrylic colors, achieving this result:


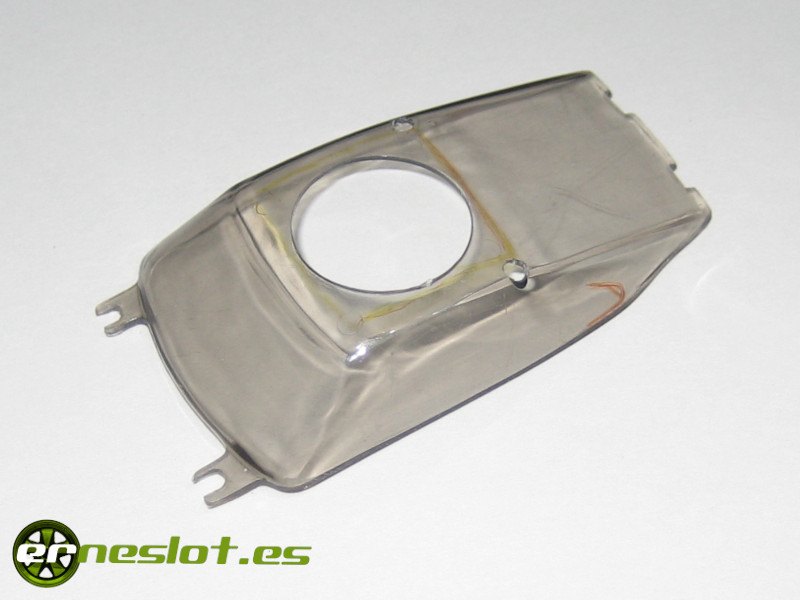
I also removed some plastic from the top of the windows to reduce the weight of the body at its highest point. The mark where I cut the roof is visible in the next photo.
Creating the waterslide decals was straightforward, as they were logos from various sponsors in different sizes depending on their placement, making the process quick and easy. The decals for the purple surface were printed on white paper, and the rear wing decal was printed on clear paper since the background was white. The only precaution I took was to cut the decal as close to the edge as possible to minimize the white paper border once it was in place. Applying the decals was also easy; being relatively small, independent of each other, and without a specific position on the body, their placement was simple and only required a little care.
After applying the decals and allowing them to dry, I applied a couple of coats of automotive clear coat to protect the livery. It didn't turn out well; it has an orange peel effect in some areas, and in others, the coat was excessively thick. I didn't do a good job of varnishing.
Once the varnish was completely dry, I carefully masked off the window seals and painted them with matte black enamel (Humbrol 33) to make them stand out and break up the monotony of the purple bodywork. I like to do these small details after varnishing; the paint job is greatly enhanced by the combination of glossy, matte, or satin finishes, giving it a much more realistic look. Painting the window seals is one of the things that really enhances a paint job, and I take my time masking them well because I paint them with an airbrush. This way, I get a straight and as precise a cut as possible. Along with the lights, this is one of the most striking aspects of car paint jobs and what makes the difference between a good job and one that isn't so good. In general, from my point of view, all areas with paint cuts should have them as well-defined as possible, avoiding brushstrokes as much as possible, unless that's the desired effect.
I equipped a Sideways chassis with an Avant Slot Hurricane motor and an 11/31 gear ratio. On the front axle, I fitted 15.5 mm diameter plastic rims with 3D printed plastic inserts simulating BBS rims, painted gold. On the rear axle, I fitted aluminum rims with Sideways inserts (reference SWG5R06).

To finish assembling the car, I still needed to glue on the remaining body parts: the headlight lenses covers, made from a piece of an old credit card, which I had previously painted satin black; and the front grille, taken from the tape used to sew the cords of blinds, painted with matte black Humbrol enamel, and glued to the inside of the body with cyanoacrylate. The plastic grille located under the rear wing is also painted the same color.
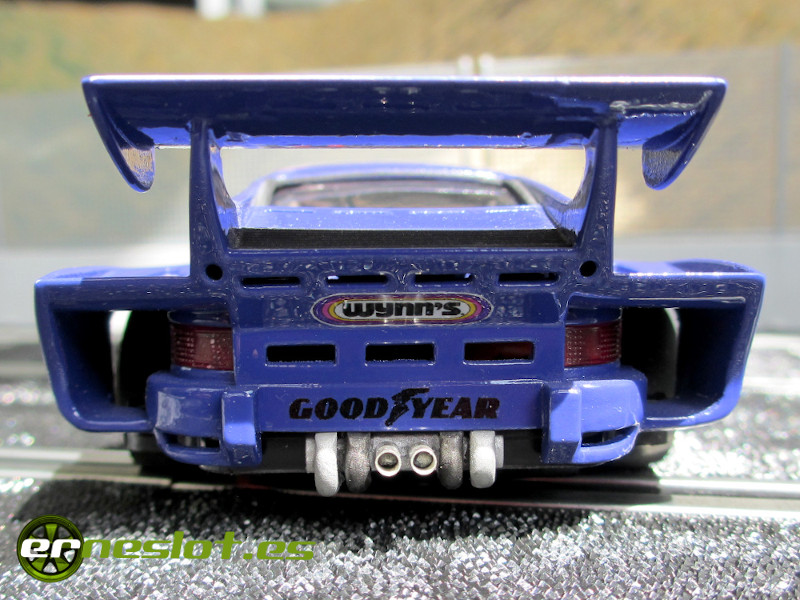
The piece that simulates the turbochargers and exhaust pipes is painted with metallic gray enamel, the same shade I used for the interior, with some details in a slightly darker tone.
And with all the pieces glued in place and the chassis and body assembled, the car looked like this:


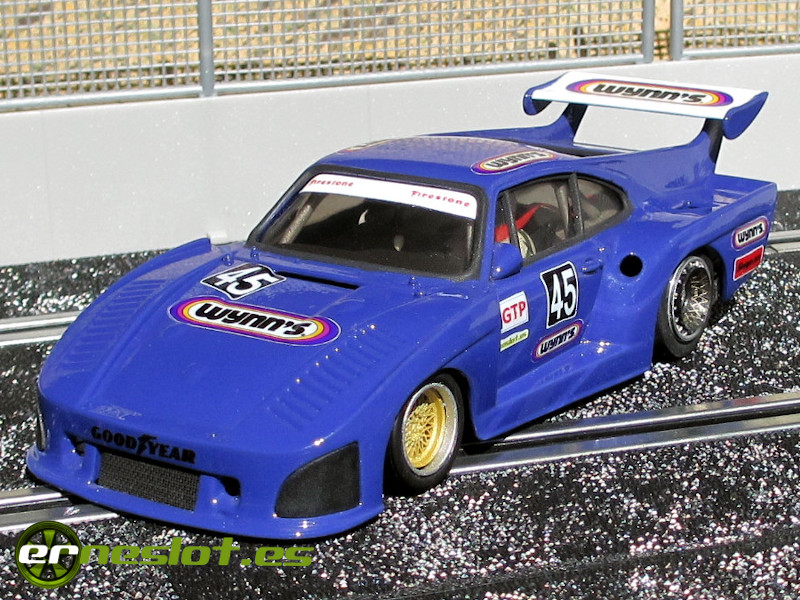
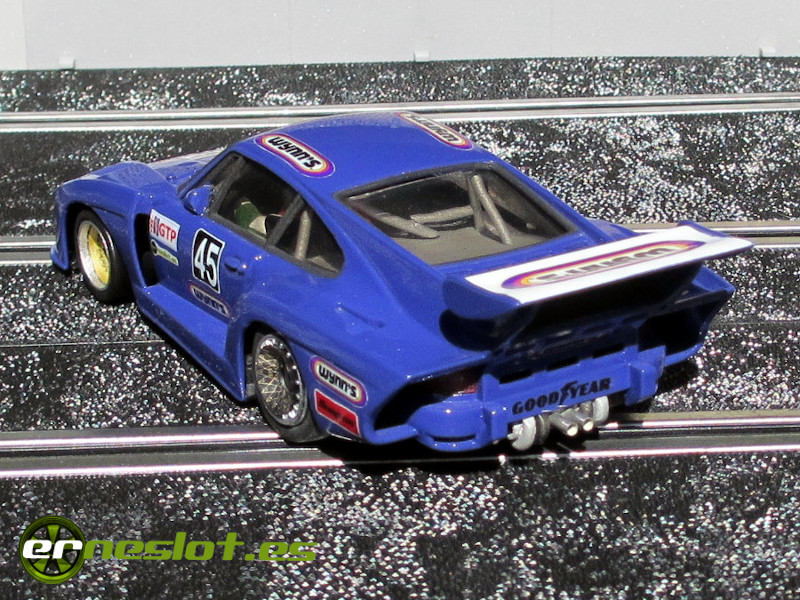
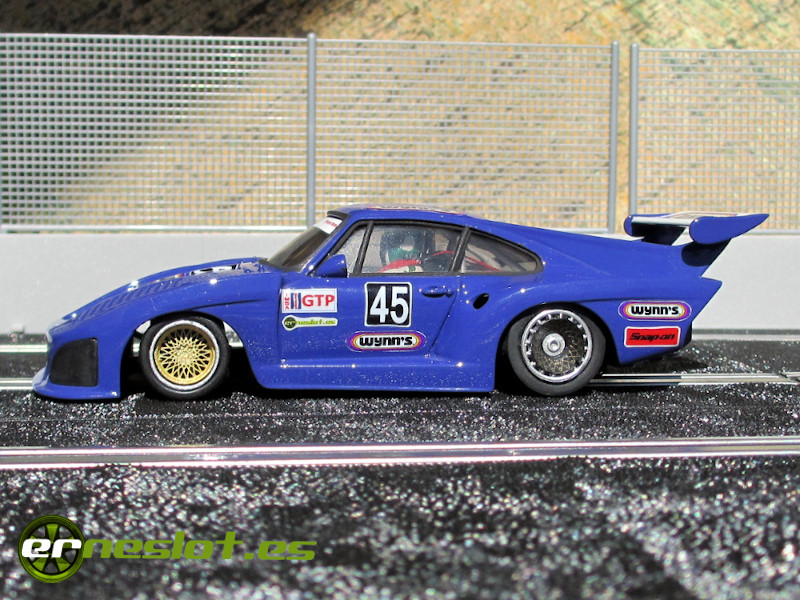
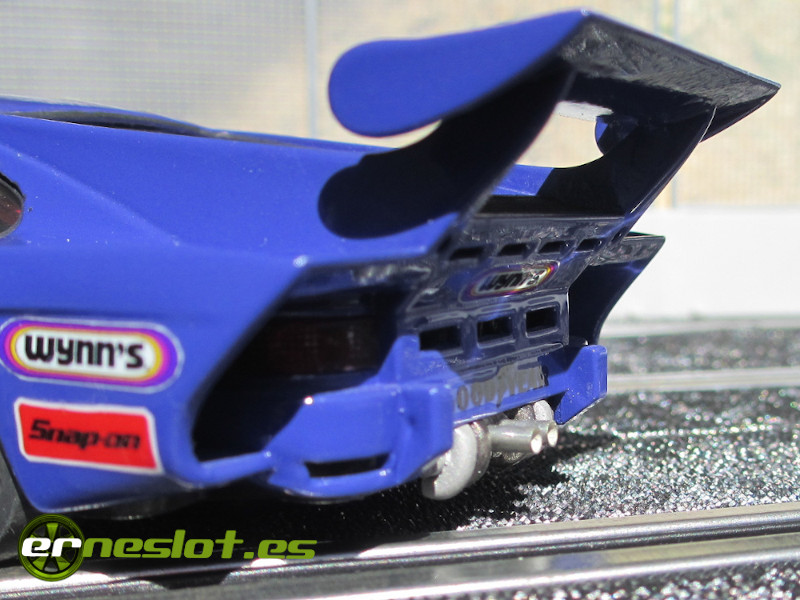

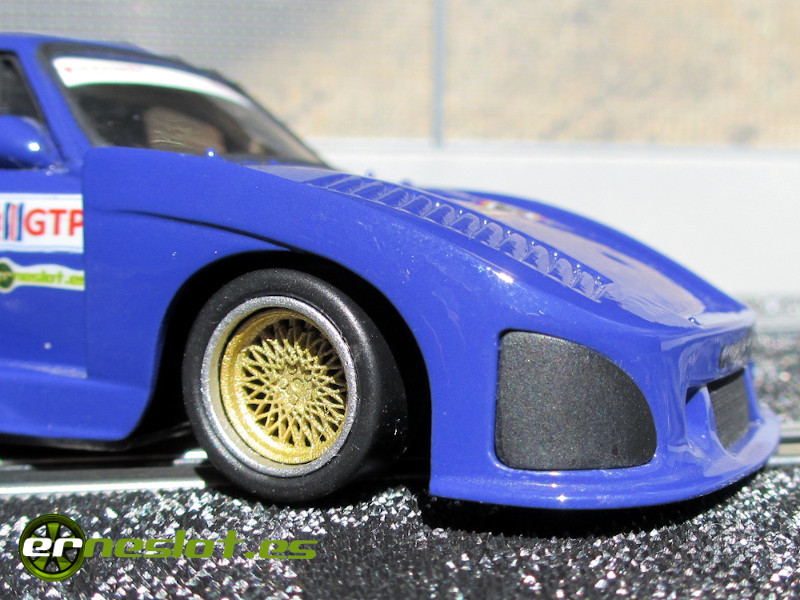
Sometimes projects come about after a long time of planning, lengthy projects involving extensive preparation, car documentation, and technical research. Others simply arise by chance. This project is one of those I usually approach as a test to practice techniques or simply to complete them, see the results, and identify areas for improvement or correction in future projects. Overall, I'm satisfied with this particular piece, except for the varnish finish, which is excessively thick and not well-finished in some places.
| Chasis | Porsche 935 Sideways |
| Distancia entre ejes | 71 mm. |
| Medidas (Largo x Ancho x Alto) | 152 x 64 x 37 mm.. |
| Peso | 91 grs. |
| Motor | Avant Slot Hurricante |
| Neumáticos delanteros | Low profile |
| Neumáticos traseros | Fly Racing |
Fortnightly updates, new cars and more in www.erneslot.es

