Techniques and tricks: Modeling
In this section I will show the materials and the techniques I use to make my models. Most materials are easily found in stores modeling (plastics for example) or even hardware stores (adhesives, fillers, putties...) and techniques are very simple but, as always, in some cases you have to practice until the results are the desired.
WIDENING A BODYSHELL
Within scratchbuilding works, one of the most typical transformation is to widen the body, or more specifically, the wheel arches. The work is very simple but very boring. I´ll show you the technique I use to widen the wheel arches of a slot car, that can be applied to both plastic and resin bodies.
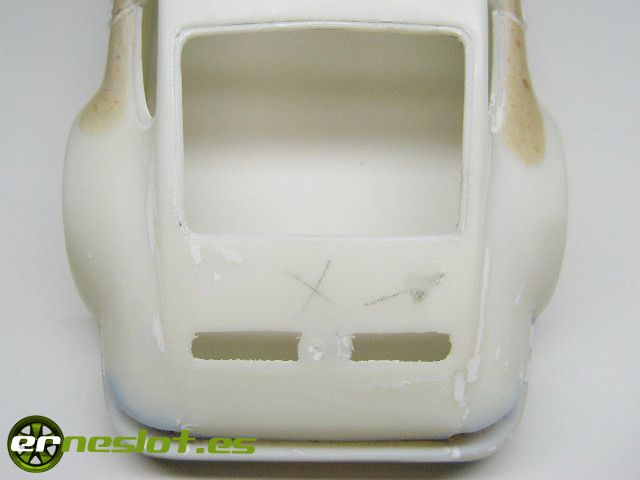
Suppose we want to widen with putty the wheel arches of a car a given dimension. The model that I´m going to use for this explanation is a Altaya Porsche 911 SC bodyshell with the paint completely removed to work it better:
Over a cardboard mark lines with the width of the car, the new width that we want to obtain, the imaginary longitudinal line that would separate the car halfway, or any other line or notation that can help us. In principle, markink the current width and the new one would be enought. The cardboard chosen should be one with sufficient thickness to withstand the putty that we will hit without deforming excessively. I usually use cardboard about a 1 milimeter thick.
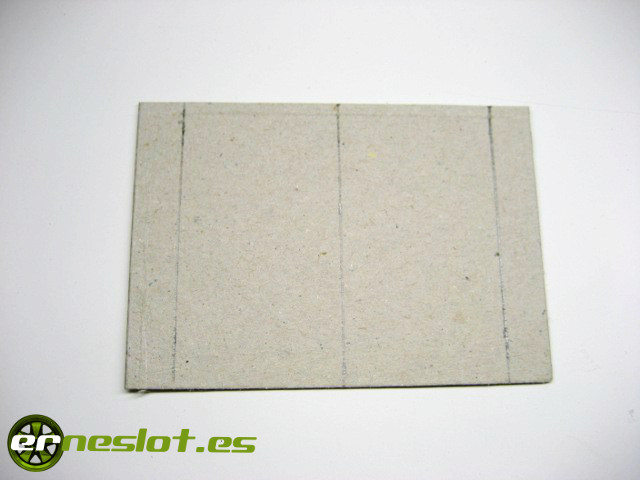
As I said, the marks on the cardboard are simply to position it well in the wheel arch. This, although it seems obvious, will save us much work when adjusting the width and the definitive shape of the putty. When we have it well positioned, glue the cardboard to the body with instant glue inside the wheel arch.
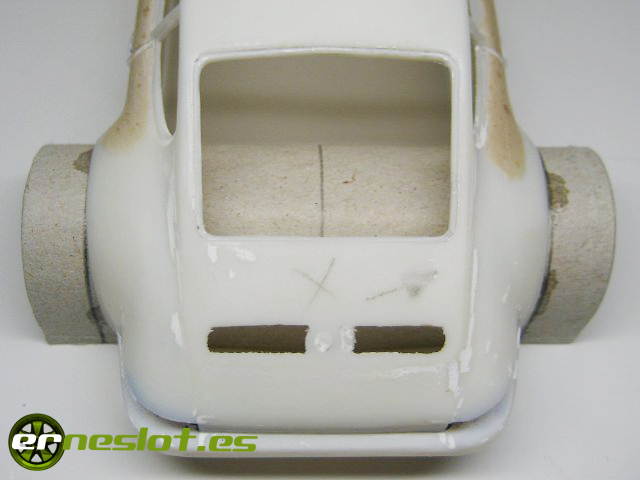
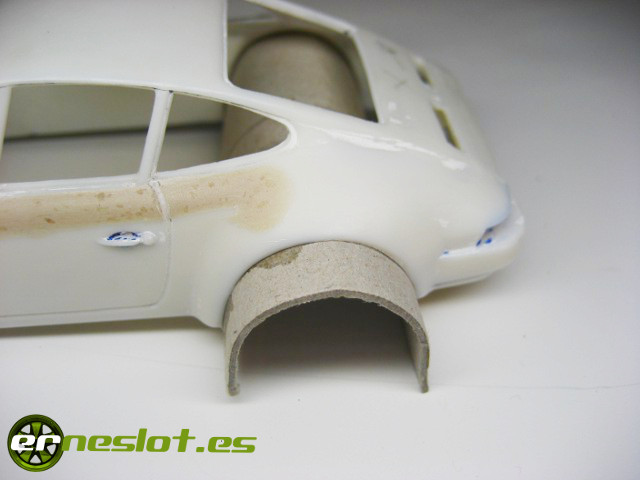
Once well pasted the cardboard, proceed to stick the choosen putty. For this cases I often use the Pattex Repair Express stick, but you can use any other putty always taking into account if its properties are what we need for this certain work. For example, I will never use Tamiya Putty for this job because a piece so large would be very difficult to mold and,at the same time, very fragile. From all I´ve used, the Pattex Repair Express stick offers the best compromise between hardness and elasticity. For me the ideal one for this task.
We will apply the putty into the approximate shape about the wheel archs. Obviously it isn´t going to be right the first time, probably would have to paste more putty to form either the wheel archs but it is important to ensure the appropriate forms from the beginnig. It will save us work.
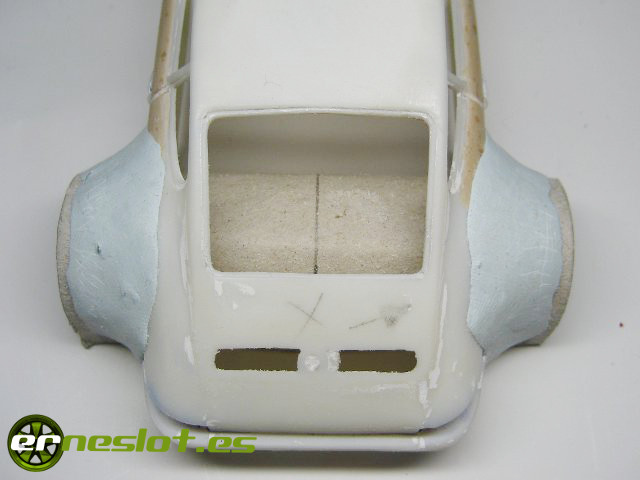
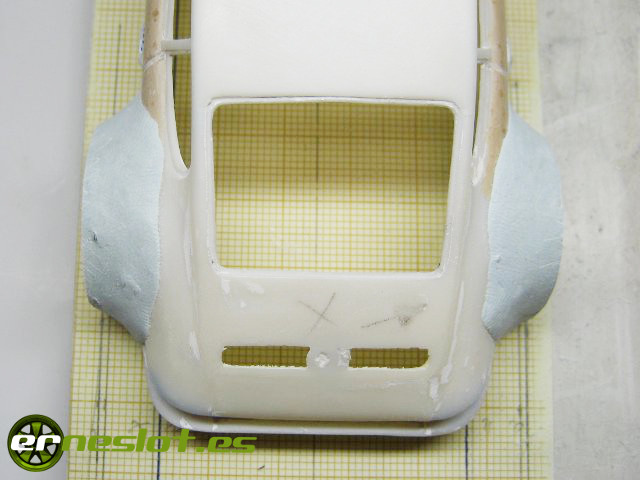
Once the putty thoroughly dry, we pull out the carboard that has been the putty support and cut off the ends to give the body the proper width. The graph paper at this point is almost essential if we want our model symmetrical. Over paper we mark all the lines that could be convenient for us to fit centered the bodyshell and the lines thar would mark the ends of the body. With a sharp cutter cut the excess from the ends of the wheel arches and with sandpaper glued to a wooden block sand the edge to leave it well finished. This part of the work is very boring, because continually we must be sanding and re-positioning the car over graph paper to check the measures, but a good work always takes a good amount of hours.
Depending on the type of cardboard used as support, the interior of the wheel arches will better or worse finished. The rougher the cardboard the harder the work to leave it well finished. And always some bits of cardboard will be attached to the body, which we must remove with a gentle sanding. In this case I´m going to use an iron pipe of about 18 mm in diameter wrapped with a used sandpaper sheet although I have other pipes of different sizes for other cases.
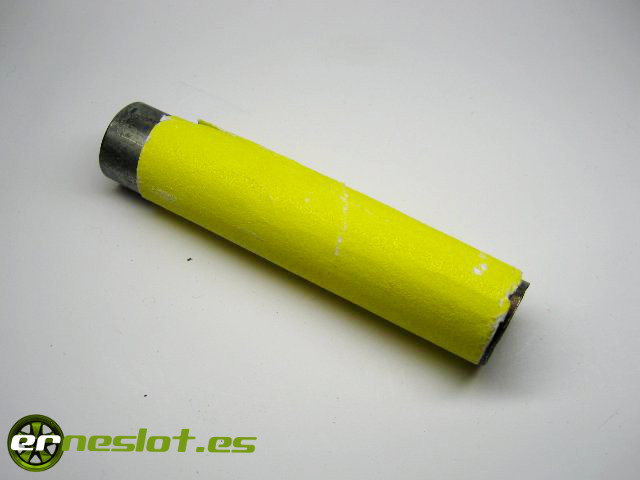
Gently I pass it inside the wheel arch to left ir completely clean. Once clean, we can sharpen the inside the wheel arches sticking plastic strips of the appropriate thickness according to:
- We just want to sharpen the inside of a wheel arch. With a thin strip (about 0.3 mm) will be enought.
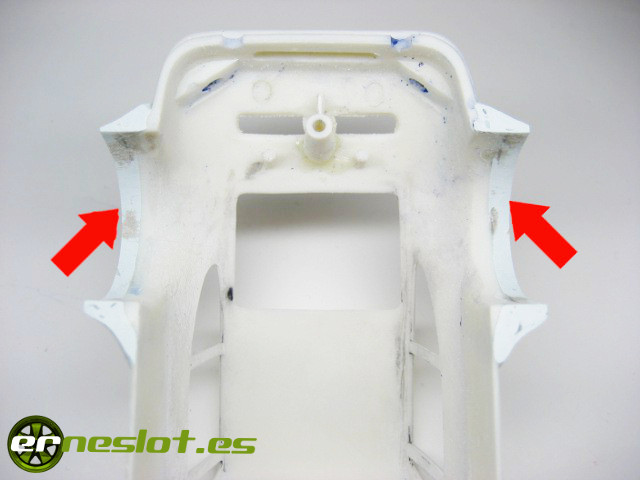
- We want to change the interior of the wheel archs to get a smooth curve or modify it slightly. The strip pasted in the interior must be thicker, thus could be easily sanded at the necessary points. I do this often when I have to make smaller the gap between wheels and body, or if the shape of the wheel arch isn´t correct and there is much gap between the wheel and the top of the pass, for example. Stick on the inside a plastic strip with instant glue and once the glue has dried I give the shape with the metal pipe wrapped in sandpaper. The thickness of the plastic strip will depend on how we want to close the hole. I noramlly use strips than 1 millimeter thick for this purpose.
In this next example I show you I´m not going to hit any strip on the inside because it will be partially covered and it isn´t going to see, so it is not necessary. That if, in this case must try to make the best sanding possible to left a smooth surface.
In the next picture the two arrows show where should be glued the plastic strips to which it referred:
The final step would be to give shape to the exterior of the wheel arch with sandpaper, file or any other tool needed. If we have applied enought putty we only had to sand or file to get the right shape. If at any point we have fallen short with the putty will stick more over the previously applied and we will continue work as usually do.
If we want to outline fully the outside of a wheel arch, we can make a paper template with the shape and then cut it in a plastic sheet with the desired thick, always bearing in mind that the thickness of the sheet must be added to the total width of the car, if we mind that dimension...
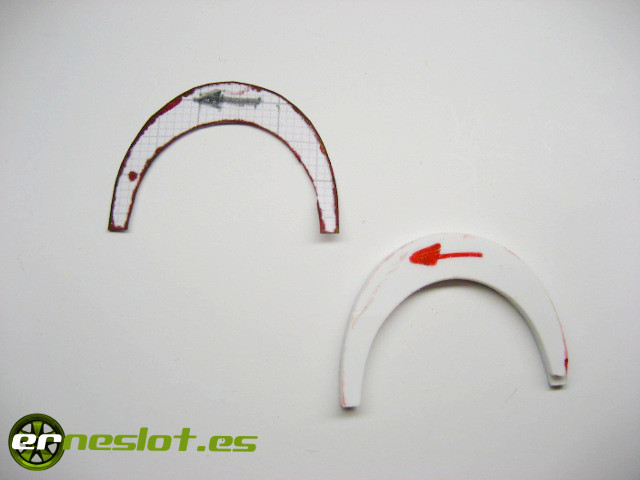
Paste the resulting piece carefully in its place,...
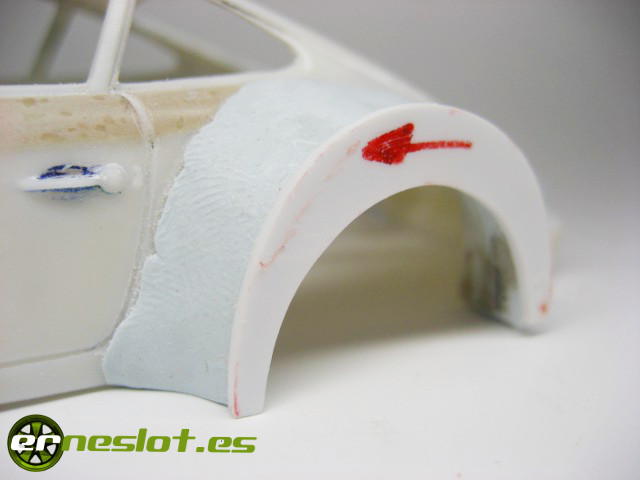
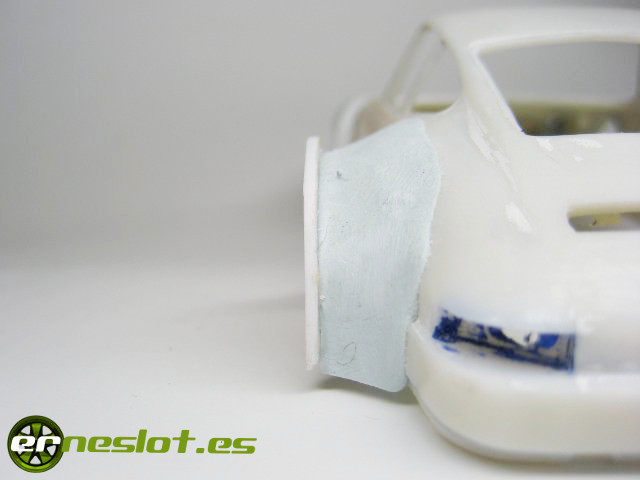
...fill the gap with putty,...
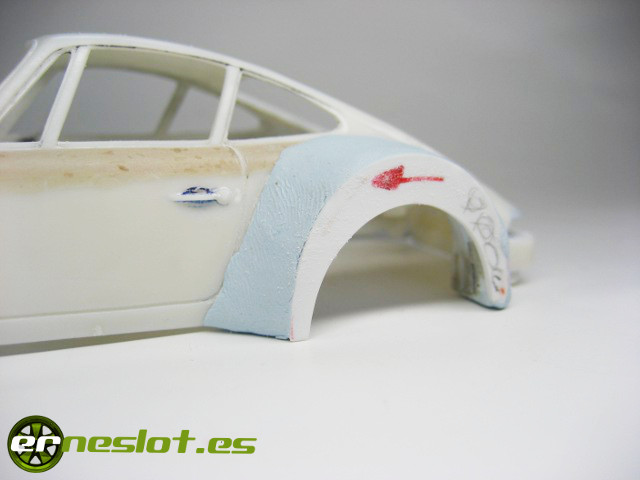
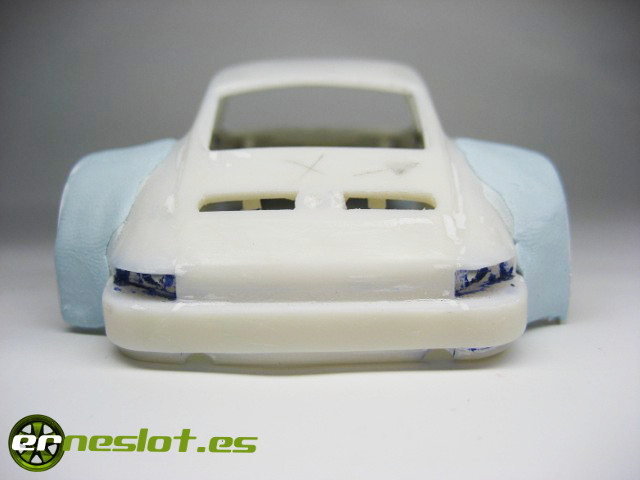
... and we have the wheel arch done, it olny last a final pass with sandpaper to finish it off.
If the wheel arch that we want to enlarge has its limits well-defined the work is greatly reduced. For example, we will broaden one where the back is a straight line almost perpendicular to the ground. If we wanted to do it with putty, which can do it, it would take us a lot of work to leave right the straight part and both sides symmetrical. In these cases is best to glue a evergreen or plasticard strip to define the edge perfectly. In the example shown below, hit a strip of plastic with a approximate shape to the wheel fitted over the body surface as best as possible. To ensure the strength of the joint use epoxi glue:
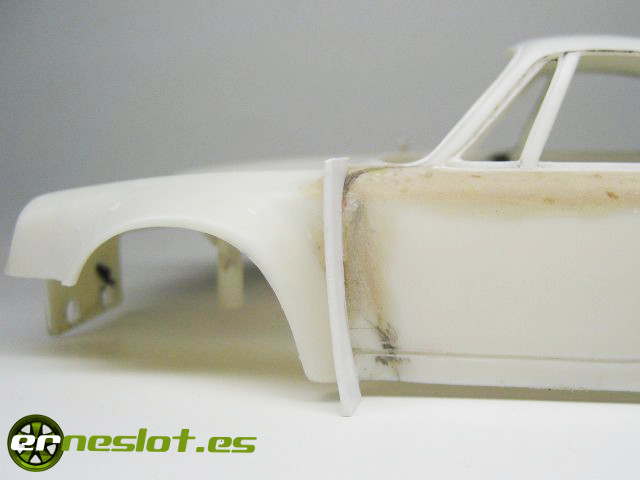
With the piece secured, stick the putty filling the resulting space.
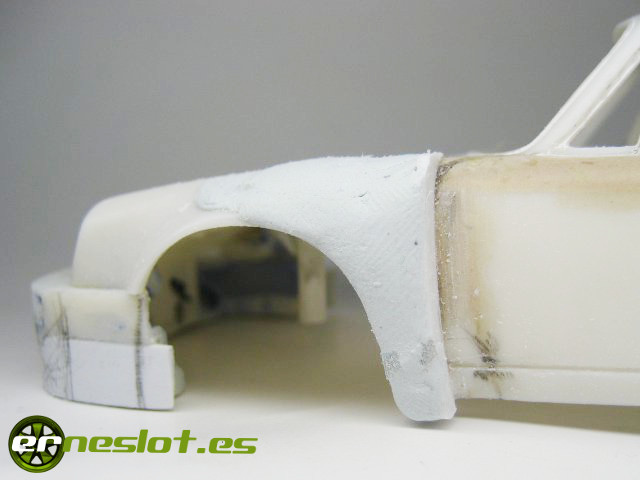
With the putty completely dry it only takes to work energetically with file and sand until we left the wheel arch to our liking:
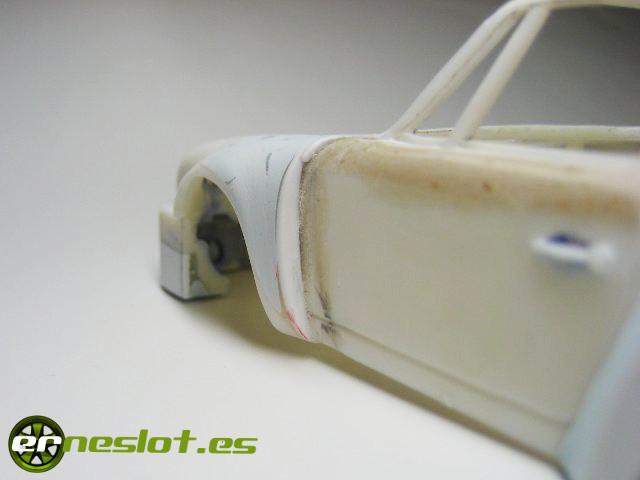
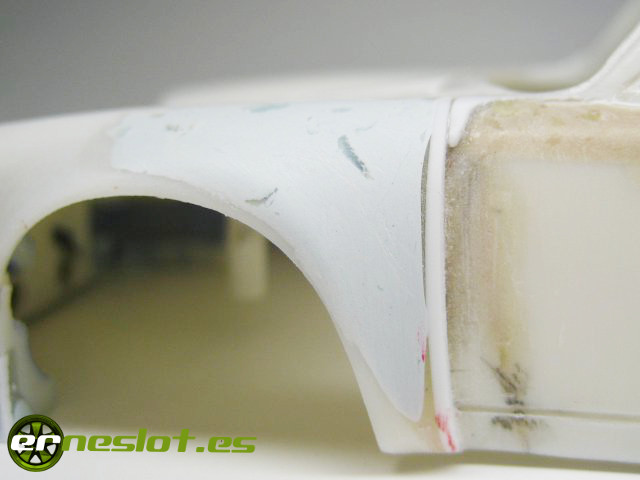
The trick to define the surface where stick the putty with plastic strips save us lot of work, material (we spend less putty), time and allows us to define perfectly the edge, with exactly the right shape and at the same position on both sides of body if we are careful when pasting the strip.
This trick can be used for widening wheel arches or whenever we want to make perfectly shaped other elements of the body, such as an air intake or anything else that comes to mind.
MODELS FINISH
To give shape to putty or plastics that stick to the body we can use the following tools:
- Files: In case to file body parts I use a set of 6 pieces needle files 6 (rounded, triangular, square, half round, flat top and flat parallel) medium grain. I use them too for give shape to pieces of plastic to made different parts (the dashboard, the seats...). Once used it is advisable to be cleanead with a wire brush to prevent residues and stop filing.
- Sandpaper:
- Roughing coarse. Sanding sheets for wood grain 100-240 depending if you have to drag a lot of material or define a specific shape.
- Fine grinding. Waterproof sandpaper sheets, grain 220, 400 or 500. I use them in two ways, dry to define the shape in the early stages of modeling and moistened in water to refine the parts earlier sanded. As previuous step before paint, I use 500 grain worn sheet to polish a little bit the primer coat (this is not allways necessary, but recommendable).
- Paint polish. If the paint has not been well applied (e.g. "orange peel" effect) and we don´t want to remove the paint from the scale model, we can give a coat with fine waterproof sandpaper grain 1200 to match the surface before repainting again. In cases where the failure isn´t serious, you can try to polish the body with a cotton cloth and toothpaste in soft circular movements.
- Tire turning. To lower the profile of the tires when needed I use iron sandpaper grain 60 or 100.
- Blades: Not olny for cutting parts, the cutter can serve to model. Using it as a scraper can lower surfaces with high accuracy and more cleaner way than the files. Simply place perpendicular to the surface and scrape gently to remove the amount of material you want. When using the cutter this way we must ensure that the blade has a good edge to work as fast and clean as possible.
So I usually use it when I have to reduce the thickness of flat surfaces, especially of plastic.
Fortnightly updates, new cars and more in www.erneslot.es


