Techniques and tricks: Materials and tools
In this section I´m going to show the materials and the techniques I use to make my models. Most of the materials can be easily found in scale model shops (e.g. plastics) or even in hardware stores (adhesives, puttyes...) and the techniques very simple but, as always, in some cases you need to practice until get the desired results.
ADHESIVES
What kind of adhesives we can use for our models? Here comes the list:
- BICOMPONENT ADHESIVES: Also called epoxy glues, this adhesives are formed by two separate components that must to be mixed in a specific proportion (generally 50%) before use. The union that forms this type of glue is very rigid and resistant so it can be used in structural joints and generally in any union that we want to ensure their resistance. Within the broad range of adhesives of this kind we can buy, I can speak knowingly about the following:
- Nural 92 . Bicomponent glue special for plastics. To paste parts that need strong joints (tails, wings, lugs to attach the body to the chassis, axle supports...). It is very dense and hardens very rapidly, much more even if applied heat with a hair dryer. If the mixture is well done in an hour can be sanded smooth but preferably allowed to dry at least 24 hours.
- Nural 3. High transparency bicomponent adhesive. I use to stick pieces which unions have to be transparent, e.g. windows or some details of the body, such as headlights and similars. Is similar to Nural 92 but the unions are not so strong. This glue is very sensitive to variations in the amount of the two components, so that often the mixture don´t gets the right consistency. Anyway for what I use it well worth. Also, if a glass is stained while sticking, it is easily removed with a cotton swab dipped in alcohol if the glue is not completely dry. As fault, note that yellow slightly over time.
- Araldit Bicomponent adhesive for general-purpose. There are several models (transparent, fast, standard ..), all of them, the most one I like is the standard (blue and white tube) followed by fast (red and white tube). Becomes very hard and has the peculiarity that if once the mixture is made by heating with a dryer it is very liquid and can penetrate well in cavityes. At the time it cools hardens very quickly.
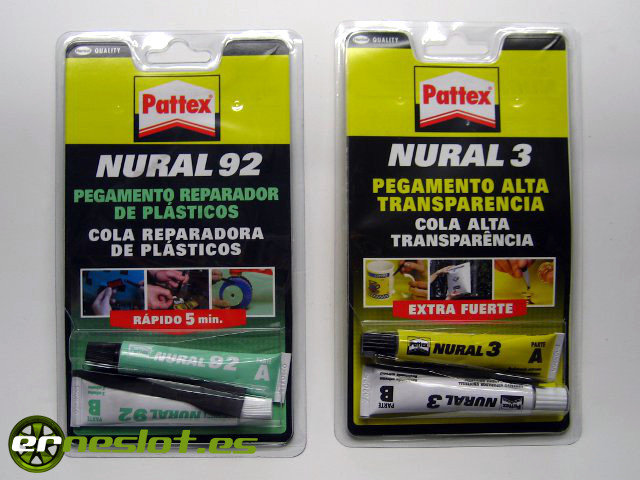 I usually use these adhesives to glue the lugs that attach the chassis to the body, spoilers supports, bumpers and any other piece that requires a strong bond.
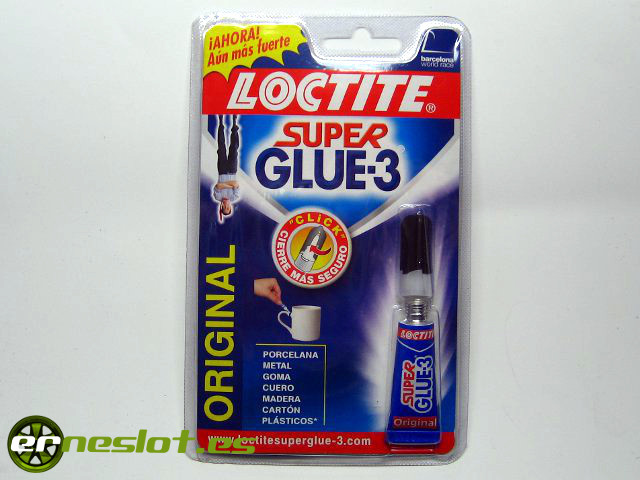
- Instant Glue (cyanoacrylate). I use it in the initial steps of bonding parts to stick or details that are not going to touch, especially in the interior. Also used in combination with bicarbonate (sprinkling once applied adhesive) unions gain a huge strength. In this last way, I usually use as a step towards strengthening the joints with bicomponent glue.
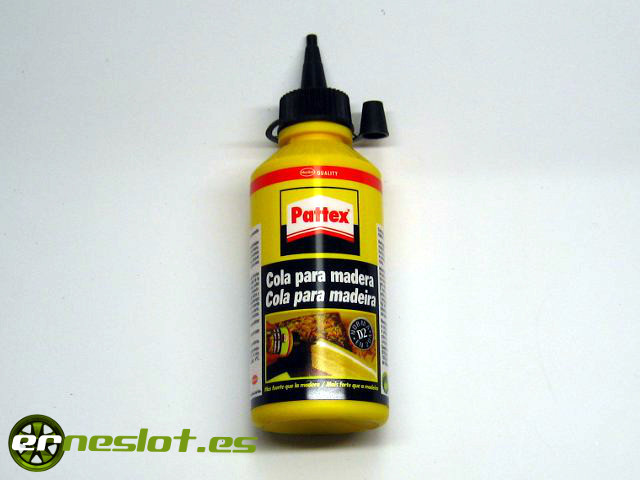
- White glue for wood. Applied as-is, or diluted with water, is ideal for pasting the details of the bodywork, headlights, grilles, photoengravings..., or the drivers tray to the body. Definitely, any joint that we want to undo at any given time. When dry it is almost transparent but unions aren´t very strong.
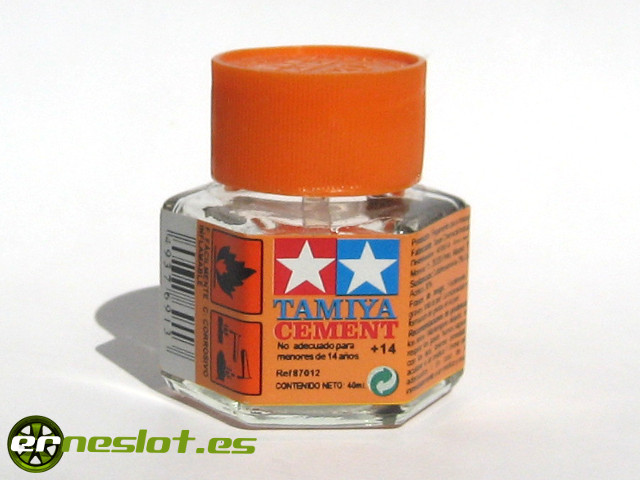
- Special glue for plastics. It is the glue that is often used for scale models, which are made of polystyrene. This glue melts the parts of the pieces where it is applied to generate a very strong unions, but can only be used for bonding polystyrene, for other pastics best to use any of the above adhesives.
- Special glue for aircraft domes. To paste the domes of scale model airplanes and other transparent parts such adhesives are used. The one I use is called "Formula 560" but in the market there are other similar products, such as the "Crystal Clear". It is a white glue that is completely transparent when dry, and also the union is very strong. It is ideal for bonding acetate crystals cars and other pieces, such as the headlights, where we do not want to see glue residue once stuck.
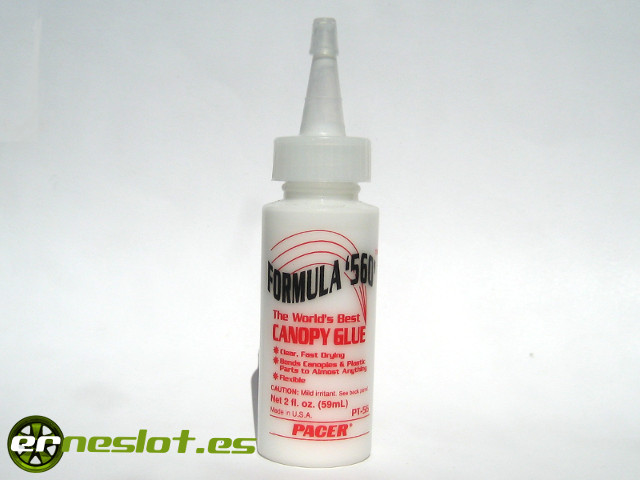
Here I show are products that I use but on the market there are others that will give the same results like these. The photos are indicative of the product.
Go to topPUTTIES
The putty is very a useful product for our transformations, to widen a wheel arch, bonnet bulge, plug holes...
I´m going to speak only of that I use or have good references but have not ever used. There are other similar products that can be found in stores, not named because I haven´t experience with them and don´t know the result they can give, which doesn´t mean that there would be perfectly valid for this works, even better than the ones I talk about below.
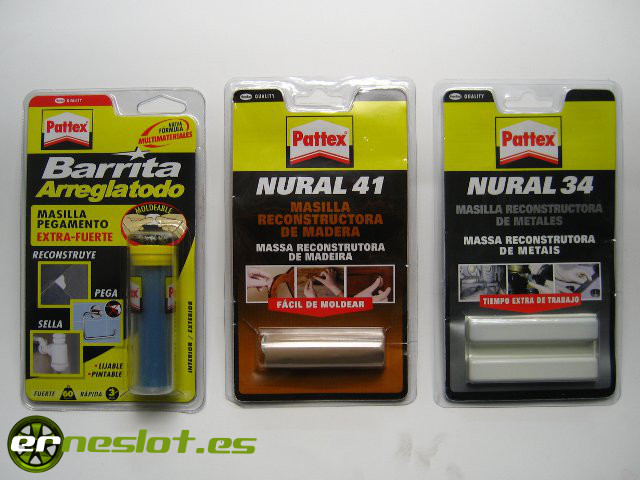
- Bicomponent putty - Pattex Repair Express. I use it for model large parts such as wheel arches, bumpers... It can be handled easily and adheres well to any surfaces. Once hardened has a certain flexibility that makes the piece doesn´t broke in case of shock (ideal for shaping bumpers and not splitting if you put the car on the track...). As disadvantages I can say that hardens very quickly, is very heavy (because it is very dense) and its elasticity means more work to mold the piece. The way of application is very simple, a bit of putty is kneaded until both parties are well mixed and stick where we want molding a little bit until longer permitt because the mix harden very quickly (3 to 5 minutes). Once attached it is advisable to let it dry for 24 hours before sanding or polishing the piece. Sometimes the mix is not quite right and you will see a few bits of very hard putty of a different color. In that case it is best to remove these bits carefully because as time goes by they tend to come off the model surface.
- Repairing wood putty - Nural 41. Putty-like Pattex Repair Express but less dense and more rigid. Ideal for modeling parts of the body that will not suffer strokes or are in the top of the body (to not raise the center of gravity of the models) and internal modeling. To be very rigid once dry we can work it very well with the sandpaper or file but can split easily if the parts are subjected to strain. It applies as above but allows more working time (approximately 10 minutes). Again, ideally, allow to dry 24 hours before sand/polish the piece.
- Bicomponent putty - Nural 34. Again it is a putty-like the Pattex Repair Express although the two components come in separate bars and the mixture tends to be more homogeneous and adheres better to the body, besides being rather more dense and weigh more. In fact it is a special kind of putty to repair metal parts. If we moisten our fingers with water before handling it is easier to shape it. I use this putty to mold the small pieces, because it is very dense and allows much detail parts. I also used to retrieve threads on the supports of the chassis with very good results.
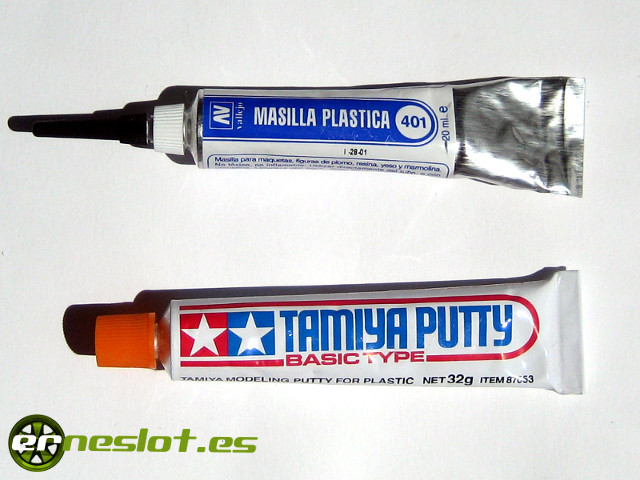
- Finishing putties. This type of putties have no structural function of any kind, but serve to finish the pieces as smooth as possible. For my work I use two fillers of this type, the Tamiya Putty and Vallejo plastic putty.
The Tamiya Putty is a gray color putty very fine-grained with a texture similar to toothpaste. Ideal to cover scratches, defects that may be left the bicomponent putties or cover pores in resin body shells. It can be used in two ways, applied directly over the surface applying it with a small pallete knife in case you want to cover scratches and large defects or diluted in acetone to apply it on the body by brush to cover small pores and defects, such as those usually have the resin body shells. Once applied is very hard and can be sanded with waterproof sandpaper to get a very fine and smooth surface finish. Its main disadvantage is that dries very very quickly, making it difficult to use in certain cases.
The Vallejo plastic putty is a white filler, more liquid than Tamiya one so can be applied so much better. It takes longer to dry but it adquires less hardness, while retaining a certain elasticity. Once dry you can sand and polish but having less adhesion force sometimes if we sand too hard can end up removing all caulk. I specially use it to finish the interior details of the cars as it is much easier to apply than the Tamiya and in the interior is less expossed to hits.
Each of these putties has its own characteristics that makes them more suitable for one use or for another, but can never be used to make large pieces who requires strength, for that use, better to use two-component putties. These are just fillers to achieve a good finish of the pieces.
Although puttyes are a good material for our transformations, we shouldn´t abuse them for large pieces, then would be very complicated to work. The ideal is to use them in combination with plastic pieces such as those presented in the following section.
Go to topPLASTICS
The putties are useful for making certain changes in the body, bulging wheel arches, change the drop of a bonnet or a bumper... but in other cases it is necessary to use plastic parts to make more complex forms, such as a wing with multiple planes, window frames, engine mounts.. In short, along with the putty and glue is the most important material needed to make our transformations.
Within the plastic world there are many varieties (ABS, PVC, styrene, lexan ..), some are easier to work and others not, some are better suited for some tasks (the lexan blisters for windows, ABS from other toys for make body parts ...), the ideal is to keep trying different plastics until achieve the desired result.
The plastics used in our models can be divided into two types:
- Commercial plastics: They are sell in model shops from brands such as Evergreen, Plasticard and others. They have the advantage that there is a wide variety of sheets of different thicknesses with different motifs (smooth, grated, gridded ..) and varied profiles (tubes, measuring rod, double "T", triangular ..) that we can use in our models. The disadvantage is that they are relatively expensive, although its usefulness worth. In this sense, the ideal is to make the most, saving the cuts that are often very useful.
- Everyday plastics: With this denomination I refer to plastics that every day pass through our hands and often go away (always to the recycling container, of course). Here is the imagination of each one allowing the use of them. For example credit cards can be parts for wings, the cap of a bottle of soda can become a radiator, some acetate from blisters serve as glasses, headlight lenses for our model lights... The possibilities are endless, you just have to let your imagination run wild. Within these plastics we can include leftover of the scale models we build, which can be worth to us as rollbars, or fuel caps...
As we going to use commercial plastics, building scale models, cutting bodies... we will be keeping a amount of smaller or larger cuts of different plastics. We can throw away the smalest ones and keep the large pieces then we can come in handy. Especially interesting is going by keeping the pieces of commercial plastics (evergreen, plasticard...), if we make the most of this plastics less times we will have to buy them (and spend our money).
Go to topVARIOUS TOOLS
The tools I normally use to make the models are:
1. BLADES, CUTTER AND SCISSORS
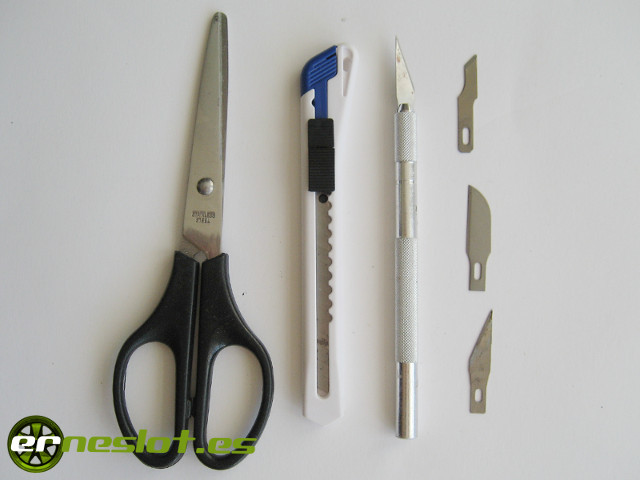
They are tools must not be absent in our case. The scissors should be better than craft ones because the materials to cut are more varied and tougher than the cardboard or paper, for example. The modeling cutter with suitable blades also will be of great help. Regarding the latter, the straight blades are the most used, although there´s no harm in to have a set of modeling knives with curved blades and in different shapes, is not expensive and it takes advantage.
2. FILES
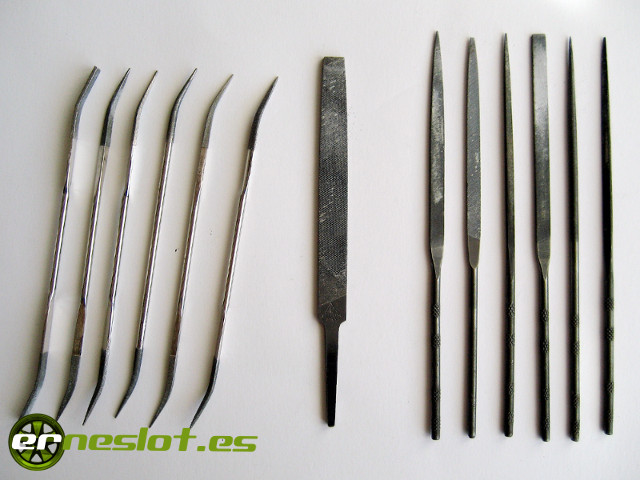
They are one of the most useful tools to build scale models. You do not need anything sophisticated, with a set of needle files of 5 or 6 pieces we covered practically all the needs. The one I use is formed by a cylindrical, triangular, square, half round, flat top and flat parallel files. As almost always we are going to work on soft materials is advisable that are of "medium" type that crawl the material well, not easily muffled and leave a acceptable finish.
Although less useful than needle files, a small file of 4 inches will allow us forward more quickly in rough tasks over large areas (narrow wheel arches, first steps of molding a bumper, etc...). In this sense, a parallel flat or rather a half-round file is more than enough.
I do not recommend the fine-tooth files unless you like to be cleaning them all the time because they leave to file. For these purposes a small steel brush "clean sparks" type is highly recommended.
Regarding the quality of the files, for this kind of work we do not need anything professional, which sold in model shops are more than acceptable. If you want something better or something concrete, in hardware stores you can find more variety.
3. SANDPAPER
I know an avid scratch fan from Los Petiflauticos forum who´s signaure is: "sandpaper, is never enough". This phrase describes very well how we have to use sandpaper to make our models. And is that if we want the best finish possible for our models we must be patient and to work energetically with the sandpaper. And is that a good job of molding can go away if we don´t have care when sanding all the imperfections that have been left. Likewise, the sandpaper is essential if the paint finish has not been the expected and we want to left the body ready for another coat of paint.
Within the existing broad range of sandpaper, the ones I use are:
- Wood sanding sheets, grain 60, 100 and 240. The first two to reduce blobs of putty or sand the plastic body if you want to remove some detail or modify somewhere, for example. The 240 grain one to finish the molding of a piece as a prelude to the finer sandpaper step. Whenever sand putty it must be completely dry, otherwise gobs are formed in the sandpaper that leave it unusable.
- Sheets of waterproof sandpaper grains 220, 500 and 1200. The first two are very good for the car model finishes, especially the 500 a little worn. These abrasives let us work small details and leave a fine finish but it is not proper to use them to remove large amounts of material because the task can be eternal. The 1200 grit is so thin I just use it to polish the paint or primer if that has not been properly applied (cracked or orange peel). Being waterproof sandpaper, can be used both dry and moistened with water, task very appropriate if we are giving the last sanding to the primer coat before painting the body.
- Sheets of sandpaper for metal grain 60 and 100. I only use them when I have to reduce the tires profile narrow them a little. They drag a lot of material.
The sand sheets are cheap and will greatly help us with our models, whether they are new or if they are a bit worn. There will be times we want to use a piece of sandpaper used better than new one, because it left a thinner surface, because it adapts better to the shape of the body, for polish paint better... It will be seeing as we make our models. The same applies to using the waterproof sandpaper dry or wet, the result is different, thinner in the second case, but also requires more work.
4. MINIDRILL
One normal, doesn´t need a much sophisticated for these works, so that with a simple (and small) may be sufficient, even if it has speed control even better. This is mine:
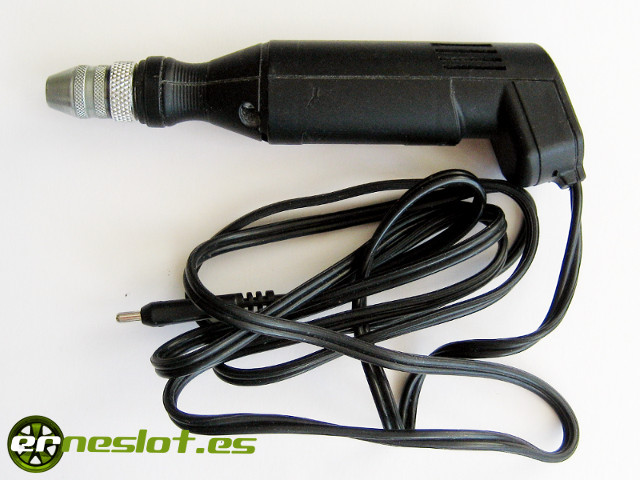
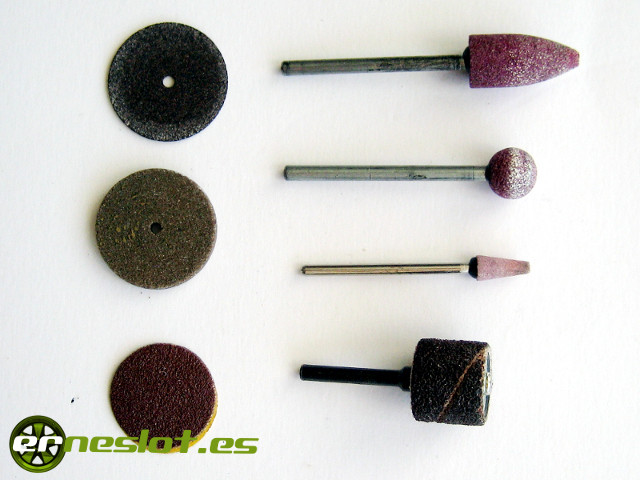
Logically the mini drill is useless without their accessories, grinding wheels for grinding, cutting wheels for iron, drills of 1 mm. to 3.5 mm, and sanding discs. In theory, no more are needed
- The grinding wheels I used are the coarse-grained soil. As well as I use them to "hard" work doesn´t matter how left the piece because I always finished it by hand.
- The cutting discs I use are for metal cutting, being abrasive wheels aren´t the best suited for cutting thin plastic but as also use them to cut the steel axis of cars and other materials give me a good result. Ideal would be to use toothed discs for plastic that cut very well and do not melt the material.
- Drills, I have them from 1 mm to 3.5 mm in steps of 0.5 mm and in some cases of 0.25 mm. Well used they last much, even the thinest, because the materials to be drilled are very soft. So far I´ve only broken one of 1 mm due to a carelessly treat, so that the investment is fastly amortized. I also use wider drills, but manually, as the chuck of mini drill doen´t admint drills beyond 3.2 mm. diameter approx. It is not hard and as being soft materials there´s no problem to drill.
- Engraving accessory. It is useful to remove material in areas where we can use the grinding wheels or must do a more careful work and that this accessory is thin and allows for more precise work.
- Sandpaper discs. Useful when we have to sand large areas, for example in the early stages of modeling the wheel arches.
For certain jobs do not need an electric mini drill but one manual one will be enought. When we make holes up to 3 mm. in soft materials such as plastic sheeting, they are very useful because we can make holes manually very precisely. I use them very often, and whenever I can, I prefer to use before the electric mini drill.
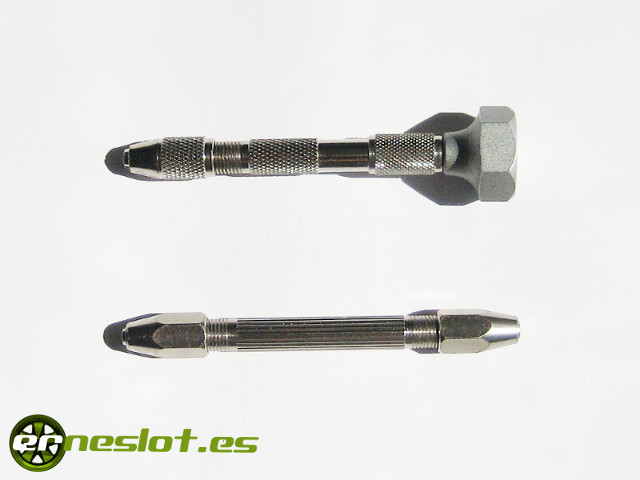
Therefore, the mini drill is very useful in all sorts of jobs that do not require a fine finish, cutting material, trimming of putty, etc ... and logically to make holes, which does not mean that it is essential, because practically all the things we can do with a mini drill we can do it by hand.
5. BRUSHES AND AIRBRUSH.
Although we paint our slot models with spray, we always have to detaill some things (lights, the slots in the body, the window frames ...) with a brush. It don´t takes a broad variety, if they can be sable hair better, and with due care last long. If we can afford the ideal is to have brushes for light colors (white and yellow) and anothers for the dark. This is because although we want to clean the brushes always remain traces of paint, so that we avoid spots of another color, especially if we are painting white.
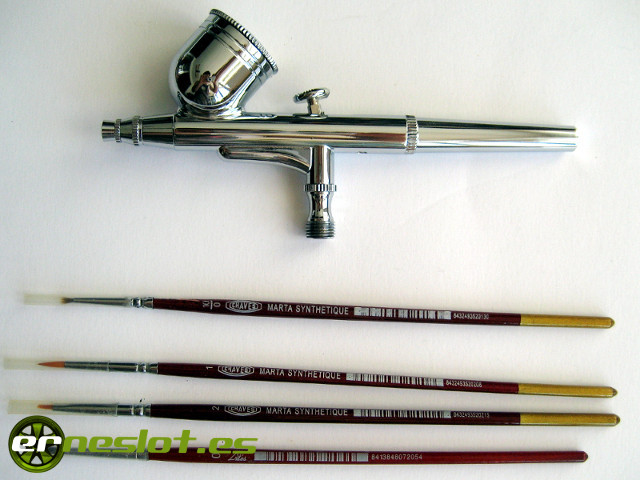
The airbrush is a very useful tool. Maybe at first we feel a bit of hesitation to use for the "complication" that means but it is not. The airbrush allows us to use different types of paint, to paint from large surfaces to fine lines, to paint degraded... We can paint large areas or small details without wasting paint because with an eyedropper can dispense the exact amount of paint in its tank. In short, the advantages over aerosols are many but it also has disadvantages which are mainly, they require a compressor or compressed air canister to provide air and must be cleaned after working with them.
On their use, do not intend nor do I have enough knowledge to speak in depth about airbrush painting. To do this already exist many books and online documentation that address the topic in depth and with much more authority than I can have. That said, what I indicated is a basic management points about airbrush handling and from there everyone can go in depth into the topic all you want. Therefore, to initiate us into the airbrush painting must be considered:
- Air Supply. The airbrush needs a supply of pressurized air to launch the paint which may be a can of compressed air or a compressor.
The compressed air cans are a good solution for specific cases, when we use the compressor a few times, or for an emergency. If we use often are expensive and they has the disadvantage of losing pressure as they are depleted so that the paint will not spray out well and can even botching the job.
The compressor is the ideal complement to supply air to the airbrush. The most common models are the diaphragm and piston.- Diaphragm ones are simpler and cheaper than piston ones, but provide less air pressure and the haven´t accumulator to store compressed air as the latter. If we don´t need much air flow with a diaphragm compressor will be enought.
- Piston ones offer many more possibilities than the diaphragm compressors. They have a accumulator to store compressed air allowing a more continuous supply of air, with more flow and more pressure, which will help us if we have to paint large areas. The disadvantages are their larger size and the higher cost than the diaphragm ones.
- Cleaning. It is the most tiresome aspect of the airbrush, especially when using enamel paint. If we want that the succesive times we use it will work correctly we must make it a good cleaning. To avoid spent all the time cleaning the airbrush the ideal is to paint better many more things with the same color. So better take advantage of that painting because when cleaning it lost some paint. Another interesting idea is to paint light colors first and then dark colors. Between colors, rather than a thorough cleaning can wash the tank with some water, alcohol or solvent based on paint in question and then put the darker color paint. By doing this, for example, we could paint with white, red, blue and black in this order without having to clean thoroughly every time we change color. In contrast, if we first paint red and then paint white wit a slightly wash between colors for sure the white wouldn´t be white but pinkish. When we go from dark colors to a lighter ones we must clean completely the airbrush to avoid mixed color tones.
To clean the airbrush we must dismantle completely and clean all parts where the paint pass through to remove all traces of paint. Previously we must rinse off the airbrush. We fill the cup with the appropriate cleaning fluid as I mentioned earlier and spray on any surface. At this point, cleaning pots are very useful as they allow us to spray without fear of leaving home with paint chips. Here is a picture of one of them:
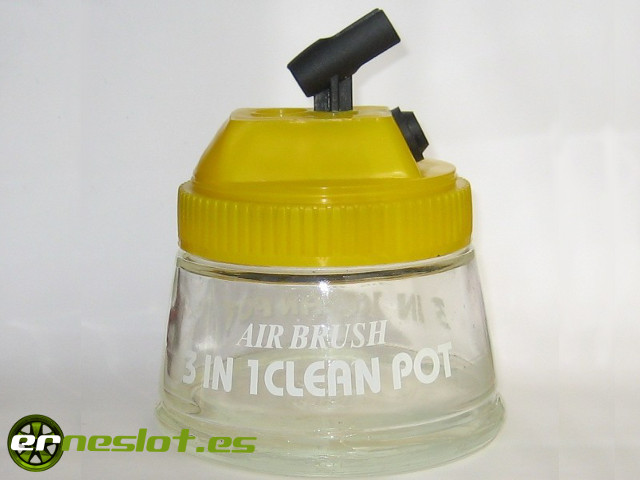
The airbrush is inserted through the side and emptied its content into the boat where we have previously pour a bit of water. Thus, we can spray to clean without staining anything. You do not need a cleaning pot to clean the airbrush, we can always spray on an old rag, or within a paint cabin (if you have one) but is undoubtedly helpful.
For thorough cleaning inevitably have to disassemble the airbrush, being careful not to damage the needle or the shutter. With a brush, an old toothbrush or a cotton swab can be cleaning up the remains of paint and then drying with some kitchen paper. In case the airbrush is very it must be dismantled completely and immerse in liquid for cleaning. May be water, alcohol or solvent. I´ve tried it with one AB300 and can be completely immersed in solvent without fear, do not attack the o-rings or anything, but be careful if left too long under water, because some of its pieces do not have anti-corrosion treatment (e.g. the spring) and can oxidize, like has happened to mine. - Where can we paint? In most cases we will paint our models at home unless we are fortunate to have a little (or big) local or shop where enjoy our hobby calmly. As most of the time this won´t be our case we must to make it at home. If we don´t want the paint to spread throughout the house when paint with the airbrush we must to do it in an open terrace (not always possible or weather permitts) or get a small paint booth, which may be a commercial one or built by ourselves. I have a commercial booth, It wasn´t too expensive and does its job. It isn´t a wonder, has a small extractor and use a filter as the kitchen extractor hoods and absorb enough paint that is left floating in the air but not all. The main fault I see is that the fan is underpowered and breathe in the same room so we must always have to clean the filters if you do not want the painting that come in for the front come out from behind. But it is far better than nothing. For some message forums and web pages about our hobby I have seen that other people have been made very good looking homemade paint booths, probably work better than mine, so if you are crafty and have time I encourage you to build one. Otherwise, a comercial one is a valid option.
- Drying cabinets The scale model painted process is delicate and many factors can ruin the job if we are not careful. A finger placed where it shouldn´t be or a blast of air or dust can leave a neat painting finish become a disaster. Maybe we can recover the mess by placing the decals, or with a soft coat of fine waterproof sandpaper, but better safe than sorry. To do this, nothing better to isolate our car model from outside when the paint is drying. I use a homemade boxes made with plastic containers such as olives or candy to those who have screwed a weld robot at the top. The cover itself serves as a base and then when I just end to paint put the pot over paint. Furthermore, it is a very tight closure that will prevent dust and spoil the job. For the paint to dry before, small holes in the bottom allow the air to enter and speed up the drying process.
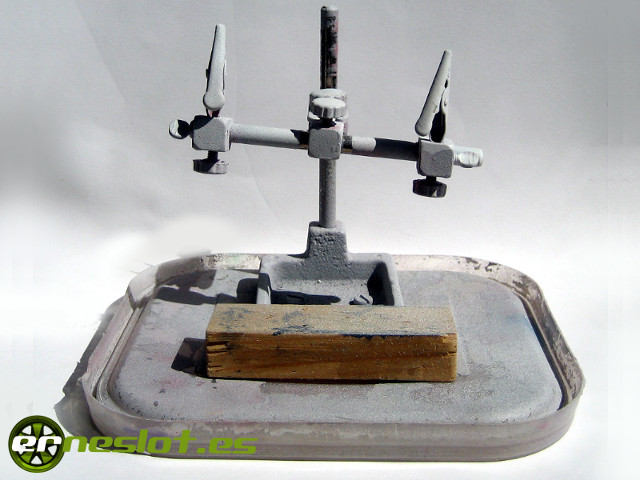
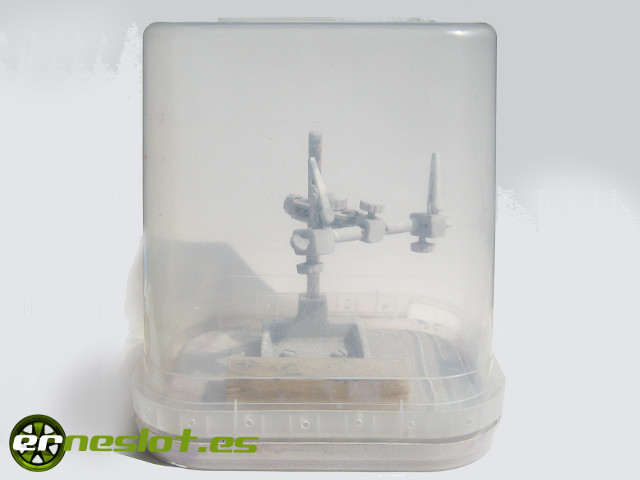
To be honest, the disadvantages of the use of the airbrush aren´t nothing compared to the advantages so if any of you are in doubt about buying an airbrush or use it for "fear" I encourage you to try it, you will soon handle well and take advantage.
Go to topFRAME RACK FOR SLOT CARS
With the appearance of 3D chassis, the adaptation of the chassis of one manufacturer to the bodywork of another has in a certain way ceased to make sense, because of the huge offer of 3D chassis for slot cars, but that does not mean that we can´t do it if we want. Maybe we have stored several chassis used in competition that have become obsolete, or we get a batch of scrap parts or simply because we want to adapt a chassis for the sake of doing it. Whatever the reason for adapting a specific chassis to a bodywork that is not the one that corresponds to it, it is important to leave it as flat and best glued as possible, especially if they are cars to be enjoyed on the slot track, because the flatter and the more "square" the chassis is, the better the car will perform on the track. Having as flat a surface as possible to work on the chassis is important. For the first chassis adaptations I made, like the ones you can see in this link, I used a MDF board to hold it to it with modeling clips before gluing the parts. The result was satisfactory, but sometimes I missed being able to hold it in some points that the clamps did not allow me, especially inside the chassis, or to do it with more precision. I encountered a similar issue when making body modifications to Ninco's Ford ProTruck to convert it to a Nascar Truck. As it was an open body at the back, it was very difficult for me to make it square and not warped. So I started to think of a kind of frame rack to use in these cases.
I had been kicking around the basic idea of ??how to do it for some time. It was clear to me that I would start with a very thick iron plate because I wanted a smooth and very resistant surface that would make it difficult for the chassis and bodies to stick when I worked with them, so I got one that was 180 x 95 x 10 mm. I made three rows of 3.25 mm. in diameter holes in that plate to then pass an M-4 threading tap. I spent a good time making holes with a column drill and a much longer time passing the taps to get the thread to all the holes. After a few hours of work this was the result:
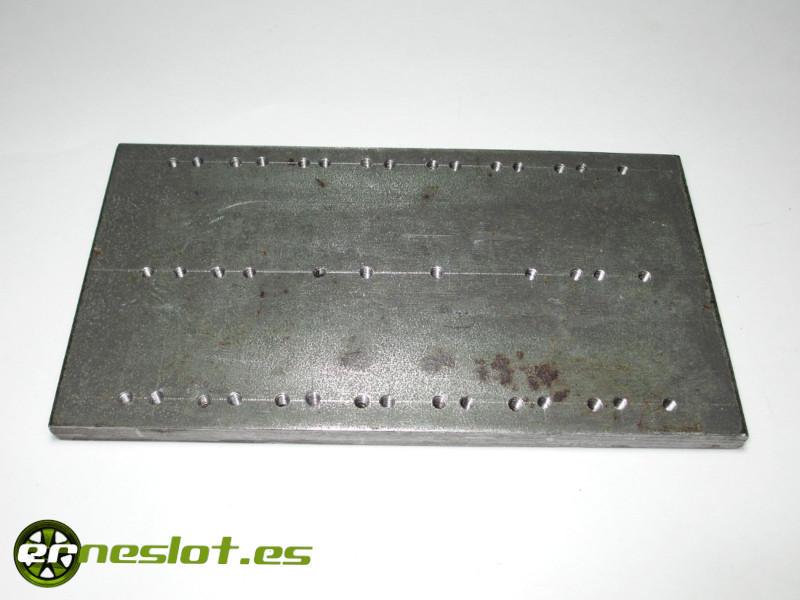
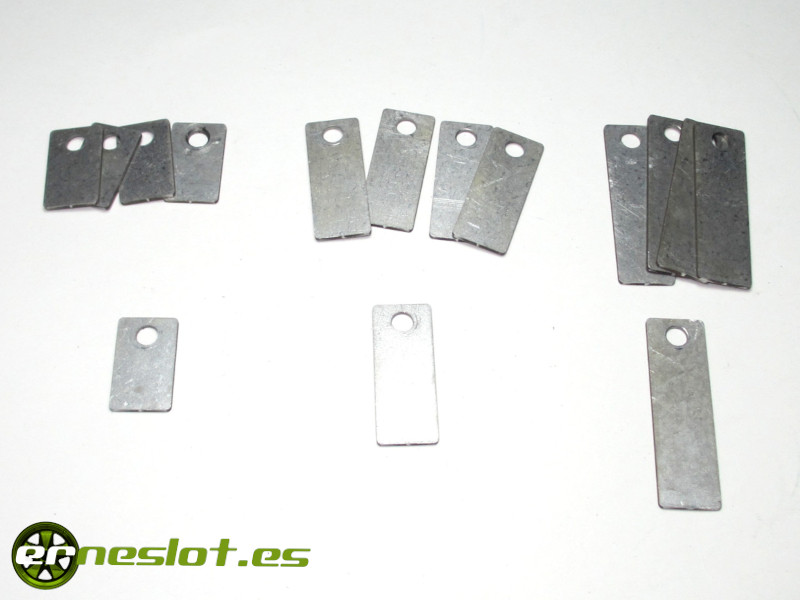
To hold the chassis to the plate at different points I thought of long metal plates with a 4 mm. in diameter hole at one of its ends to use them as clamps. With a DIN 912 M-4 screw you could attach them to the plate and rest them on the chassis to hold it in place. The dimensions of these pieces were 10 x 20, 10 x 30 and 10 x 40 millimeters with a thickness of one millimeter to have different options depending on the part of the chassis to be fastened. Those pieces were made for me by my friend Joan who works in a machining company and he left them perfectly as you can see in the following image, just what I wanted:
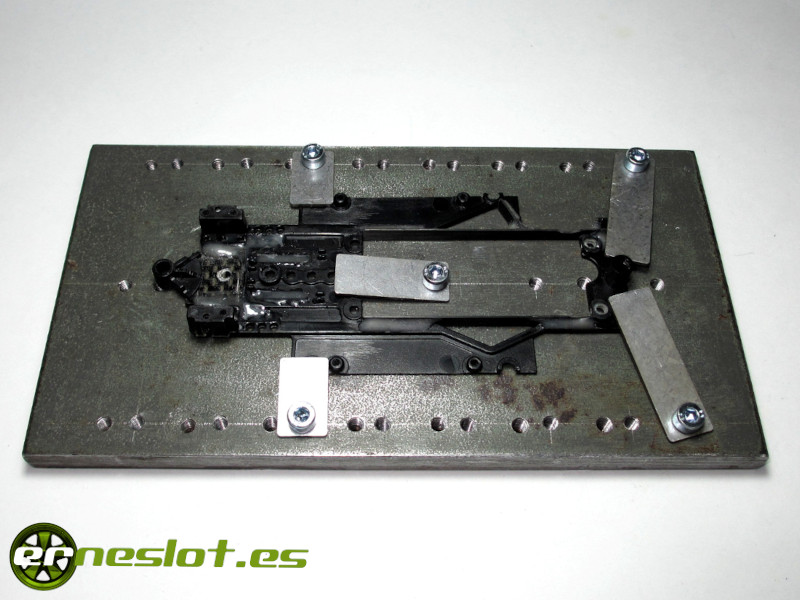
In this way I already had my frame rack made with the clamps to hold the chassis to it and work on it. I just had to use the "clamps" of the appropriate size resting on the chassis and attached to the plate with the metric 4 screws. In this way, the chassis that I want to work with is perfectly attached to the plate and I can glue the pieces that want without risk of moving:
The clamps are useful to hold the chassis, but for the bodies I needed another solution. I thought of some 10 x 90 x 5 mm steel flat bars. with two holes at the ends for the screws to fasten the plates to the bench and other holes with an M-4 thread to be able to screw screws if necessary.
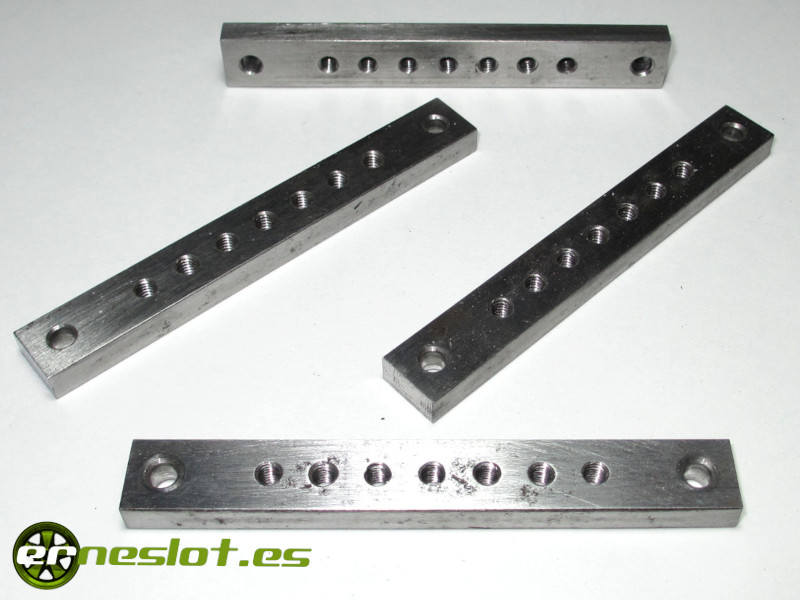
The intention was to be able to use these flat bars as a bridge and fasten the body to the plate and make it as square as possible before gluing the corresponding pieces. These pieces were also made for me by Joan and they are exactly what he wanted. Perfect. In the following images you can see a body fastened with the flat bars I´m talking about:
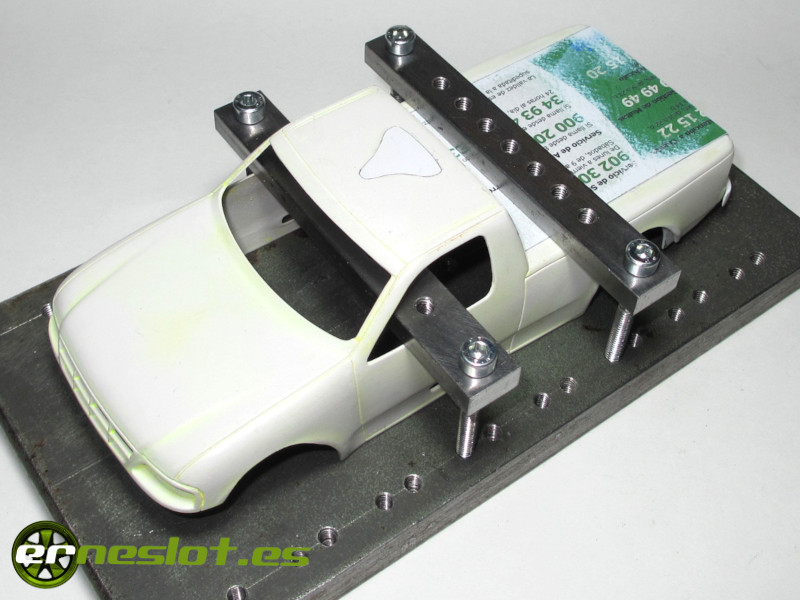
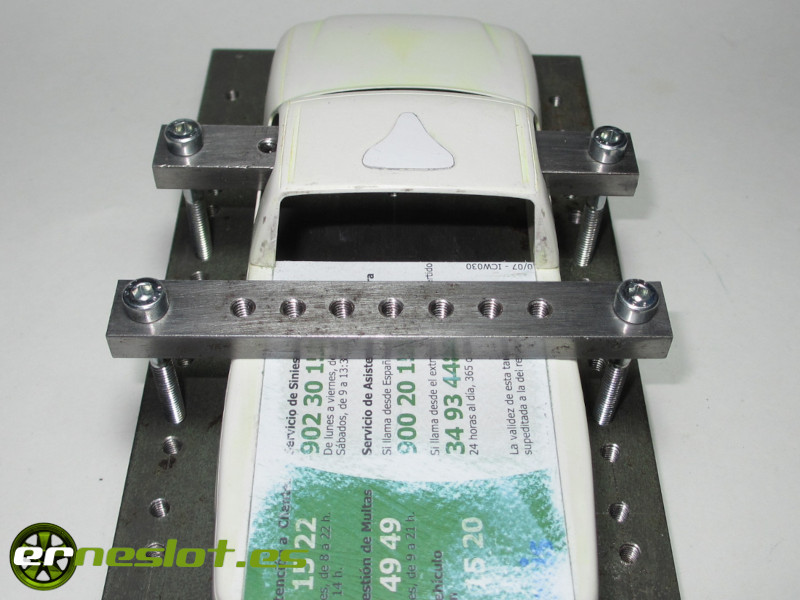
These flat bars are also very useful when I want to hold the chassis on the bearing supports, and the intermediate threads allow me to thread a screw to tighten the chassis in some points that interest me, as you can see in the following image:

In case of having to work on a motor pod they are also useful. In the following image, appears an Avant Slot pod that I repaired with some carbon fiber strips because it had cracked in the area where the bearings are fitted and the clamps and flat bars helped me to leave the pod as straight as possible before gluing carbon fiber strips.
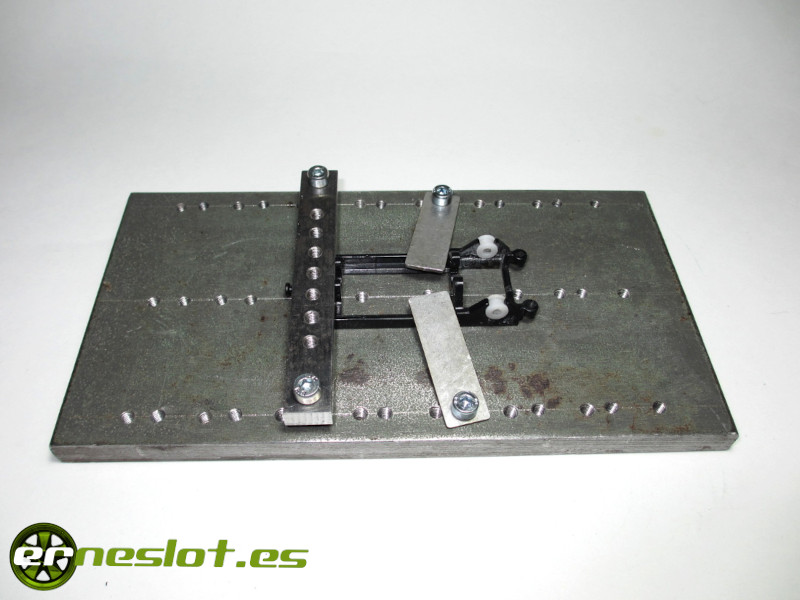
It is in this way that after a few hours of work and a little (much more) help from my friend Joan how I got the frame rack for slot cars that I have been wanting to do for a long time. For the modifications I make, it is a very useful tool that saves me a lot of work when it comes to keeping the chassis and bodies well aligned.
Go to topFortnightly updates, new cars and more in www.erneslot.es


