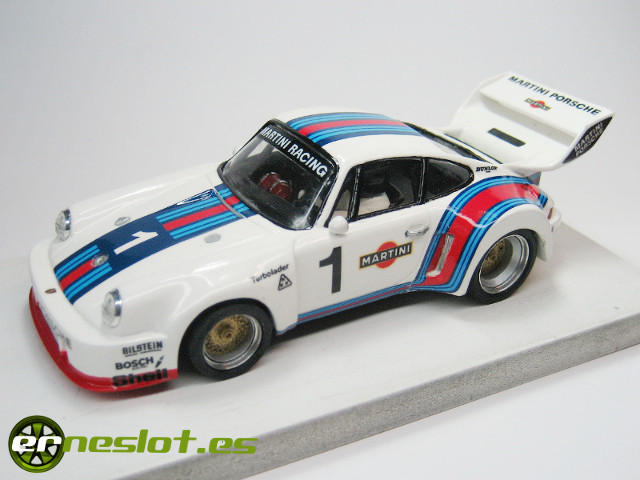
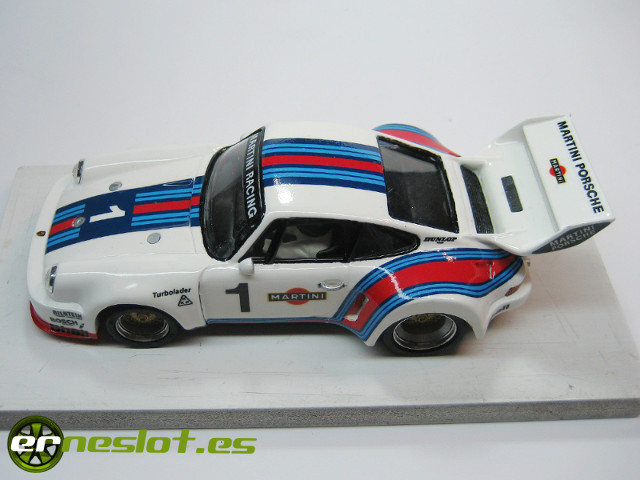
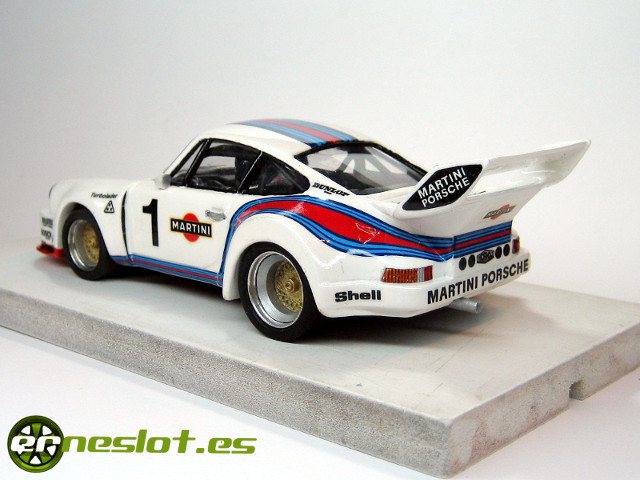
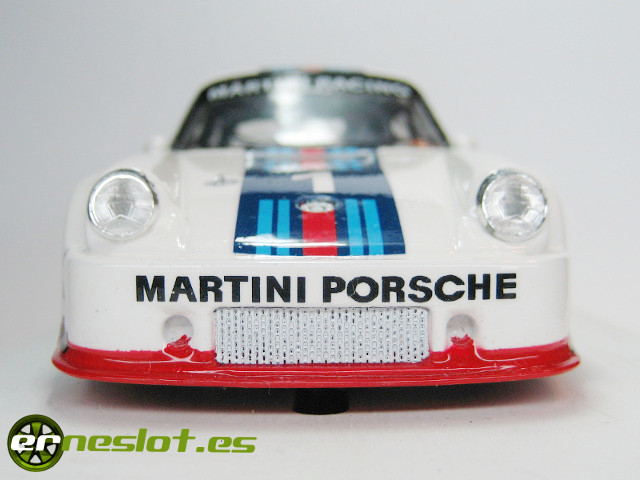
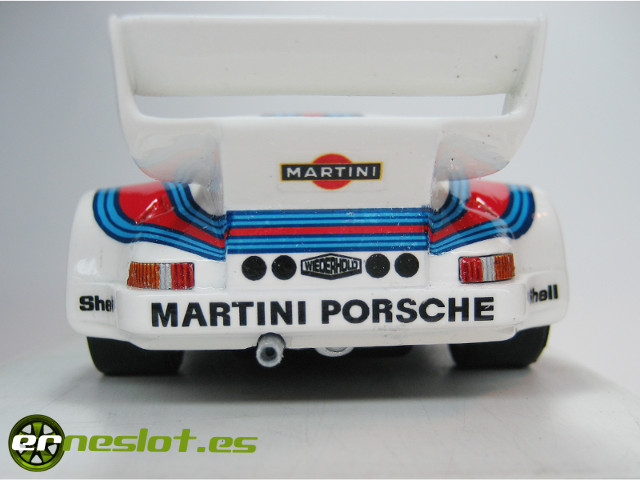
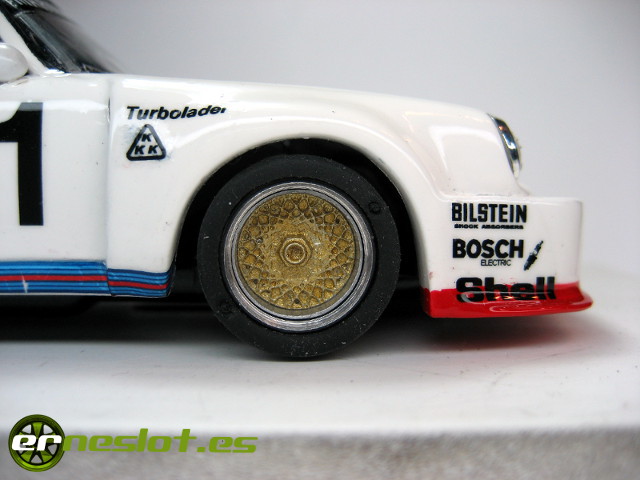
Porsche 935, 1976 Vallelunga 6 hours
In the mid-70s, Porsche had a few years developing the turbo engine in competition. Based on the 911 Carrera, in 1975 introduced his street turbo model, the 911 turbo or 930.
RS and RSR models were regular participants and winners of the races of the time, always in private hands. Porsche, taking advantage of its new street model turbo-powered, decided to prepare it to compete.
In a first evolution, prepared the car under the criteria of the FIA Group 4. The competition model framed in this group, 934, was very similar to the street car though slight modifications, such as the flared wheel arches with fiber parts to accommodate wider wheels and modified front spoiler to accommodate two oil radiators, one on each side. To approve in this category, Porsche did not have many problems, partly because the engine was developed with the intention to their use in competition. The number of minimun units form the base model (930) required to enroll in group 4 were 400 and Porsche outperformed that amount. In addition, the technical regulation of group 4 was too favorable to the 930, to the point of having to increase the weight of the car because the very street car was below the minimum for Group 4 cars.
The F.I.A. group 5 was "special production cars", open to cars of the group 1 to 4 to which it could be modified within certain limits. For this group, Porsche developed the more extreme versions of the 930.
Just as the 934 had great sememes, not just aesthetic, with the 930 model, the Porsche 935 was a completely different car. Despite being based on the model 930, the changes were huge.
From the 2808 c.c. engine to which was attached a KKK turbo blowing to 1.42 bar delivered 590 hp at 7800 rpm., which increased to 630 C.V. if the pressure of the turbo rise to 1.56 bar. The Dunlop tyres were specially made for the model, mounted on 17" front and 19" rear rims. The body had major changes, a large rear wheel arches, large rear spoiler where was integrated the intercooler and a flat nose without the 911 characteristic headlights, which went on to be placed in a front spoiler, which included an oil cooler.
In this way the car was introduced for the first race of the season (Mugello) and swept to victory, which I do not think it was a surprise, because in the pre-season tests at Paul Ricard the car was faster than the 6-wheel Tyrrell F1.
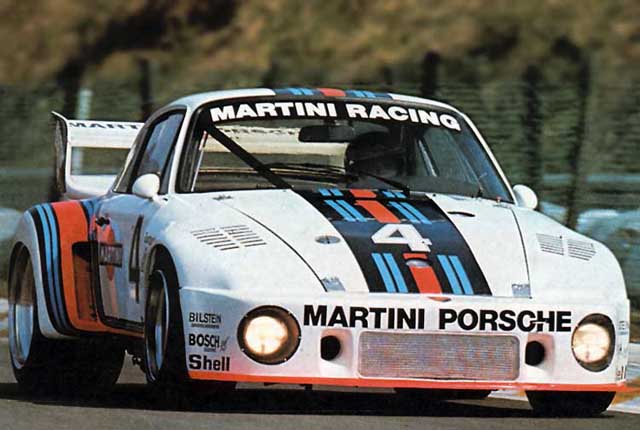
During the 1976 season were built two different versions of the 935, due to the problems of regulation that had the rear spoiler Porsche among others, so that the car that raced the end of the season was very different from car who started it. This is the car configuration that started the season:
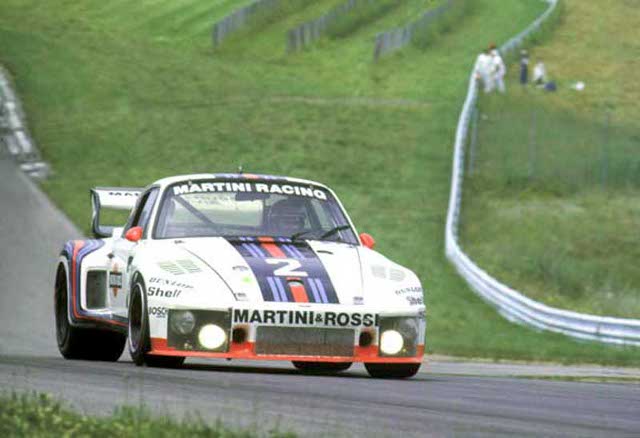
And with this configuration, the official team raced the final races of 1976:
In addition, the first version had two configurations, the version of the first picture, flat-nose, and a version with the lights of the original, which is shown in the pictures below and that I´m going to reproduce.
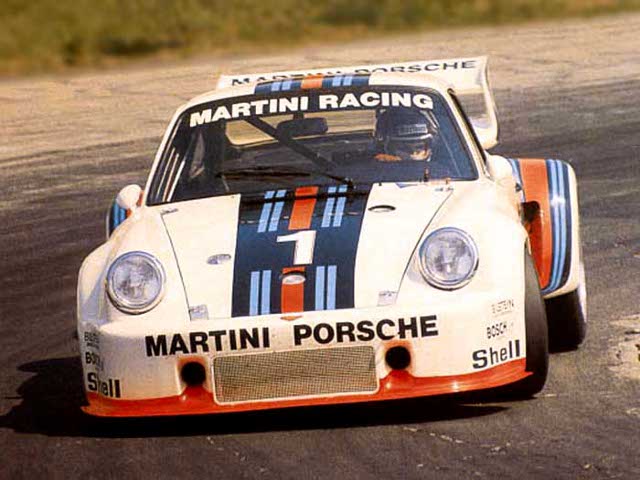
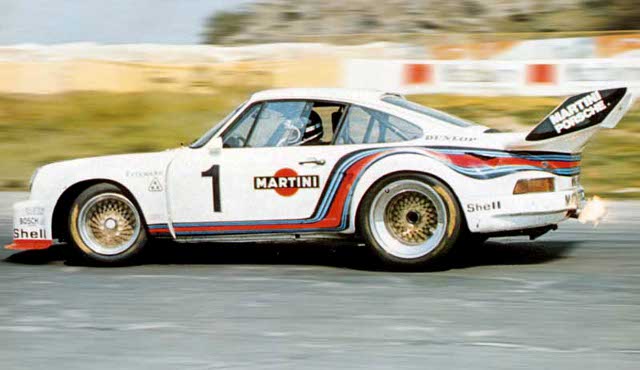
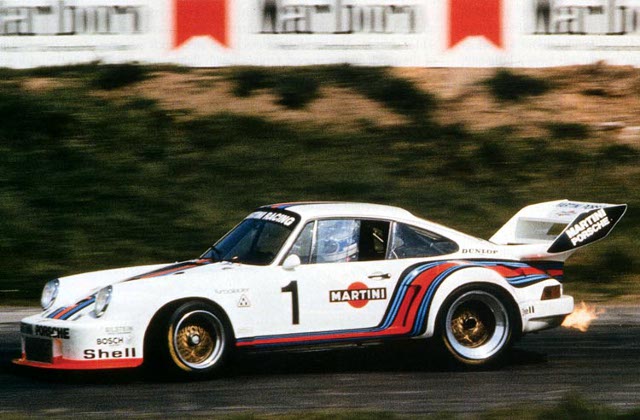
All photos are taken from the web page www.jacky-ickx-fan.net dedicated to the great Belgian driver Jackie Ickx.
I want to build this car for three reasons, the first is that I love it, and more being a version with the production 911 headlights, the second is that work is going to be easy because I have well learned after a few modified 911 (including a 935 like this one) and the third is that I have made the decals, so the decor will not be a problem.
As for the rest of models derived from the Porsche 911, the body from departure is one from Altaya "Rally Míticos" collection, well known by those who visit this page. In fact, almost the construction process will be the same, although with some change to make it faster and better, I used to make the Porsche 935 participants in the 6 hours of Mugelo in 1976 and you can find in the menu on the right or clicking here.
The first steps are the usual, dismantle the body and faded completely to work more comfortably. After that, I started with a change very little evident on the body that I did in the reproduction of the 911 SC: modify the fall of the bottom of the windows. What I will do is change the fall line that the starting body shel has in the space indicated by arrows in the picture below:
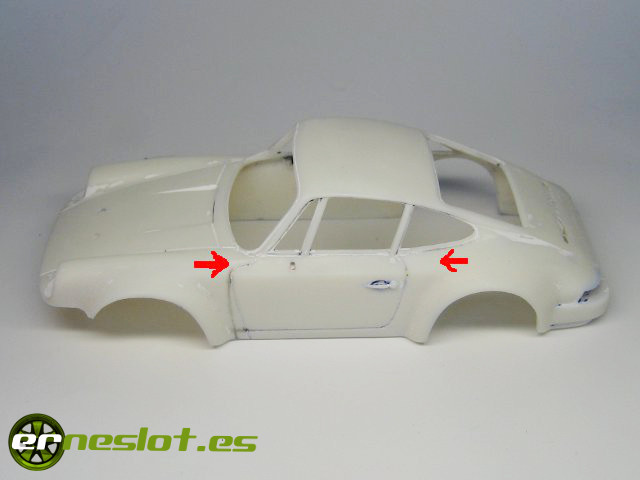
Apply Nural 41 putty in the indicated area and to cover the slot of the doors, which as I said before, does not have a proper fall.
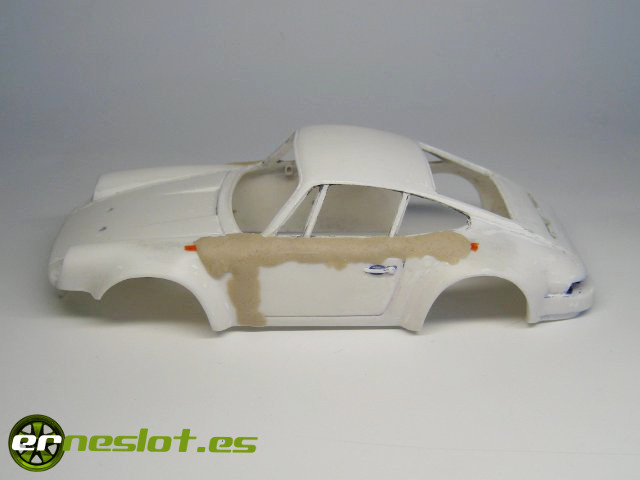
Once the putty well dry give him the proper way with different grain sandpaper, starting with the coarsest and ending with the finest:
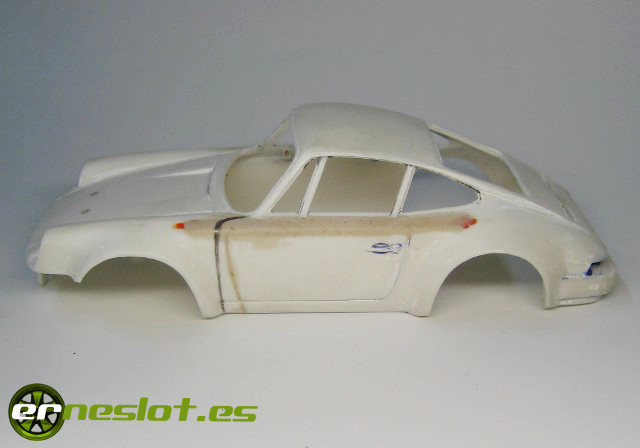
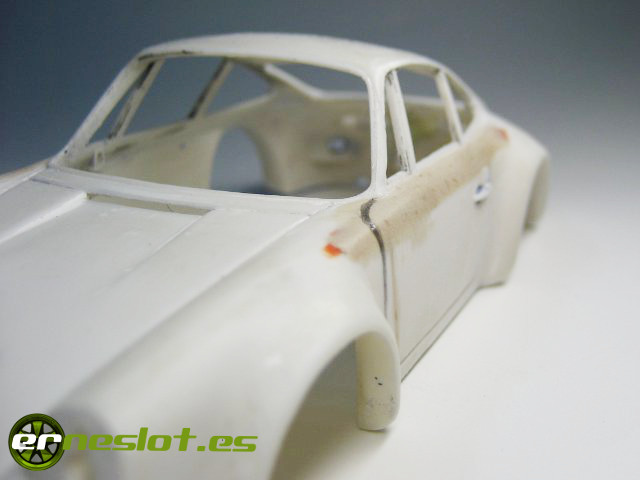
As can be seen in the previous pictures, the change is incredible.
The following modifications were made to the body to widen the wheel arches, both front and rear, a process well known and explained in detail in the "Widening a bodyshell" section from "Tips and tricks" and you can see it following this link.
To left the rear well finished, and as a step towards the construction of the rear wing, opened a hole to place a resin grid cloned from a Fly Car Model 911.
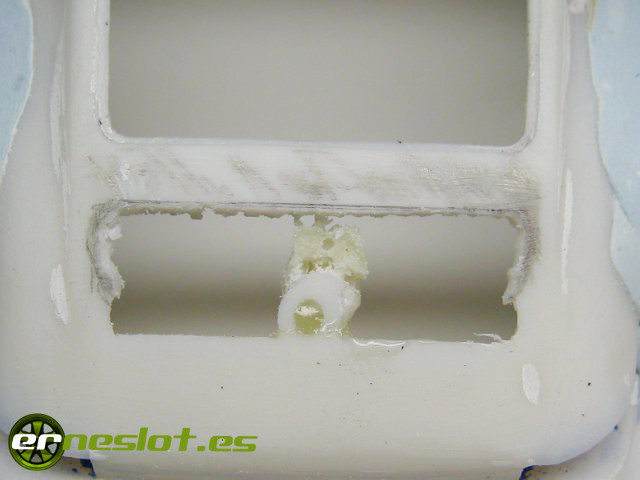
With the hole open and well defined after filing carefully pasted inside evergreen plastic strips,....
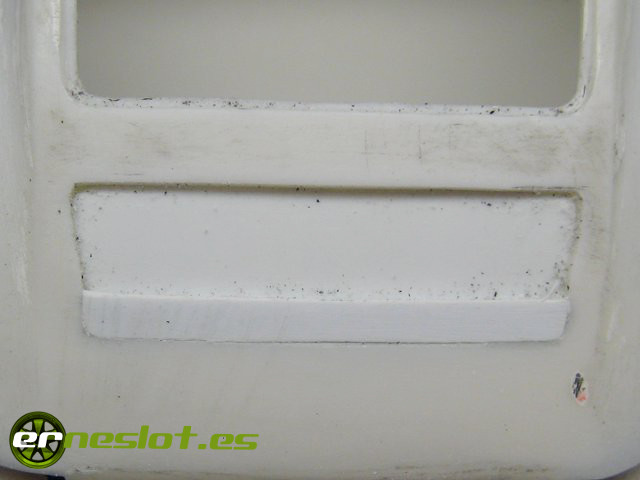
...and put the grill to check that everything had been correctly placed.
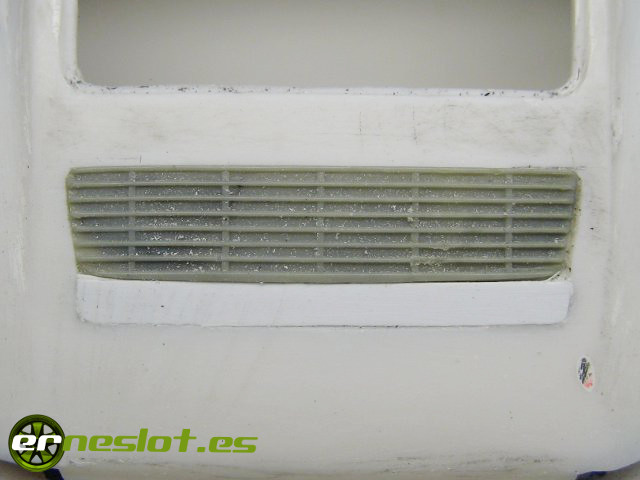
Having well-placed the rear grill would serve as reference for the construction of the rear wing support.
Unlike when I did the Mugello Porsche 935, I will make the rear wing support with evergreen plastic rather than mold with putty, it is easier to work and the forms are more correct. First, make a paper template of the sides of the support and then cut it in a plastic sheet of 0.75 mm thickness:
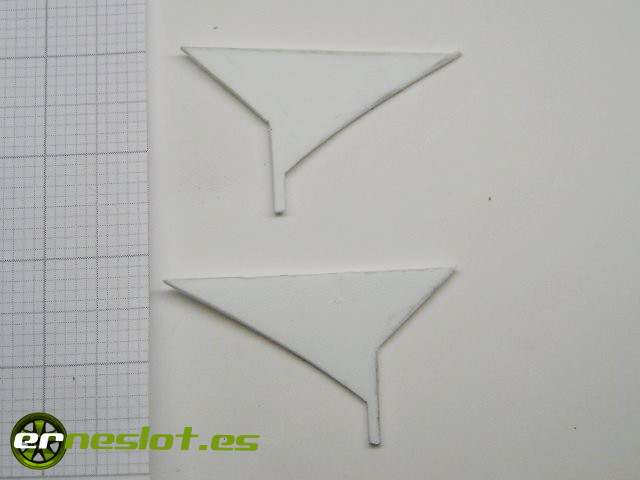
Once cut instead stick with the piece that closes the rear of the support. First tentatively stick the pieces with a bit of cyanoacrylate in case we need to do some changes in its position. When we make sure that everything is in its right place reinforced the joints with bicomponent glue. A little sand in some places will finish the job. The result of this work was:
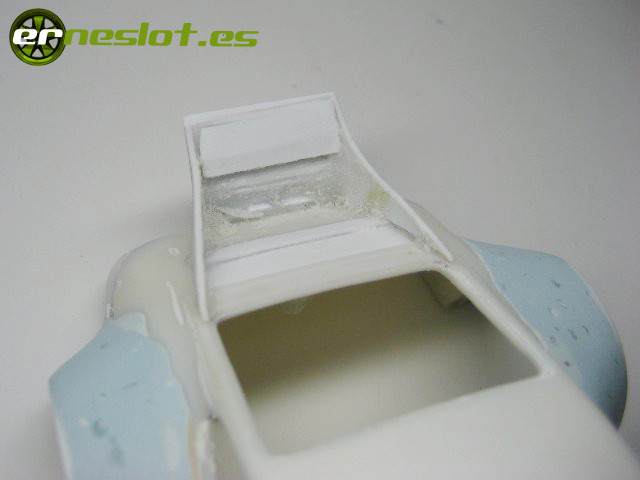
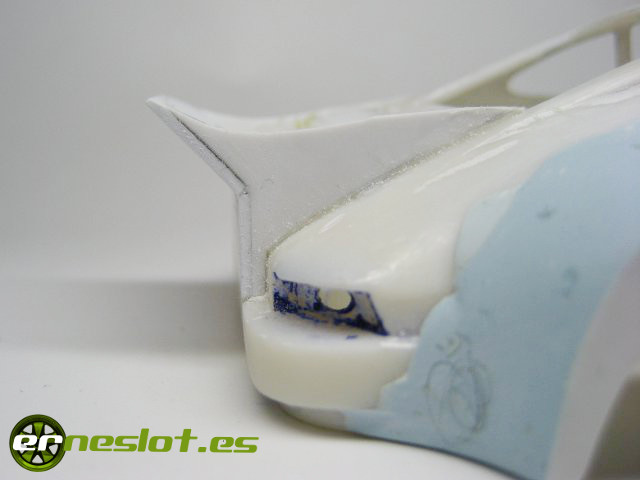
It is advisable to make the side pieces slightly larger than necessary and then adjust the shape with sand, lime or cutting with a cutter. Is always easier to remove than to put ... In this particular case, left the top of the pieces that form the sides of the wing a little higher, then gave the curved shape filing and sanding careful to leave well prepared the support for the second part of the job: the construction of the wing itself.
As I did with the 935 Mugello for the construction of the rear wing I"m going to help me with a Revell Porsche 935/76 1/32 scale model, which has the same rear wing that I want to build to my car. I will not clone it, I will use it only to get the forms and measures and I will do with plastic strips and putty. This is the wing of the model:
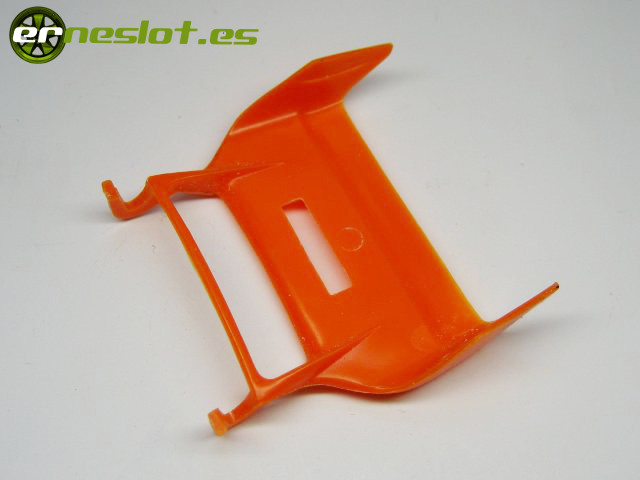
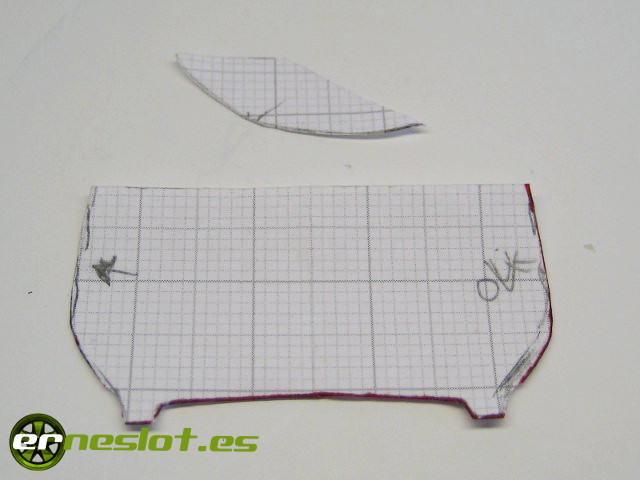
Helping me with the wing of the scale model, do the templates of the parts the wing consist on graph paper and then cut them out from a 0.75 mm thick plastic sheet. When cutting, always try to cut slightly larger than the final piece to later adjust shape and size with sandpaper. In order to make the two side pieces symmetrical (and whenever we want to make two pieces the same way) stick them together with some glue that is easy to take off, as a contact adhesive, for example, or a few drops of cyanoacrylate, and work like a single piece. Having reached the final form, get unstuck with care, for example helping us with the blade of a cutter, and remove the residual glue with a soft sand. Whenever I have to do symmetric parts use the same technique and gives very good results.
Once the pieces cut stick them between themselves, first with cyanoacrylate after bicomponent glue and then give a little putty to reproduce correctly the wing shape. The work is very slow and heavy, the checks must be continuous for the piece is correctly reproduced. Helping me with sandpaper, patiently adjust the dimensions of the parts and shapes until get the piece we want. The following photo shows the piece in the middle of this process.

The opening in the middle is to fit the grille who has the original car to cool the intercooler.
To five it the thick and adequate shape to the wing lower horizontal plane pasted another 1 mm. thick evergreen sheet:
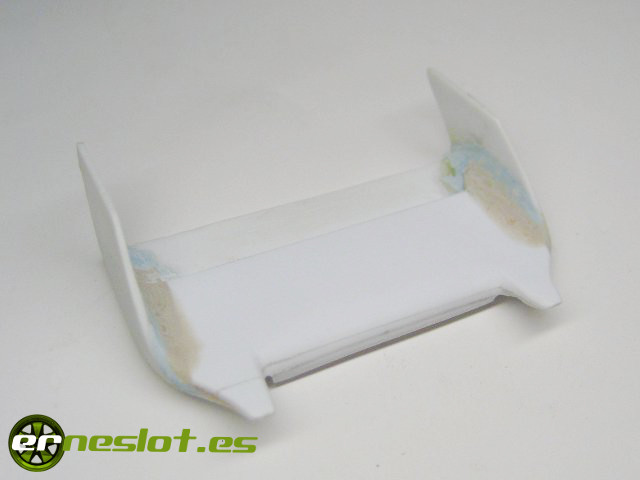
And after adjusting patiently with lime and sand paper, I made again the hole for the intercooler grille. At the bottom I hit a strip of evergreen to support the grid.
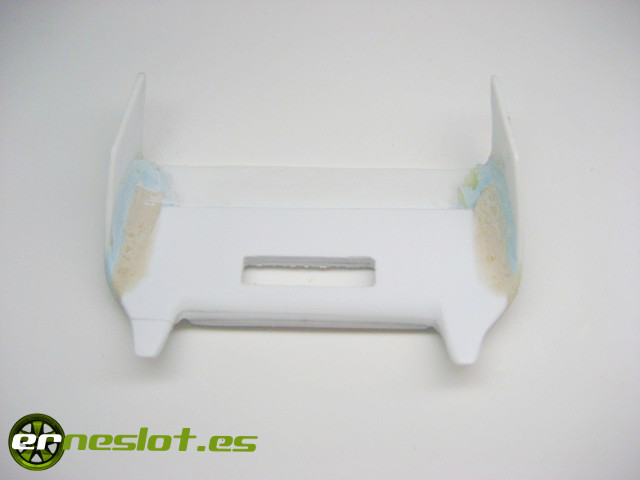
The upper plane of the wing is a separate piece made from a strip of evergreen of 0.5 mm. thick ....
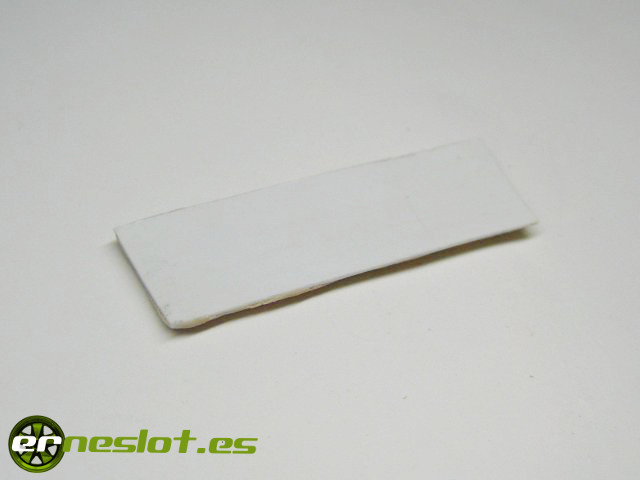
.....which pasted Nural 41 putty on the bottom ....
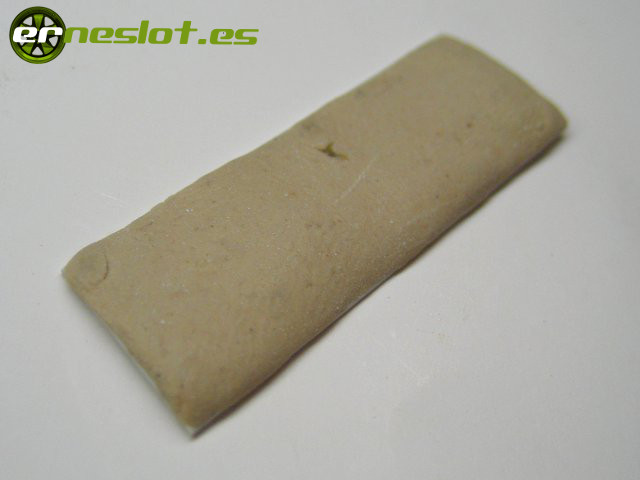
... and then gave shape with fine sandpaper:
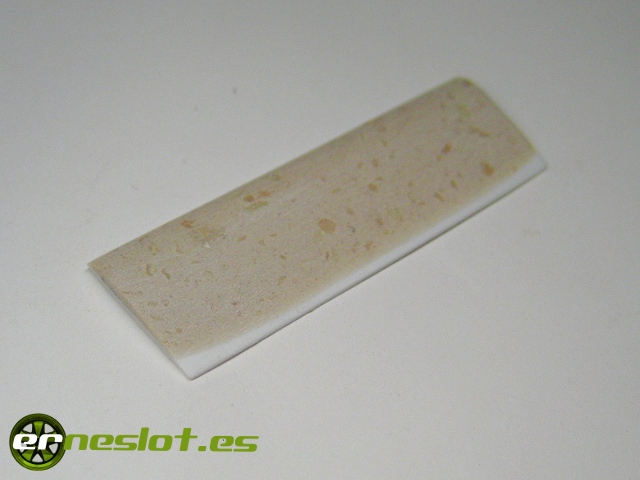
As I want to build the wing as a completely separate piece from the body, covered the top of the wing support with a piece of plastic:
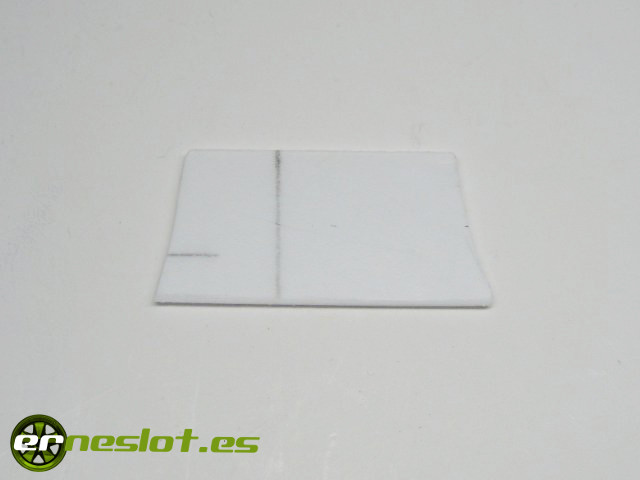
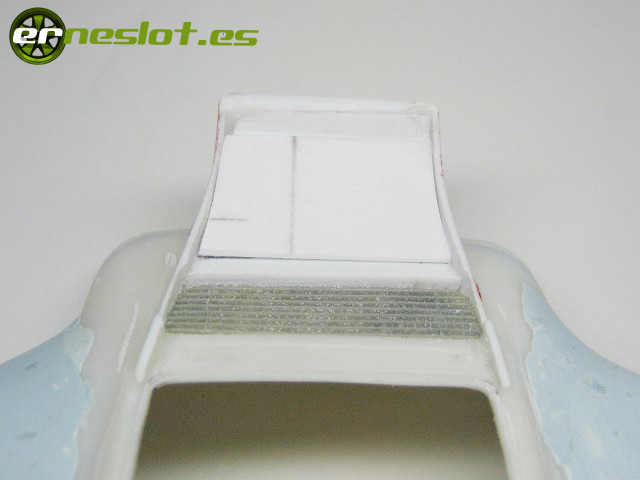
And with the help of putty gave the final shape:
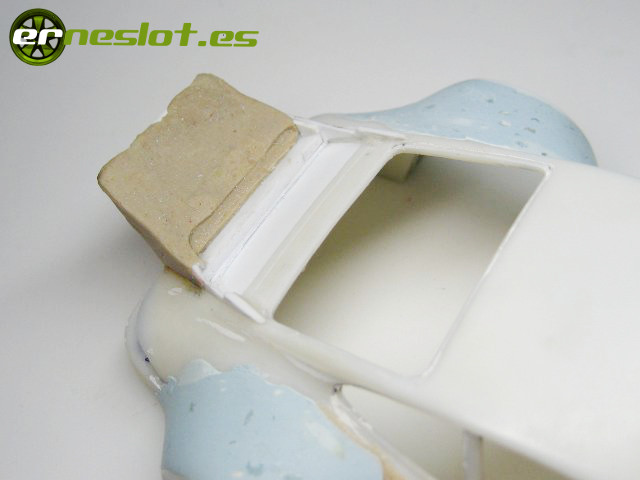
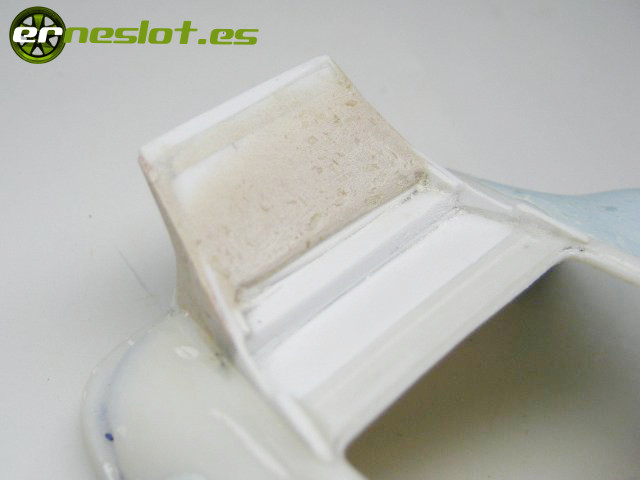
A cloned resin grid was used to finish the job. The wing with all its parts and put in place was as follows:
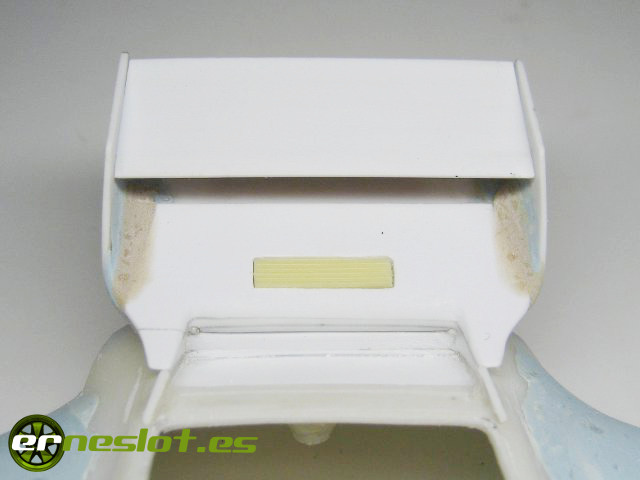
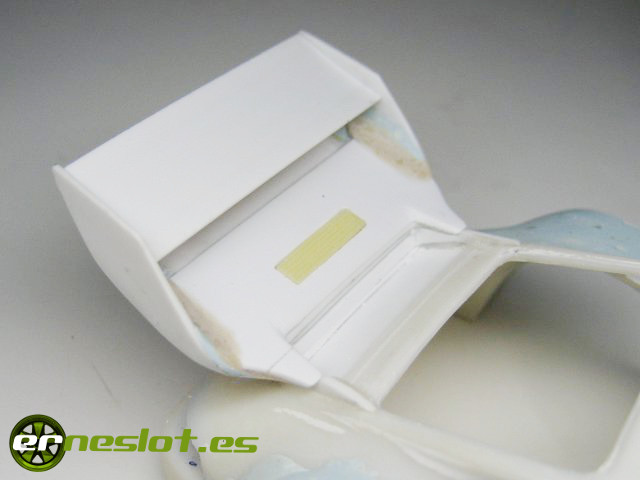
A few details remain to finish but most of the work is finished.
This is yet another transformation of the bodywork of the Altaya Carrera RS but I keep discovering new things about the reproduction. As I prepared to make the openings of the air intakes on the rear fenders of the car I noticed another bug in the reproduction of the car. The shape of the rear door was incorrect, as was the case with the front. The slot that defines the door was too moved backwards, while the original car fell forward, leaving a sticking door more and more distance between the door and wheel arch. In addition, the doorknob was shifted downward, while in the original car was higher.
In this first picture you can see the original fall:
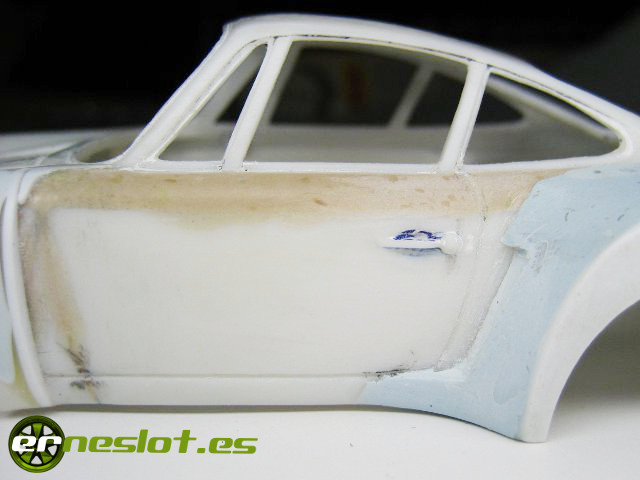
And in this one is marked where it should be:
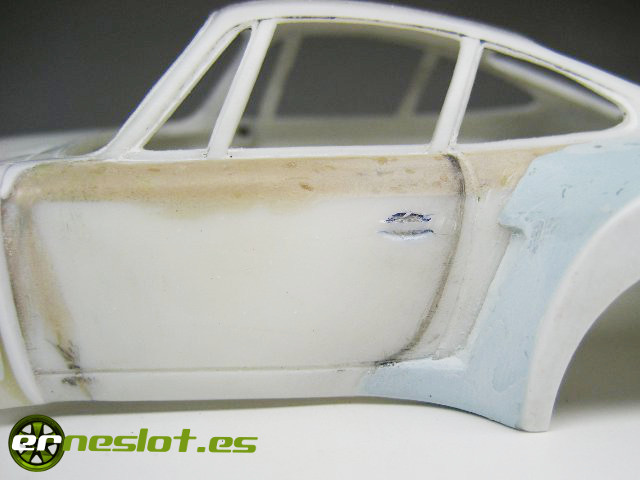
The only solution was to remove the door handles, make the shape of the door and close the old slot. And that's how I did it.
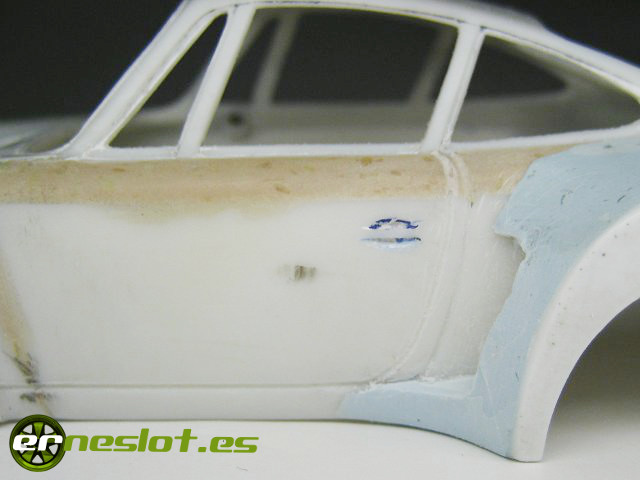
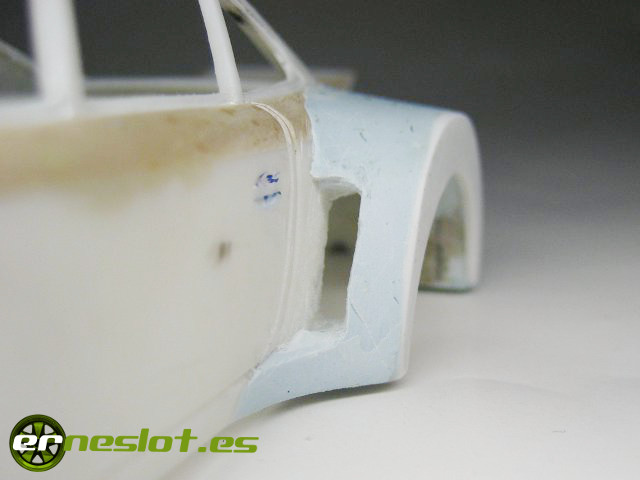
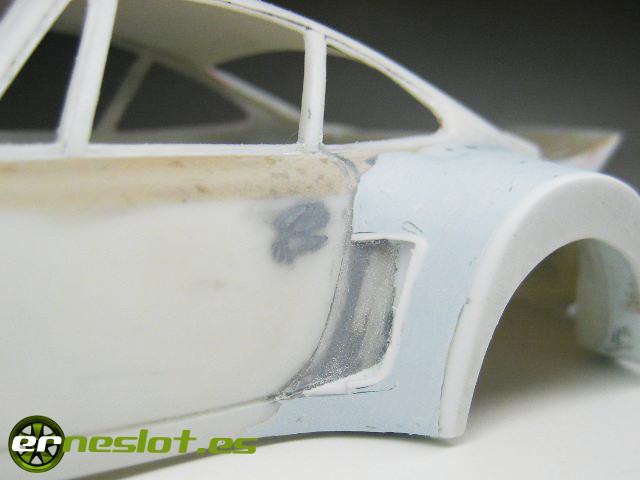
With the shapes os the doors well-defined started making the air intakes of the rear wheel arches. First I opened a gap with the mini drill lime in place.
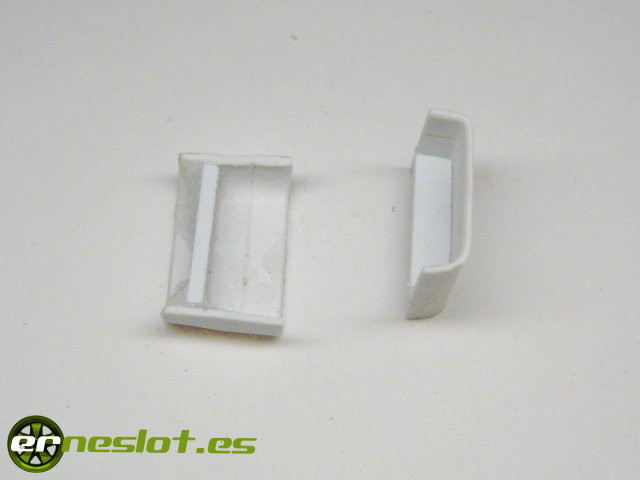
With 0.5 mm. thick evergreen strips, do a piece to leave a well-defined shape of the air intakes. In this way it both intakes have the same shape and position.
Paste both pieces in their proper place and then apply a bit of putty around to plug the gaps.
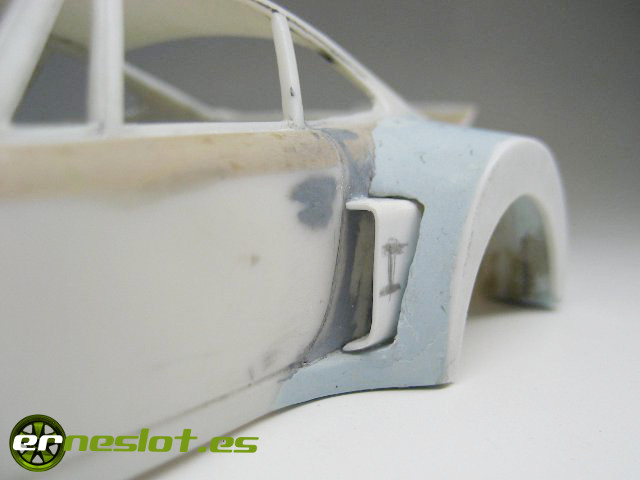
And with patience and sandpaper I give the final shape:
The front spoiler of the starting model is very different from the fitted on the Porsche 935, so to start its transformation processing I took the scale model spoiler unpainted that I cover the holes of the indicators with plastic pieces.

Extend the bottom of the spoiler with a piece of 1 m/m thick evergreen plastic.
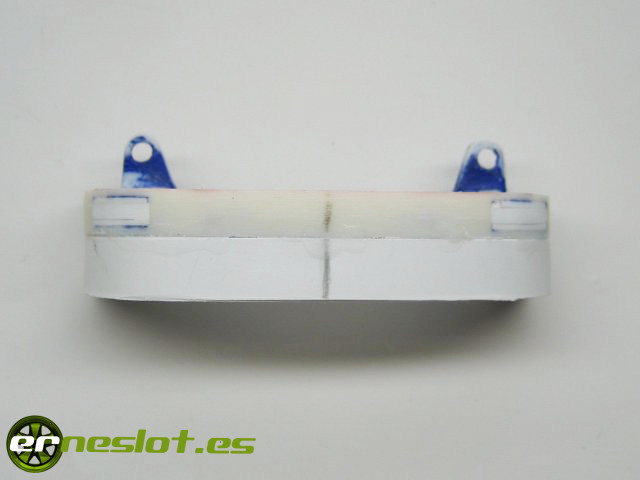
I pasted the spoiler to the body to work both together and thus made it better suited to real car. With a file to give the spoiler its right shape, because as I explained in other transformations of the same body, the bumper of the scale model is too long and square compared to the real car one. In addition, I applied putty on the sides and with the aid of lime and sand gave him the right shape. With the spoiler right reproduced, I drew the lines where must be opened the holes for the front grille and the brakes air intakes.
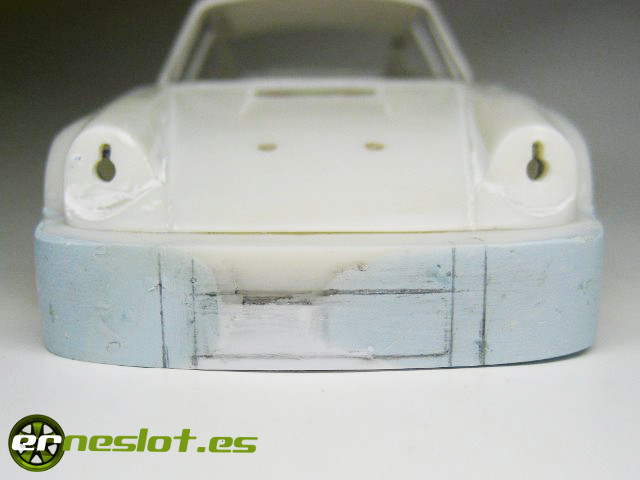
With the help of the mini drill opened the holes and with file and a lot of patience gave them the right shape. The work itself is boring but as I had done it for Mugello Porsche 935 to me was quite entertaining.
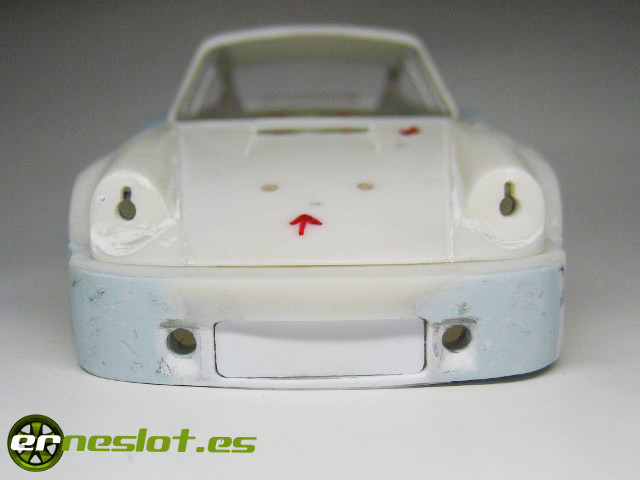
The lower edge of the spoiler I cut from a 0.5 m/m thick evergreen sheet...
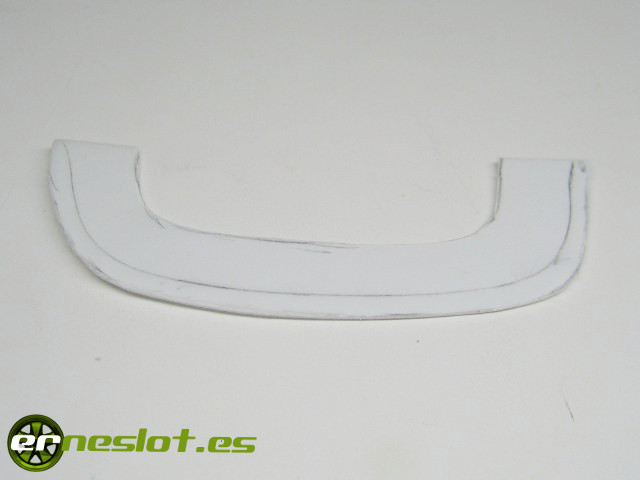
...that after pasted under:
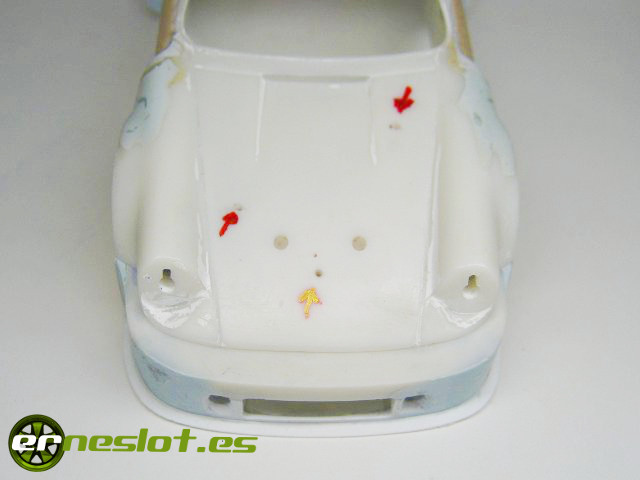
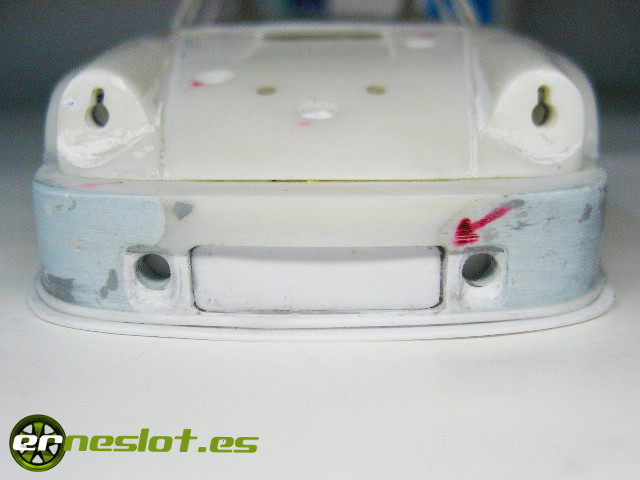
In the above photo are on the hood of the car a few arrows marking the position of the holes where will place the oil plugs and gas bearing the car. With a hand drill and a 3.75 m/m drill opened holes for subsequently pasting below plastic pieces.
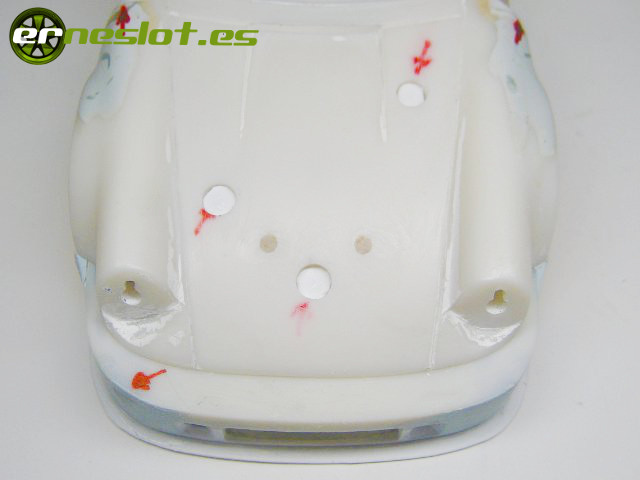
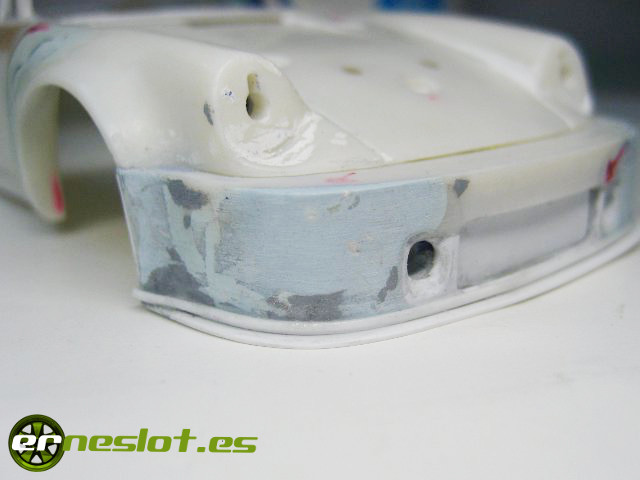
After leaving the front spoiler as best as possible after a hard work of sanding, I would finish its bottom. I needed a thin plastic strip to attach just above the 0.5 mm plastic sheet which had previously stuck. The form had to be a quarter of a cane, and as I had no profile of these characteristics, I took a half-round profile of 1.5 m/m cutted in half by scraping carefully with a cutter.
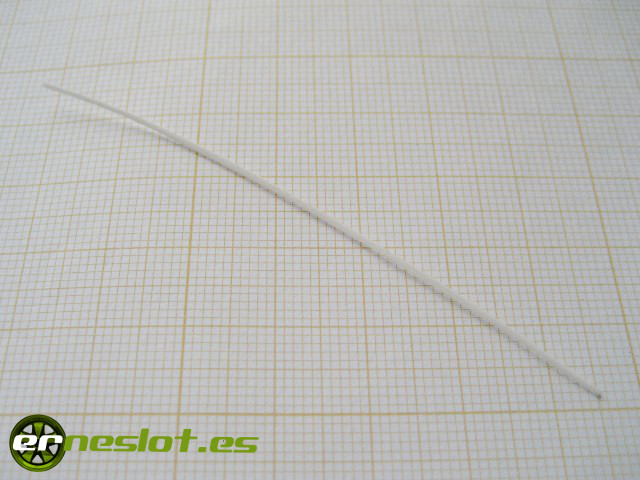
With great care I pasted the strip around the spoiler sticking it with cyanoacrylate and then finished it off with fine grain sandpaper. The result was this:
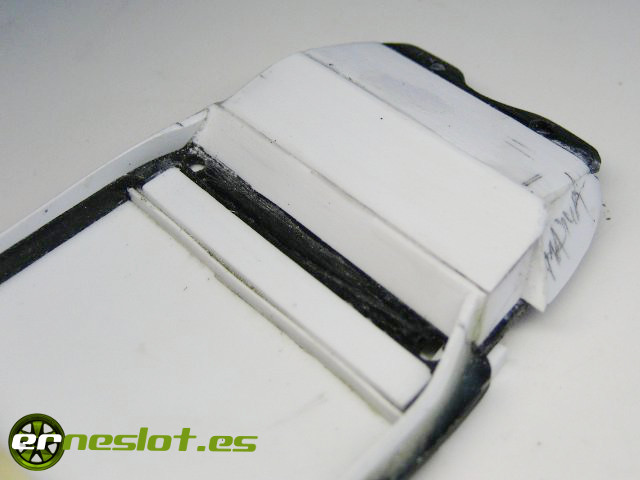
I began with the interior of the car and what I thought it would be a minor work became a big headache. I wanted to improve the shallow drive"s tray of the car and make it a little more colorful. To do this, I cloned in resin a dash from a Porsche 911 scale model and stuck it in its place.
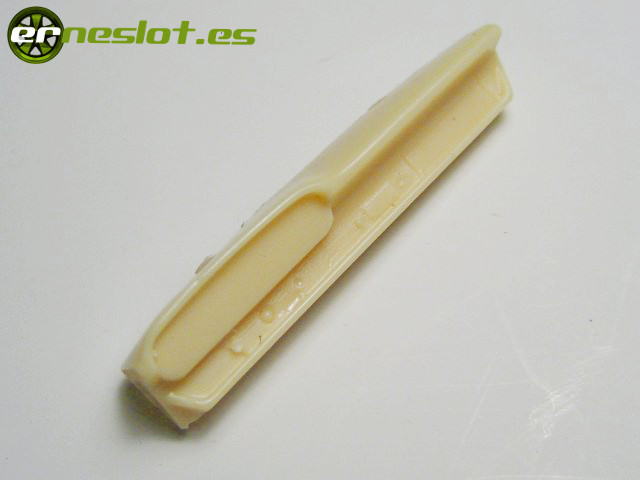
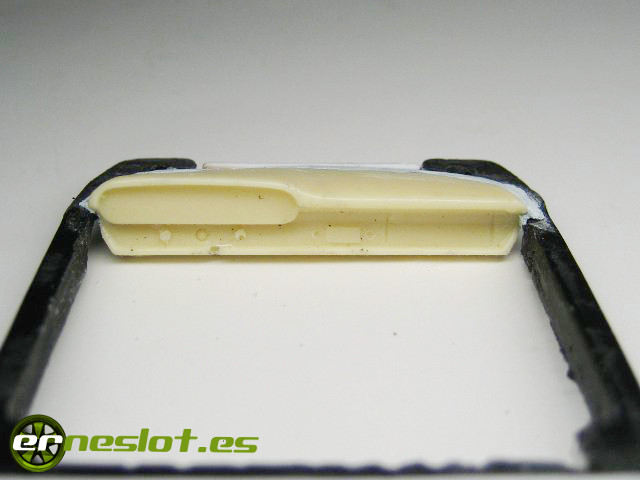
In the back I hit a few pieces of plastic to make the shape of the tray and here the problems started.
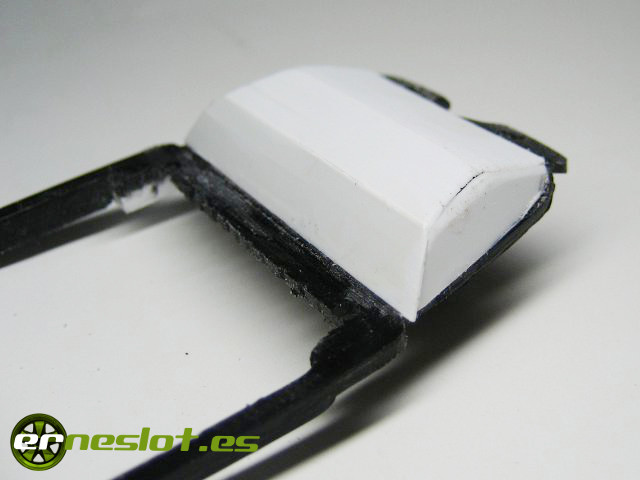
As I was not sure how to reproduce the shape I was hitting parts to give a similar way. After seeing photos of the car something didn"t fits fine. The fall of the rear window was not good and I did not like the result. In the original car, the tray falls down from the base of the rear window to the rear seat backs but in my case the opposite was true. Looking closely at the model and a Fly Car Model Porsche 911 I realized the problem. The rear of the car is bad reproduced. If you look at the Fly scale model (a more modern and better quality reproduction than Altaya"s one), the fall from the roof in the back is curved, while in the Altaya model the fall is a straight line. In the following pictures you can see what I mean:
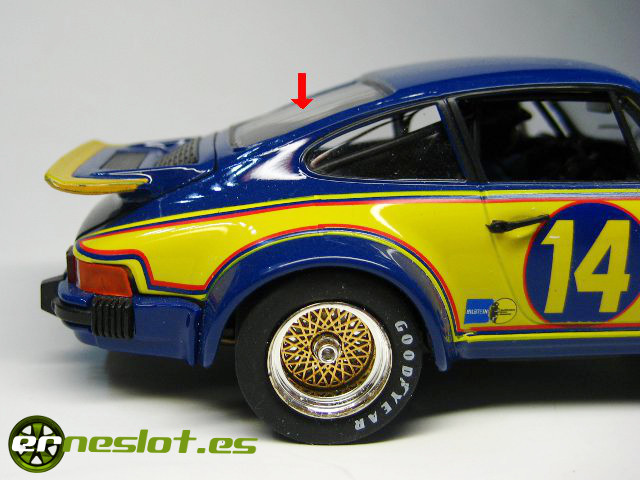

This detail, which don"t seems very important, just determine where ends the rear window at the bottom. In the original model (reproduced by Fly Car Model), the bottom of the rear window is above the bottom of the side window, according to an ascending line from the side window to the rear window, as shown in the next picture marked with arrows:
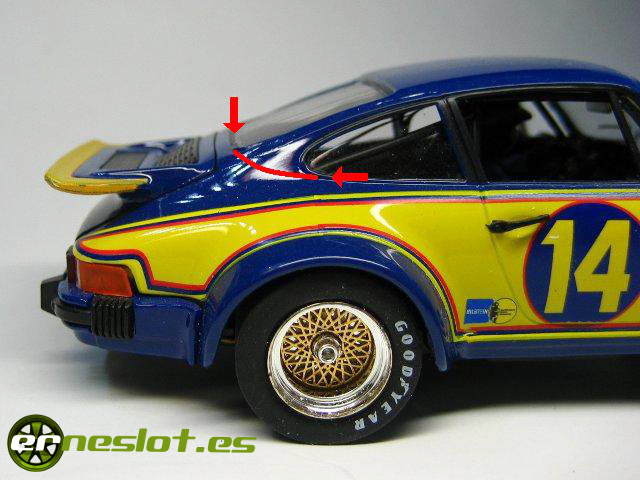
While in the Altaya model, the rear window is below the bottom of the lateral line, in part by the poor reproduction of the fall from the roof and partly because the rear window is too large.

So when I put the pieces in the back of the tray inside the car, the fall drop to the other side. In an attempt to disguise the trouble, I shortened an inch the height of the rear window, hitting a few pieces of evergreen on the bottom...
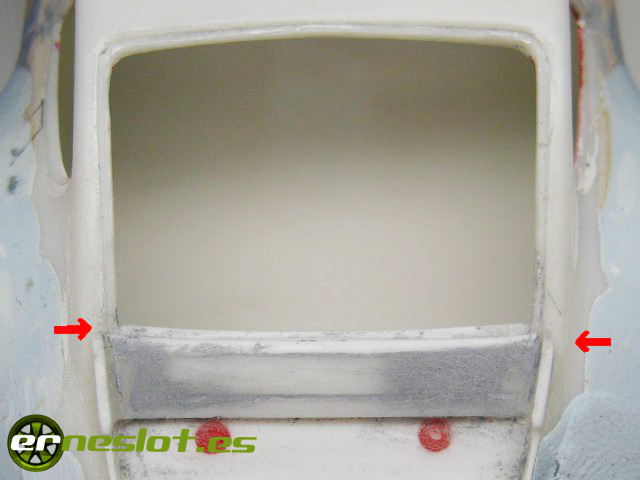
...who helped to hide the problem a little bit. Getting the same roof shape as the original car was a too much complex task and if I wanted the window line climb upward would have left the back window very small so I decided to leave the window as it had been.
Due to the problem discussed above, rather than seeking an exact replica of the interior, I interpreted it to look like the original car. The rear part of I made in two parts with different slope.
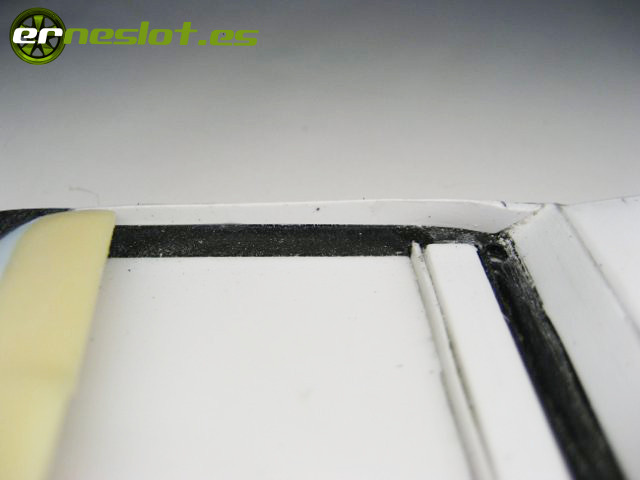
The adjustment of the glass and the drivers tray in the interior sides was not good and the distance between the two parts was great, to reduce it I stuck two pieces of plastic to fill the gap between both parts. While the adjustment was not perfect but it improved greatly.
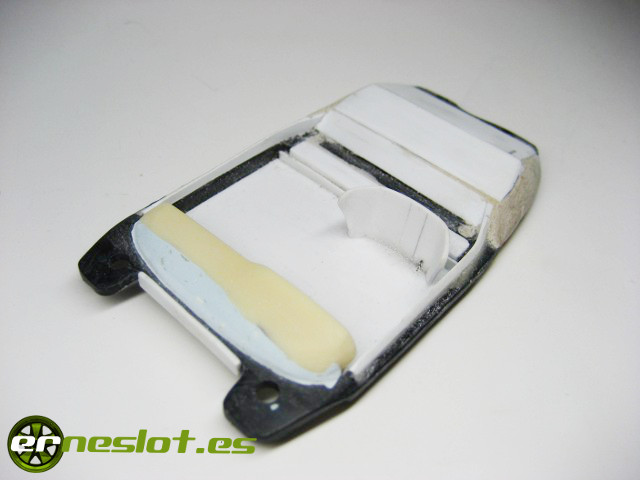
Finally, a seat made of a plastic part helped me to leave the interior finished except of the necessary touch-up putty and other small details.
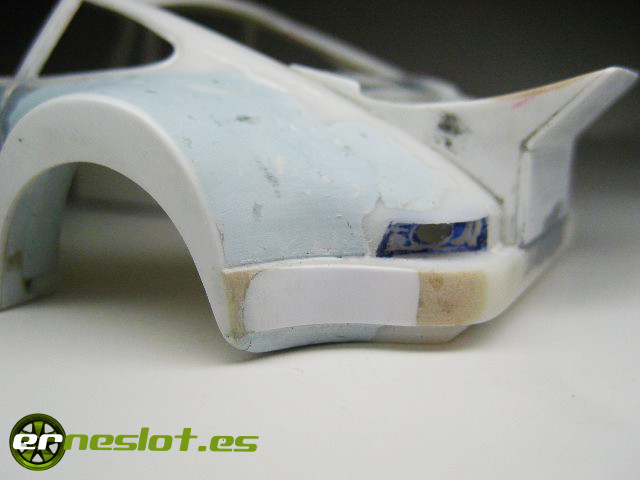
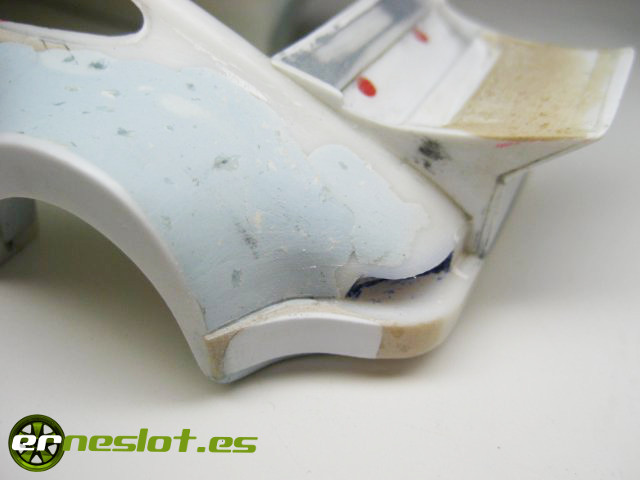
After finishing the interior, I focused on to finish the body. The finish of the bumper at its junction with the rear wheel arches did not like it. The shape I left wasn´t well defined as seen in the photo below:

To improve the shape, first hit a strip of plastic 1 mm thick.
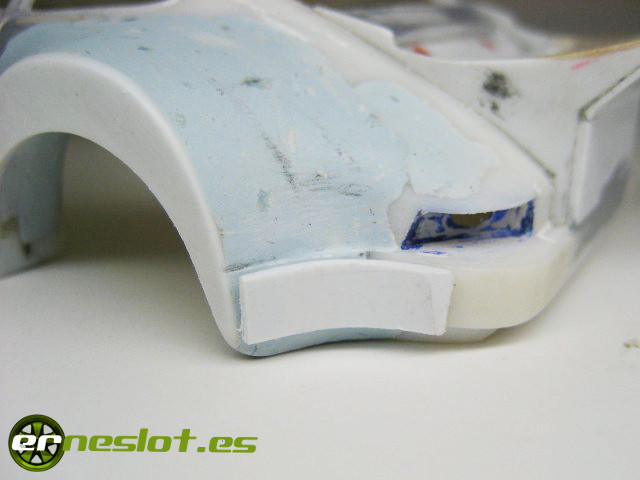
To fill the gaps, applyed wood repair putty, it can be work very easily and allows plenty of working time, apart from being very light.
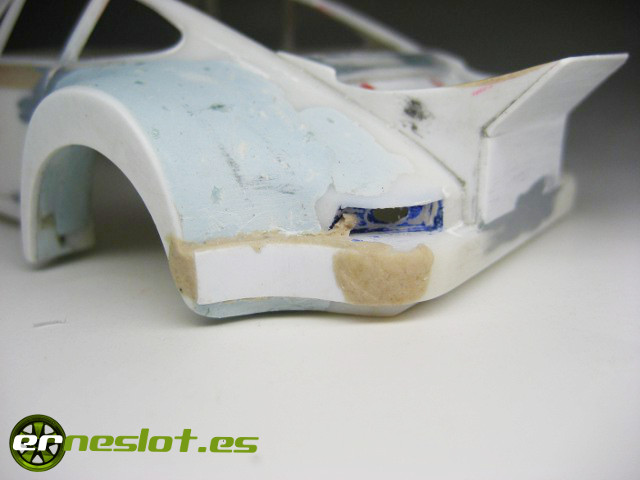
To finish, I defined the shapes well with sand and lime. So I was satisfied with the result:
One of the latest changes to the bodywork needed was to place the rear NACA air intakes. As to do it from scratch was a very laborious work I cloned a couple of them in polyurethane resin from a Fly Car Model Porsche 908 body.
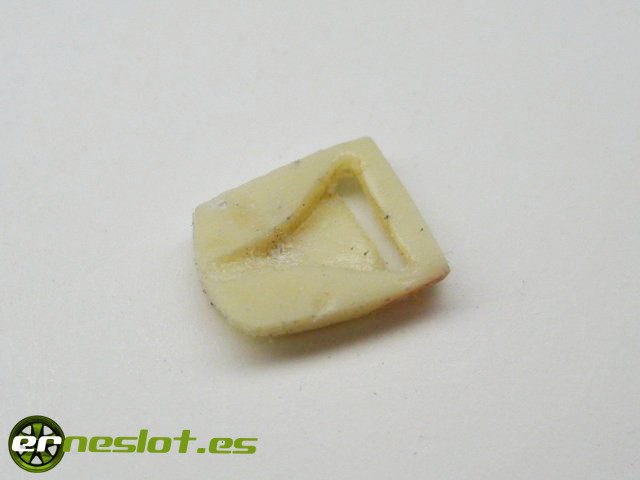
Marked the position of the part over the body. In this place I opened a hole with small drills and a file.
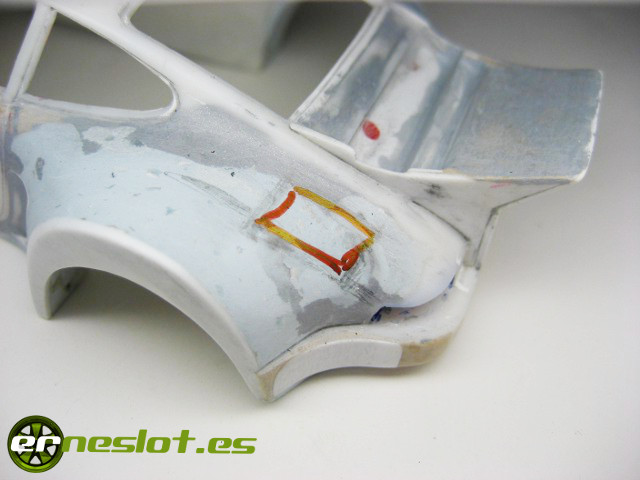
Finally, I glued the piece in place.
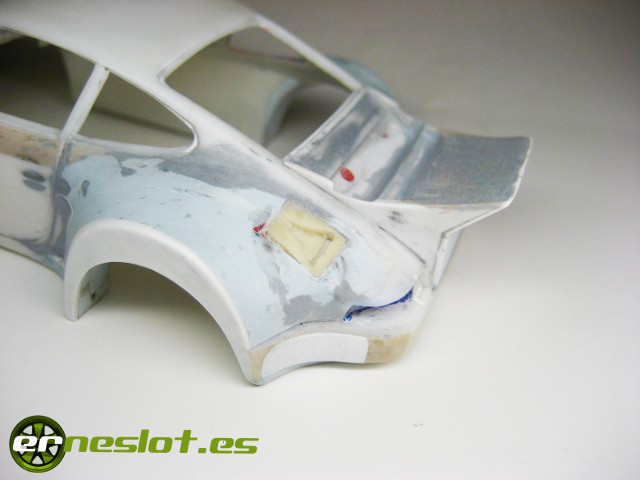
To finish the car modeling, a coat of white primer allow me to highlight the faults that correct with putty and fine grain waterproof sandpaper.
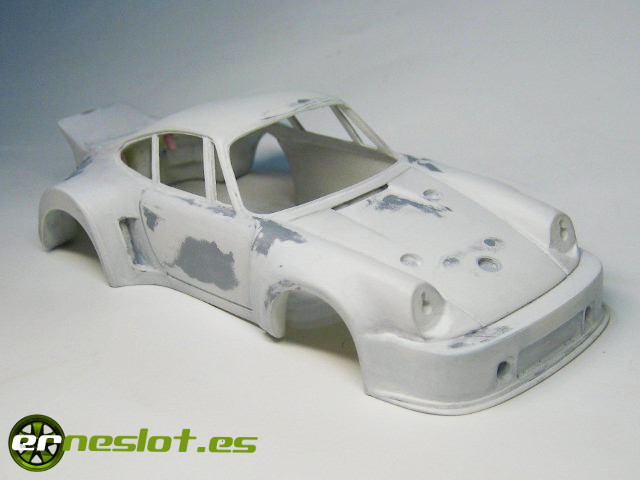
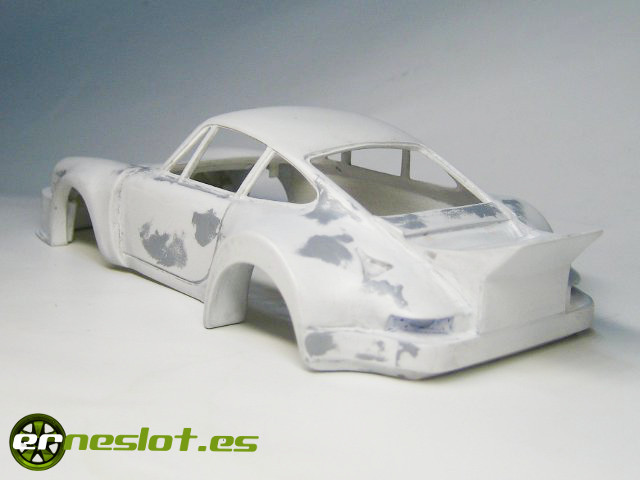
Once fitted the fails over the bodyshell surface, I pasted the rear wing and applied the first coats of white paint, gloss white Duplicolor spray. After the second coat, I pass a very fine sandpaper over the surface to erase the sings of orange peel the spray left.
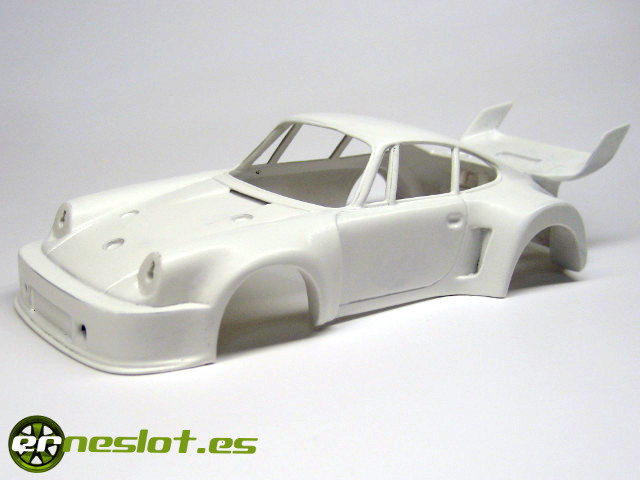
Between coats of paint prepared inserts for the tires. My friend Alberto cloned into resin some aluminum wheels for the kit that I have for sale. With them the car is perfect. But the resin wheels are not perfectly circular so the behavior of the car on the track leaves a little to be desired, but honestly, how many of our cars have hit the track?.
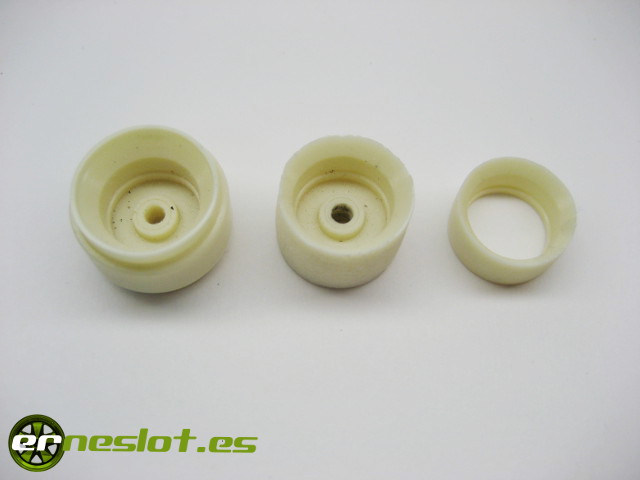
Anyway, I had saved a early Ninco aluminum wheels useless for competition, and I decided to use them for the car. The intention was to make some inserts from the resin wheels that Albeto made me and fit them inside the Ninco rims. So patiently sanded the resin wheel one by one until made an insert to fit into the aluminium rim. In the photo below on the left appears the starting wheel in the center the same wheel half worked and the right the insert completly finished.
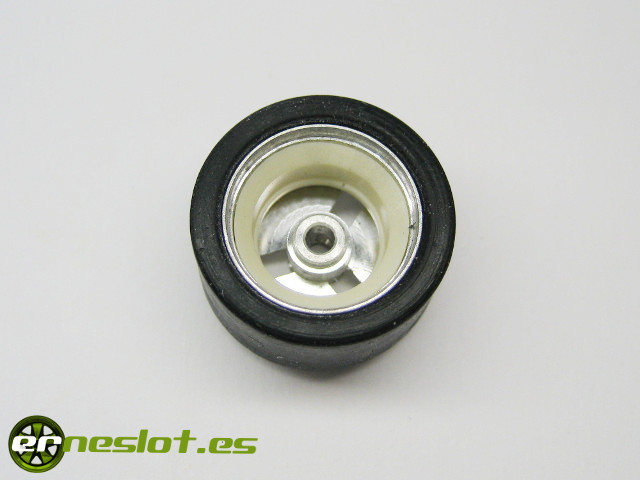
This is how the inserts looks placed into the rims.
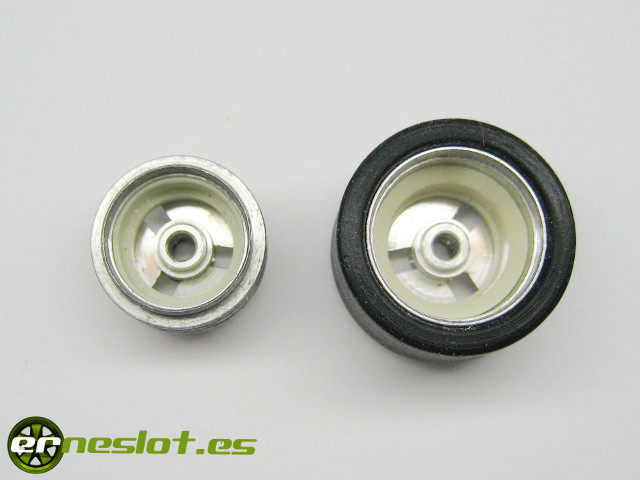
The front and the rear wheels of the car ar of diferent size, so did the same work in both cases.
To avoid repeating the same work twice, I made a silicone mold with new inserts to take all necessary copies.
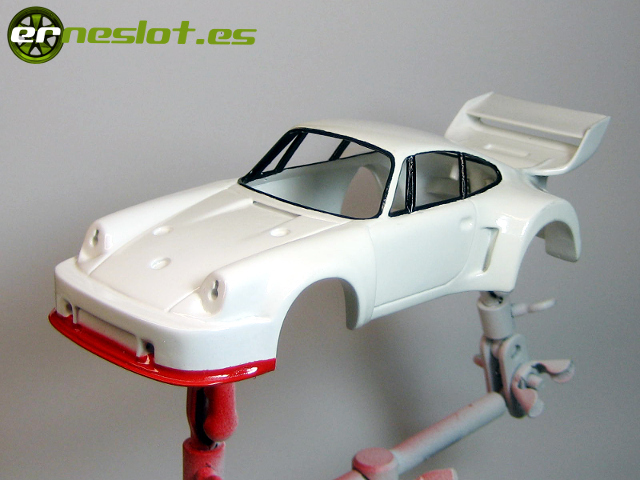
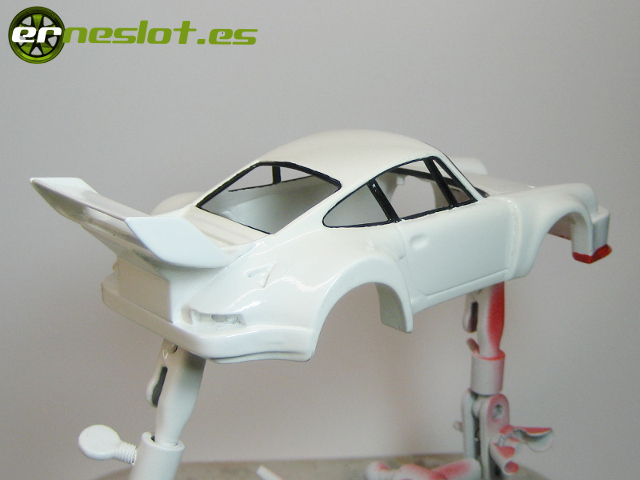
Once finished the bodywork with tree coats of white acrilyc spray paint, the details paint in black and red, only last to place de waterslide decals. The decal decoration process is the same I used, and I´m going to use for sucesive works, to decorate the "Targa Florio" 911 GT3 that you can see in this link. With the paint completely dry, applied a slim coat of automovite varnish over the bodyshell. Once dryed, we can manipulate the bodyshell witout worry of crash the paint, because is very hard and shiny.
The placement of the logos and the small size decals is very easy, but the big decals, such as the wheelarchs aren´t easy. First of all, I placed the easy decals, then went to the difficult ones. For the rear wheelarches, first placed a decal into the air intake.
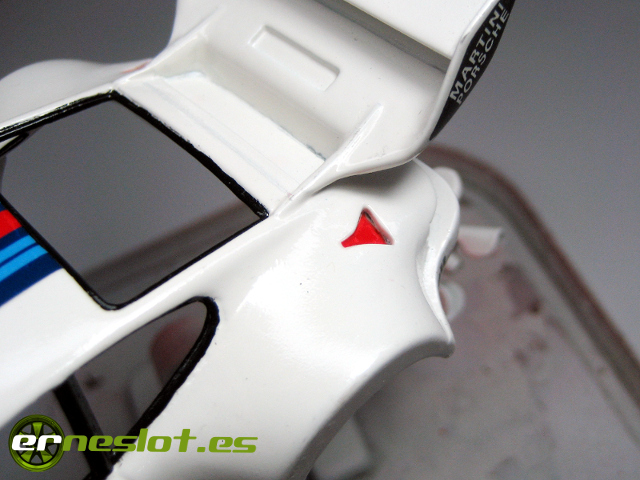
After letting dry completely, placed the rear wheelarch decal with much care, and let it dry too.
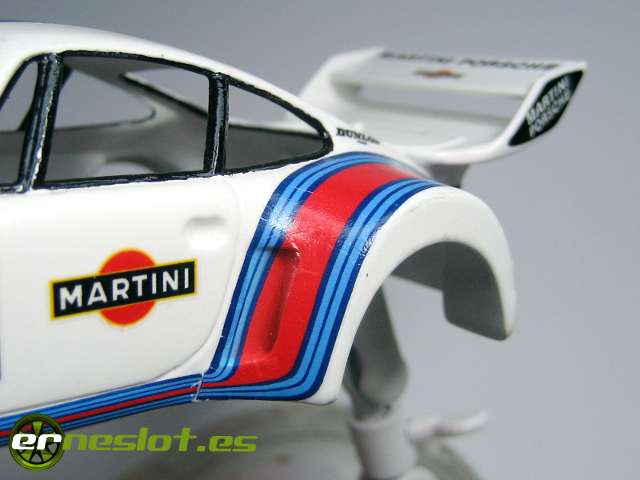
Cut carefuly the decal where the lateral air intake was.
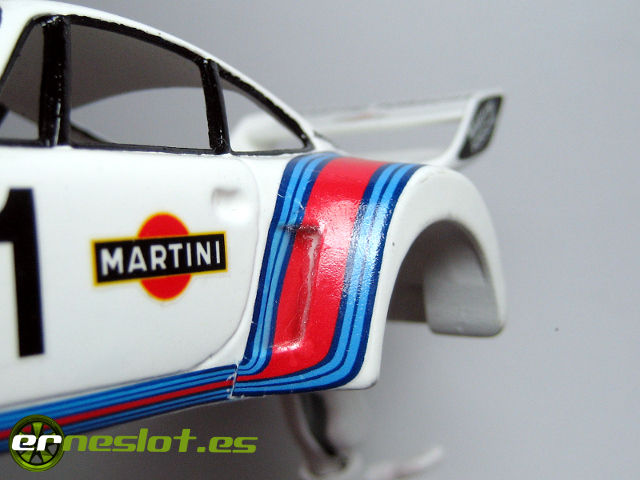
And pasted it with a little bit of Micro Set. Now, the decals adjust to the shape of the body much better.
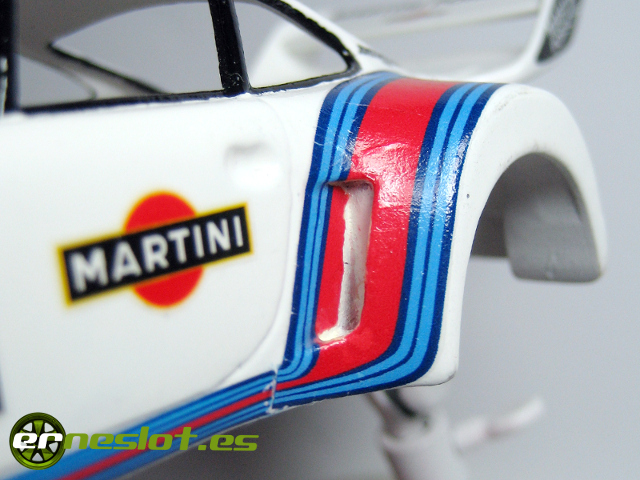
With the top air intake the process was the same, I made two cuts in the decal in the place where the intake was, and with the Micro Set soften the decal and let it well placed and attached to the surface. This was the result.
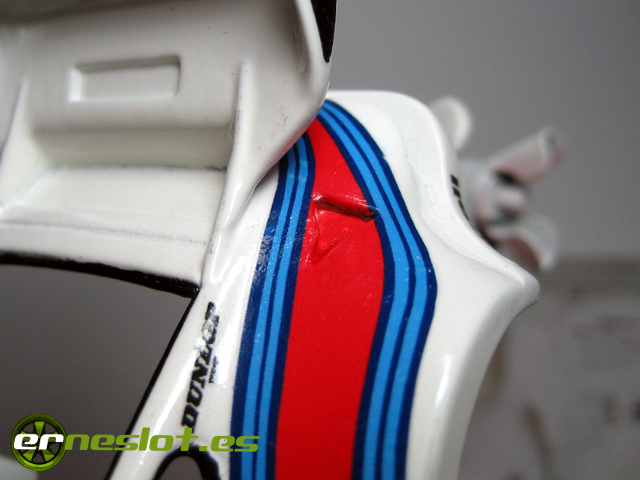
The decals who simulate the front wheelarch air vents looked like this:
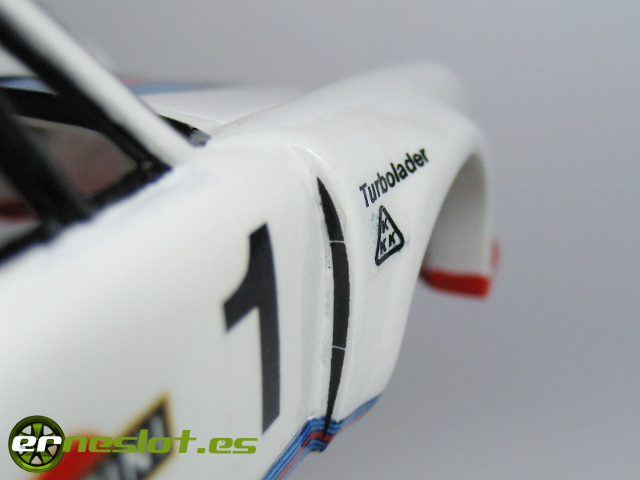
And again, I did the same process with the bonnet decal, once the decal well dry, cut the decar and applyed Micro Set.
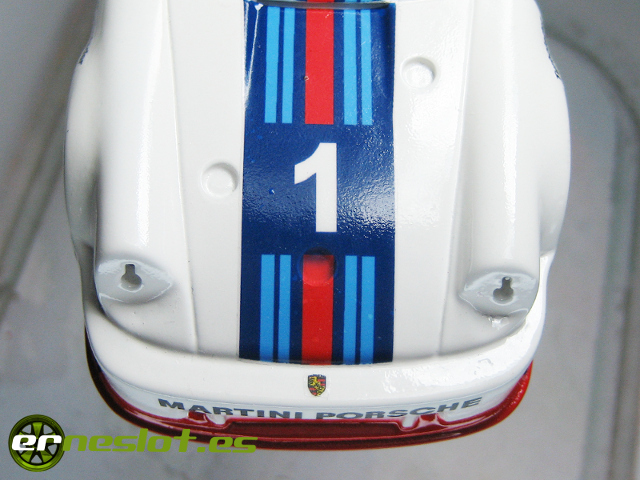
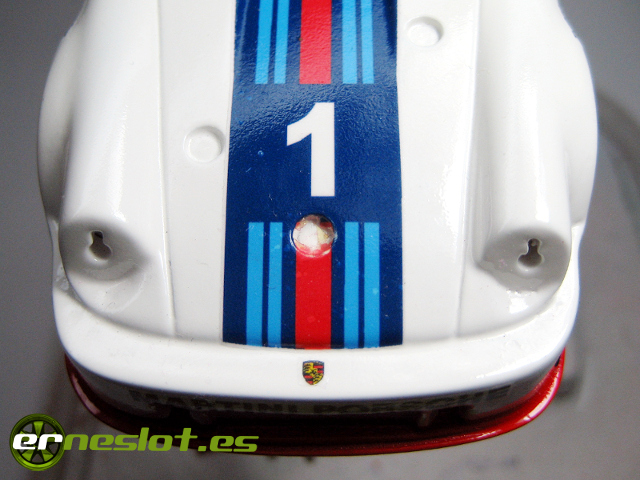
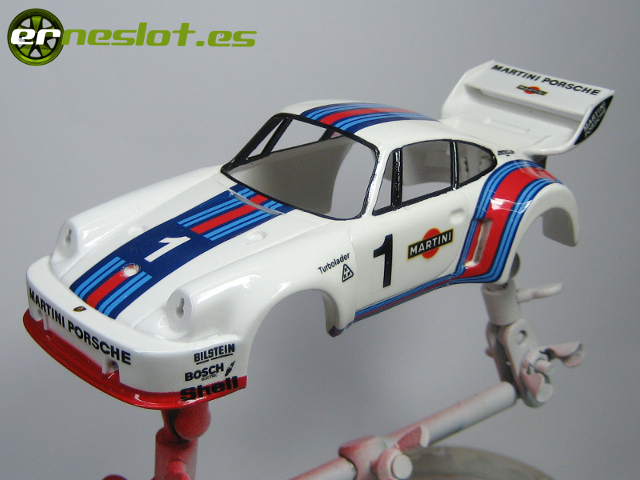
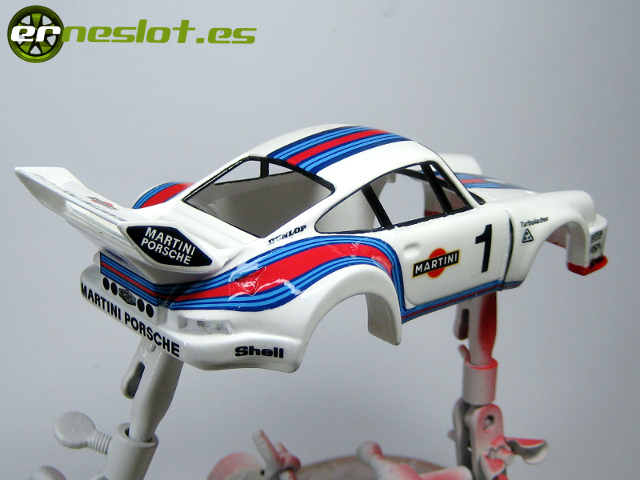
And this is the car with all the decals placed:
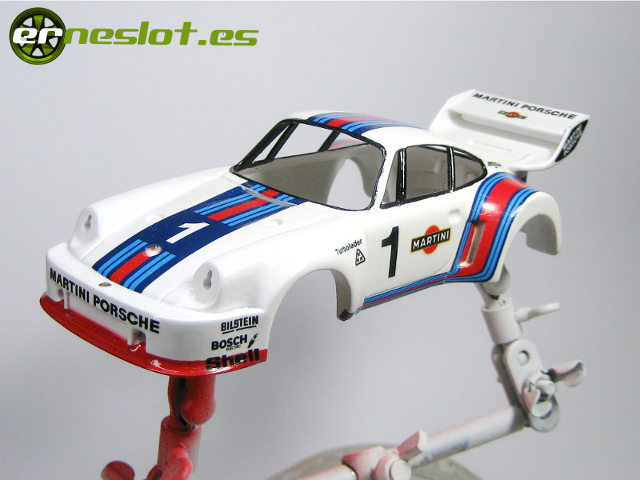
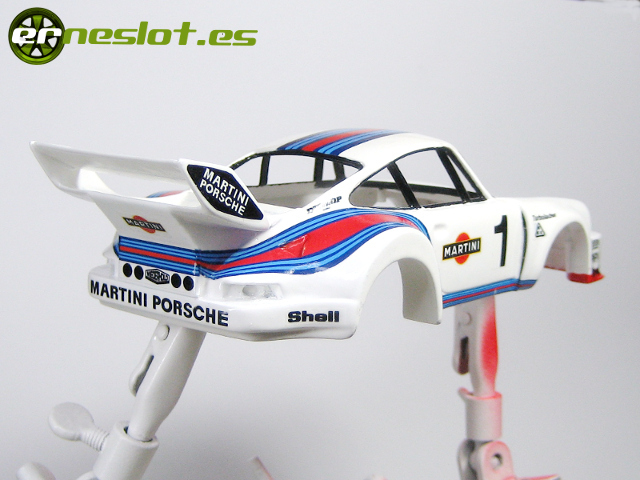
To attach permanently the decals and not spoil the decor while building the rest of the car, apply a final coat of automotive lacquer. This was the result:
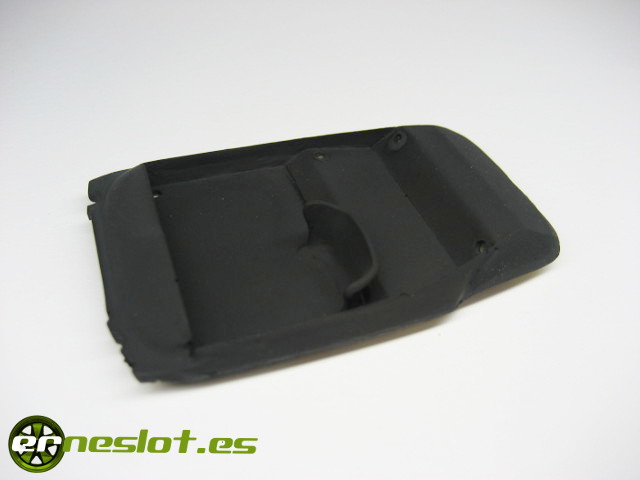
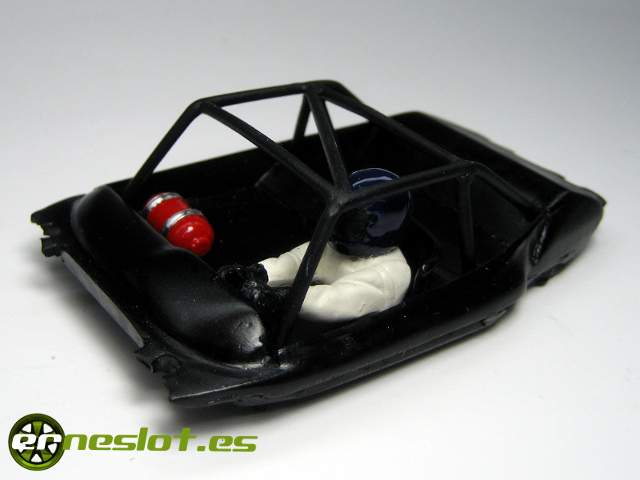
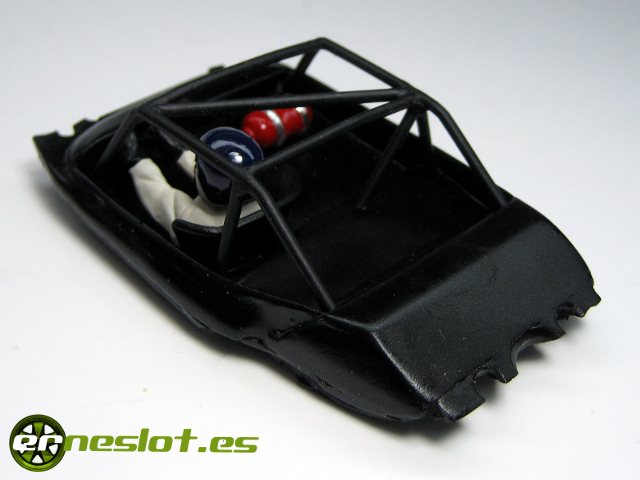
The time of drying of the automotive varnish is about three days, adn during thos days, I finish the interior of the scale model. First of all, painted the driver´s tray in matt black.
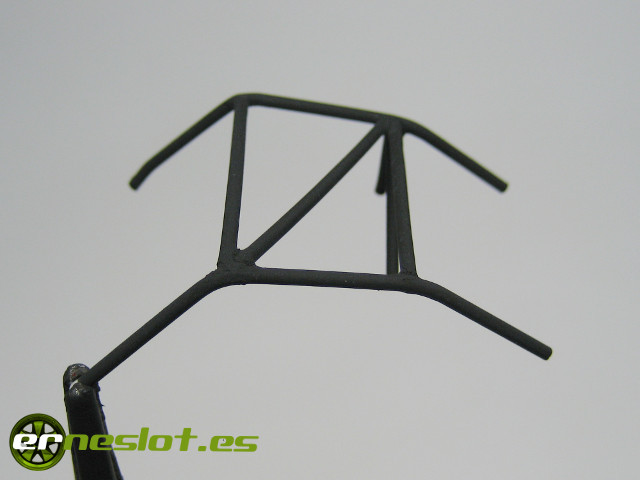
After, I build a antiroll cage with 1,6 milimeters diameter rod.
And at last, placed the rest of the pieces of the interior, the driver, the steering wheel, and a extinguisher to give a better look. I apply a coart o barnis wax "Bosque verde" to give it a satin finish a protect the paint.
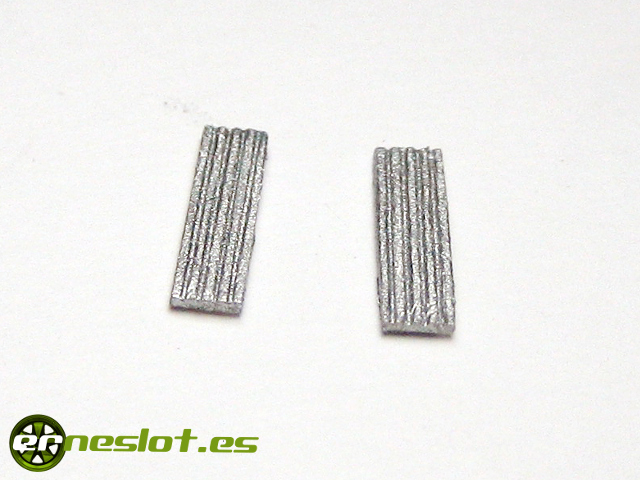
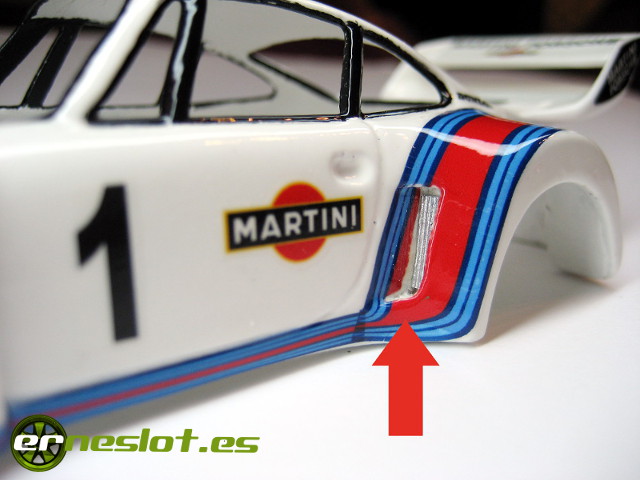
With the bodyshell completely dry, I placed the rest of the details of the body. One of them, the radiators of the lateral air intakes, made with a slotted plastic stripe painted with grey enamel to give it a more real look.
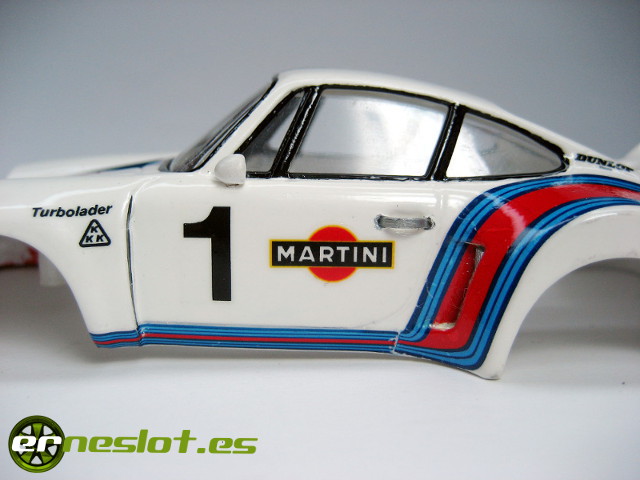
Then, place the mirrors and door handles made with cable clamps type 36/10. For fastening out better, drilled holes with a 1 millimeter drill, hole where introduced the staples, by cutting the excess inside the body. The result has been a very real door handles.
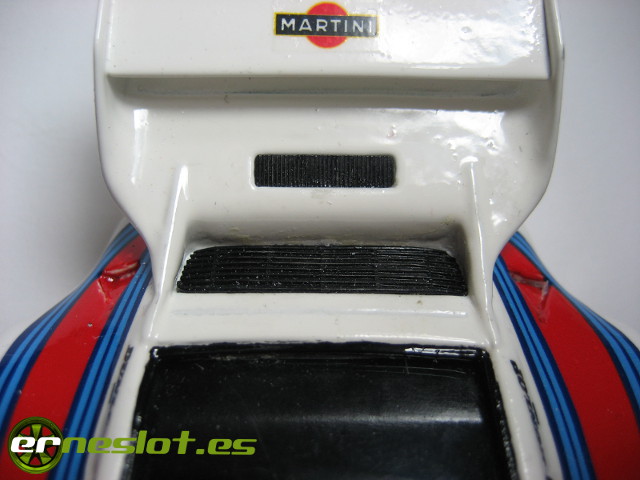
The rear grills were very simple to install, only had to painted black and glued carefully in place.
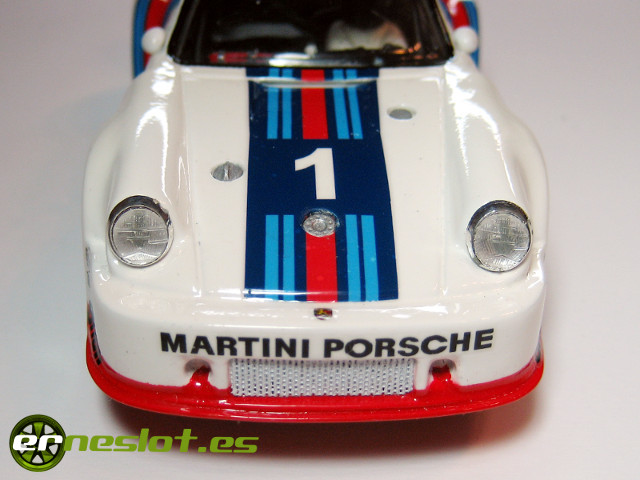
And finally, the caps of the front hood, painted with gray enamel, and the front grille, made with the shadow mask of a CRT TV that found in the trash can. I painted slightly with white enamel spray paint to give a more realistic look.
To paste the glass I used a transparent double-sided tape, very thin and resistant. I had not thought of before and is much easier than stick it with glue and is very resistant. For such crystals, which are attached to the ceiling, it seems an ideal solution. Then, I painted with white enamel a line in the windshield in the place where would be the "Martini Racing" decal, because the decal is printed on transparent paper and would not look good if placed directly on the glass.
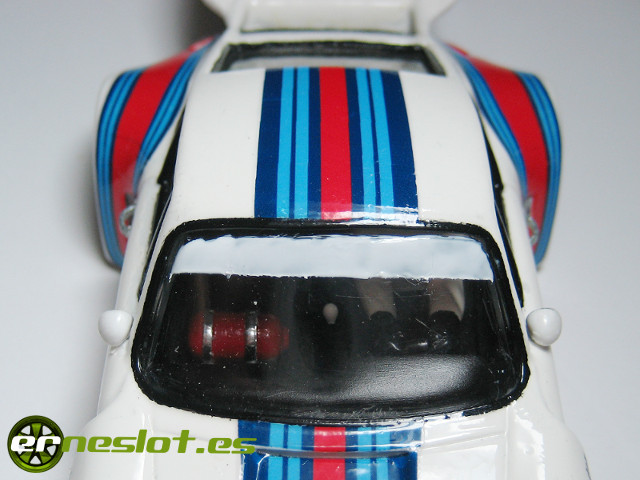
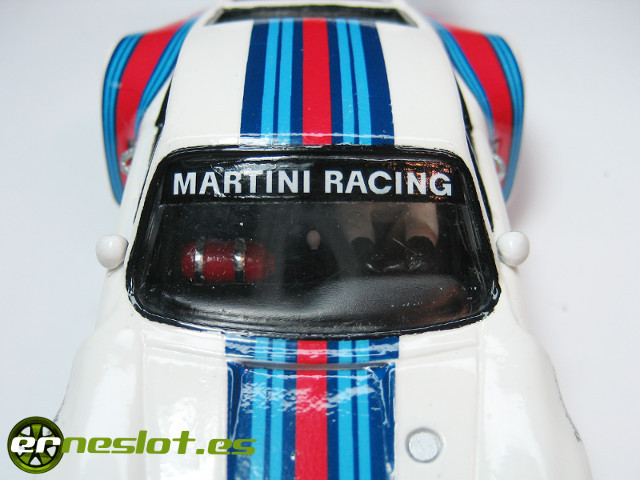
As you can see, with this procedure, the result is very satisfactory.
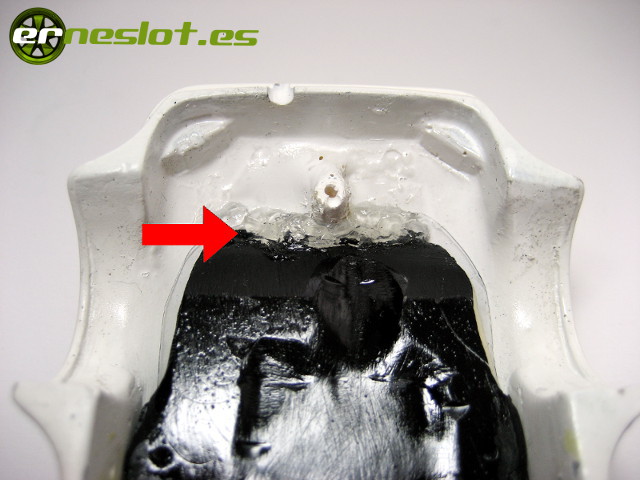
Finally, paste inside the body with very interesting glue, Ceys Tri´action (like Pattex Repair Extreme), which is a thick, transparent adhesive who can be used in multitude of surfaces and materials. When is dry looks as a clear gum and achieves a very strong bond, but it is easy remove if necessary.
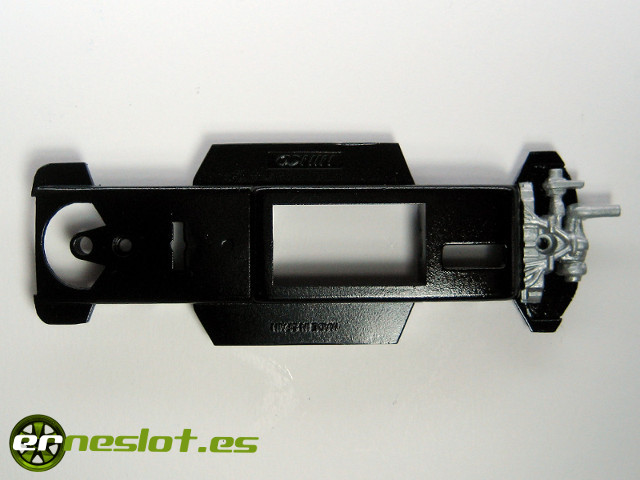
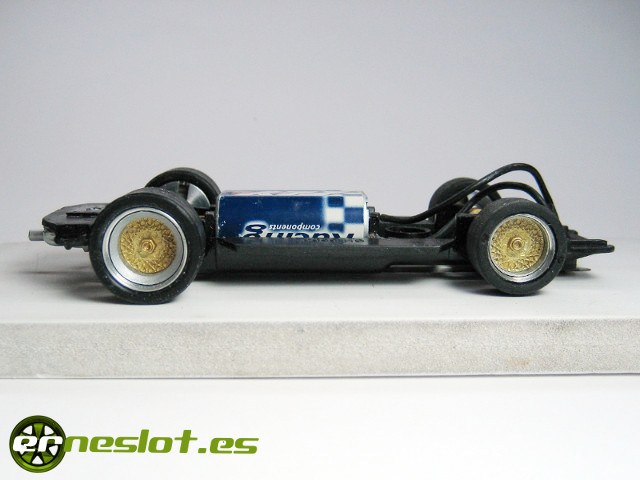
At last, the olny thing missing was to mount the mecanical components on the chassis, a Porsche 911 Ninco one, but first pasted the simulated engine, manufactured in polyurethane resin, which had previously painted with gray enamel.
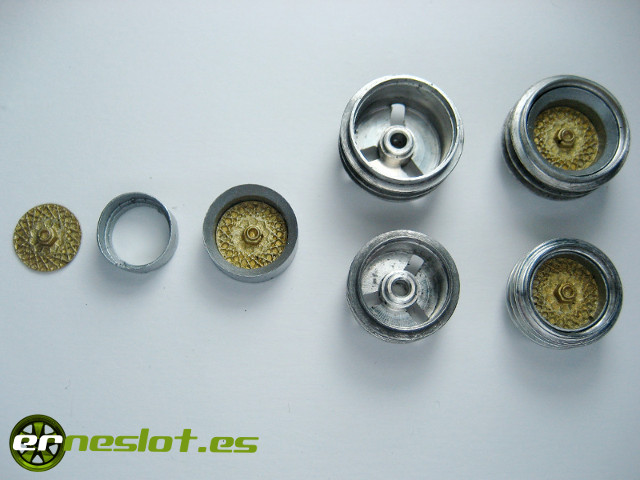
The rims are a Ninco aluminium ones, 18 mm. at the rear and 15 mm. at the front, simulating the different sizes of the tires of the original car. The inserts I made for tires where painted with gray enamel, to the ring, and gold, to the center of the rim. After I pasted inside the aluminium rims with cyanoacrylate.
Like the wheels, axles and crowns were also calibrated from competition equipment no longer used, like the engine, which is a Fly Racing long box type. The chassis mounted with all components looked as follows:
And this is the car fully assembled:
To be honest, I am delighted with this car, and despite all the time spent on its construction, I have thoroughly enjoyed doing it, that is what this hobby is all about.
| Chasis | Porsche 911 Ninco, adapted |
| Wheelbase | 73 mm. |
| Dimensions (L x W x H) | 145 x 64 x 40 mm. |
| Weight | 113 gr. |
| Engine | Fly Racing long box |
| Front tires | Scaleauto |
| Rear tires | Slot.it 20 x 15 mm. |
Fortnightly updates, new cars and more in www.erneslot.es


