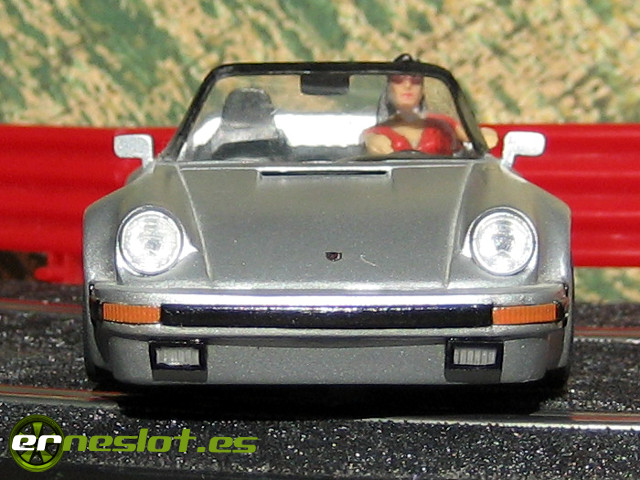
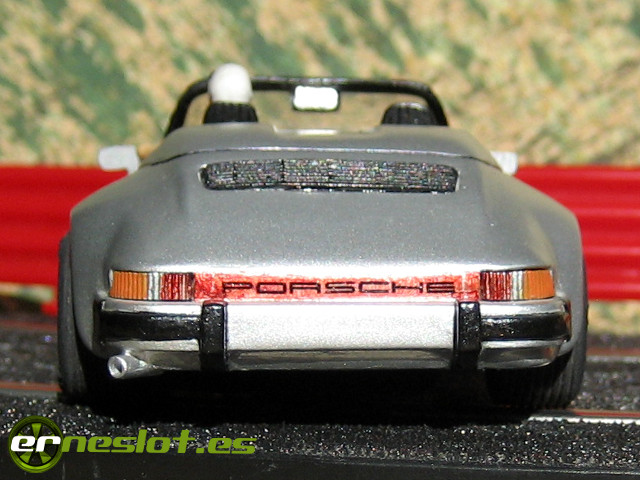
Porsche 911 Speedster
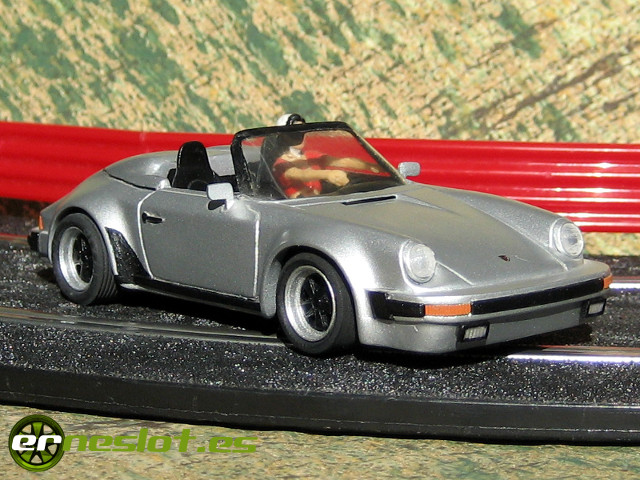
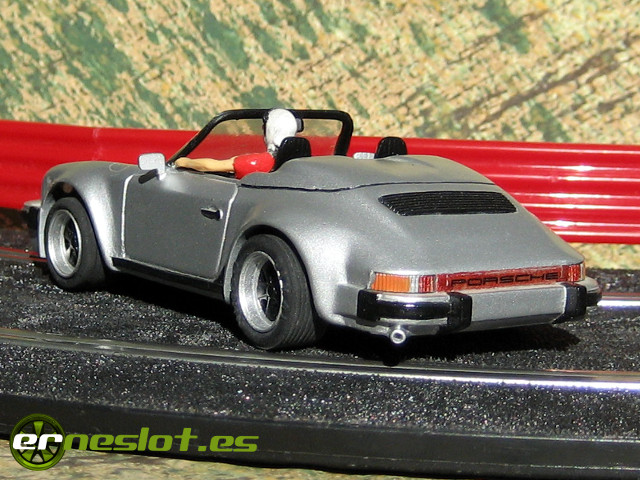
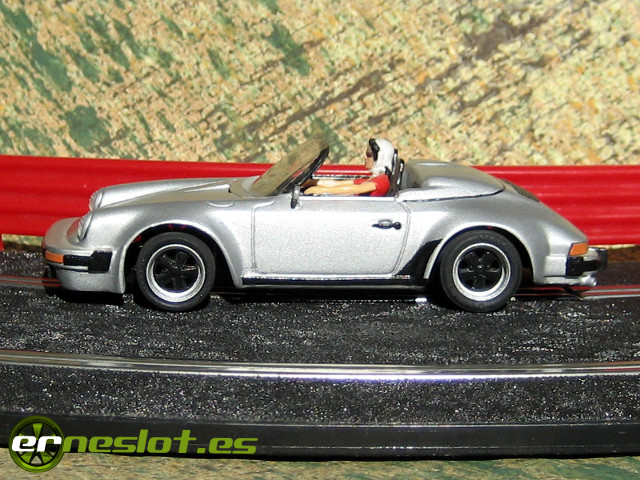
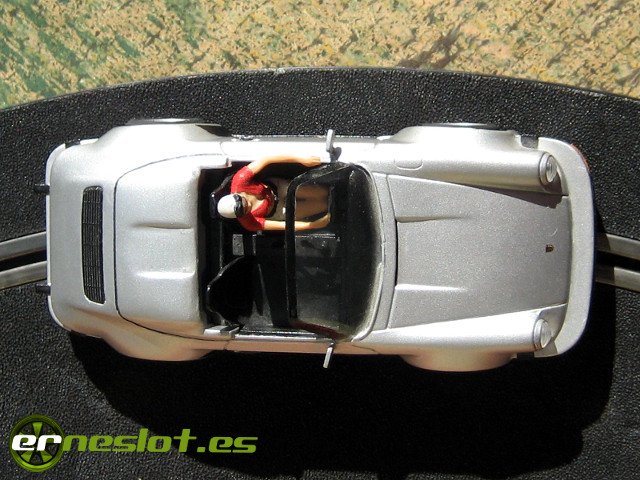
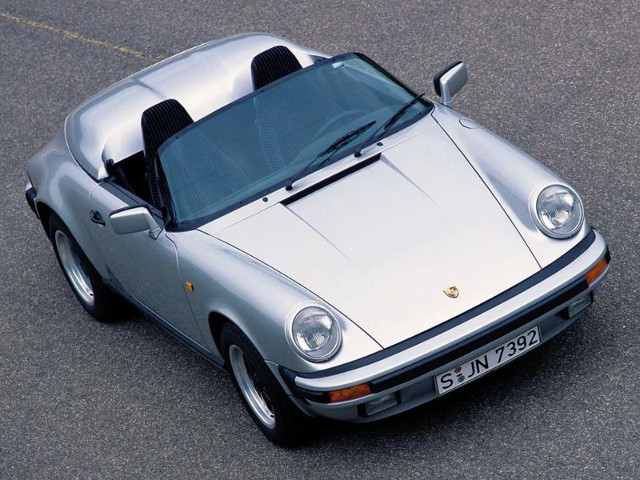
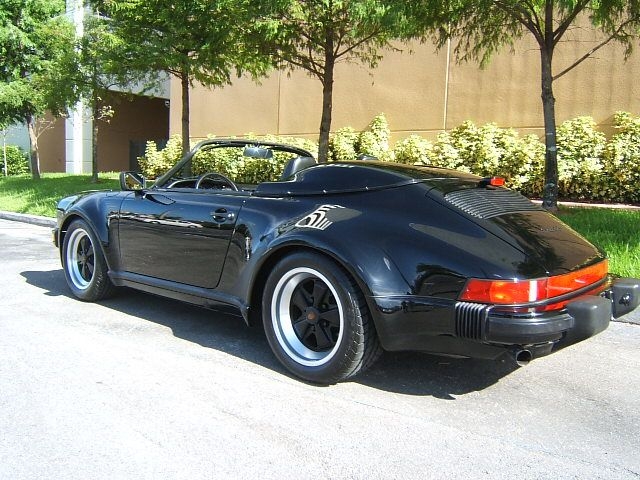
The Porsche 911 Speedster appeared in 1989 at the end of the life of the second series of 911. It differed from cabrio model fundamentally on the more inclined front windshield, and in the fiber cover-hood, feauting two humps instead of canvas cloth that covered the roof in the cabriolet model. The rest of the car was like the other 911, except the front spoiler, which had slight variations in the models targeted the U.S. market. Here you can see a couple of photos of this car.
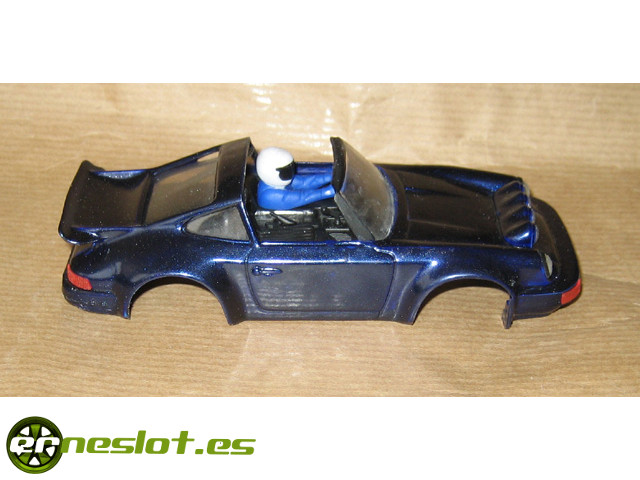
To do the reproduction of the model at 1/32 the scale I start from of a 911 SC Altaya body that its former owner had tunned to a targa model in a very simple way as you can see in the next picture. At first time my intention was to do the targa version of the model looking closely at the body of which I´m going to start from, and especially because it was missing the small front window the targa version fitted I decided to do the Speedster version, prettier and with more personality than the model 911 cabriolet. This is the body of departure:
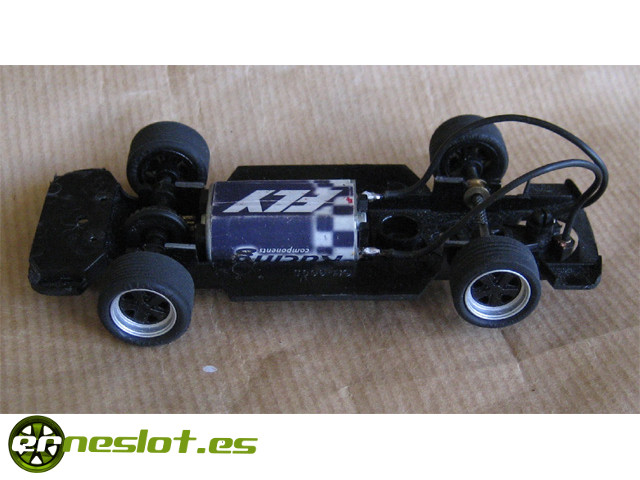
The start as usual, was to dismantle and unpaint the body inmersing it in alcohol. It was a little dificult to take the paint out, I guess because his former owner had painted it with spray applied enamel, so I had to help me with sandpaper to left the body as clean as possible. Once cleaned, the first thing I did was to adapt a Ninco 911 chassis, which is rather easy because the wheelbase is the same and only had to adjust the front and rear of the chassis and paste into the body two evergreen rod lugs attached with bicomponent glue by matching the chassis bolt holes.
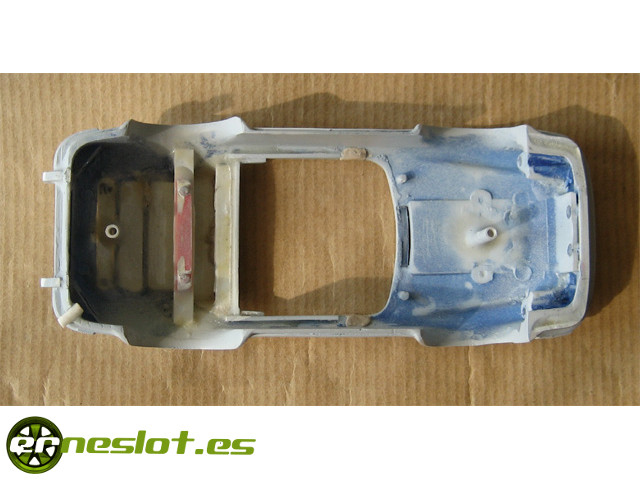
In the next photo you can see how the body was once unpainted.
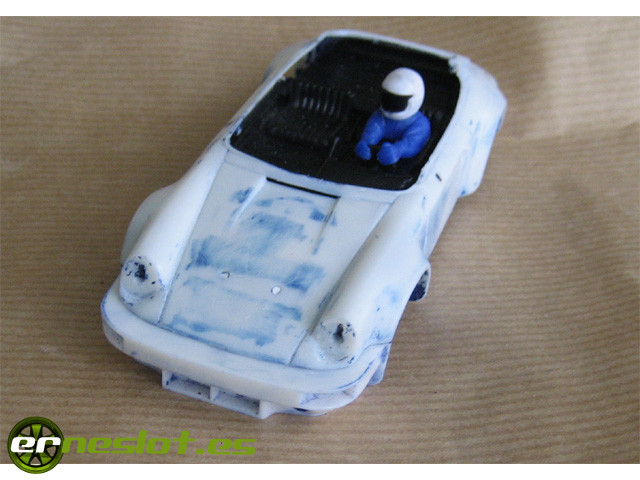
Also took the opportunity to cut what remained of the roof and rear spoiler, because the model did not have it.
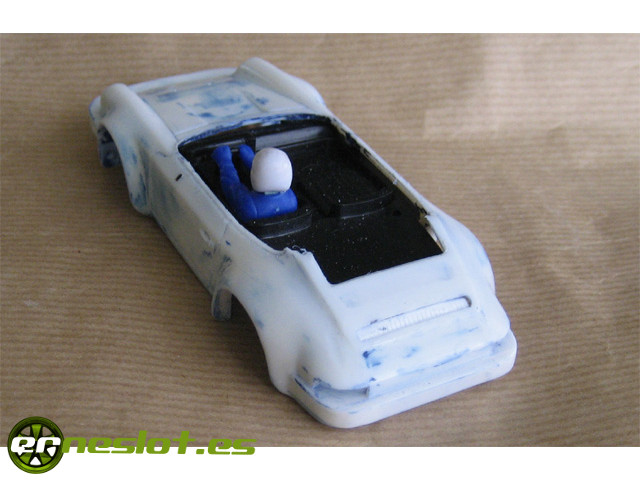
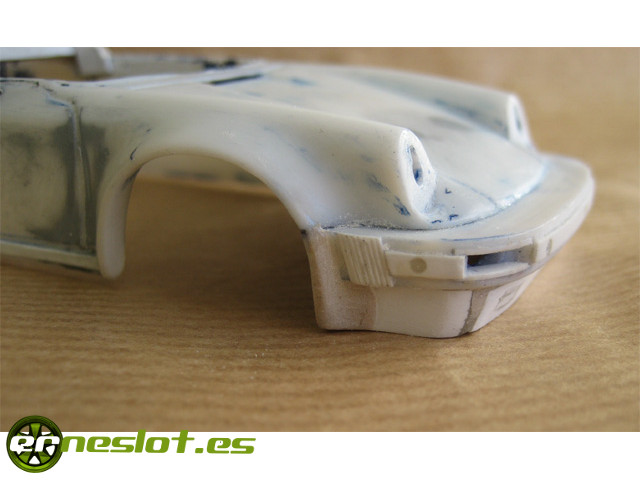
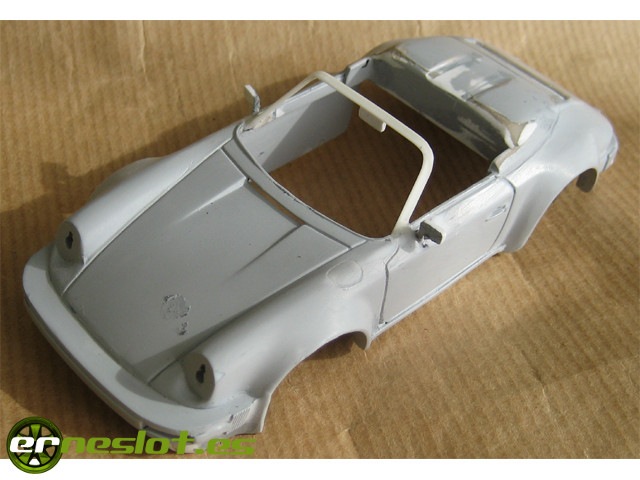
The first changes in the body affected to the part of the cover-hood humps and front spoiler, which are actually the two parts that further modifications must to be made, so based on pieces of evergreen plastic, putty and bicomponent glue I was giving them a most appropriate shape:
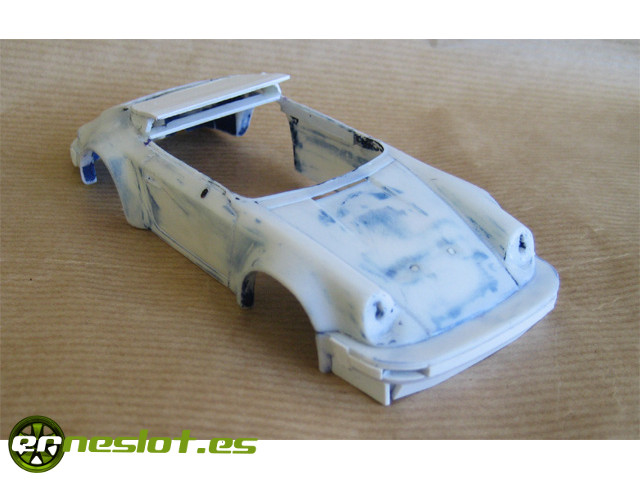
To simulate the rubber protection for front and rear bumpers and the characteristic bellows of the model I used evergreen pieces of 0.5 mm thick and glued with bicomponent glue to ensure the strength of the joints:
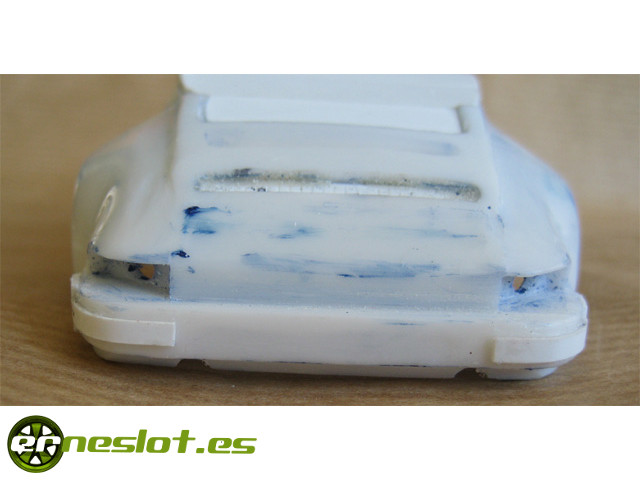
The bellows are made from the same plastic strips with the lines marked with a small triangular file. Below you can see the result:
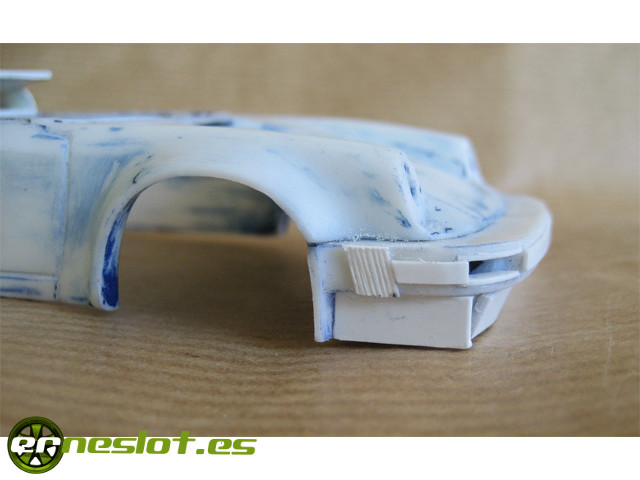
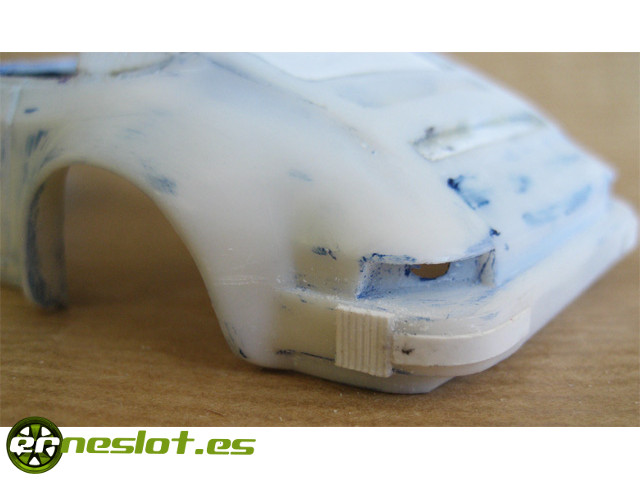
Over the plastic stuck to give the shape to the hump applied a bit of wood restorative putty because it is easy to handle and also after drying weighs very little, so we avoid putting too much weight in the upper parts of the car which then penalize their dynamic behavior, though of course the car is not going to be on slot track to beat records...
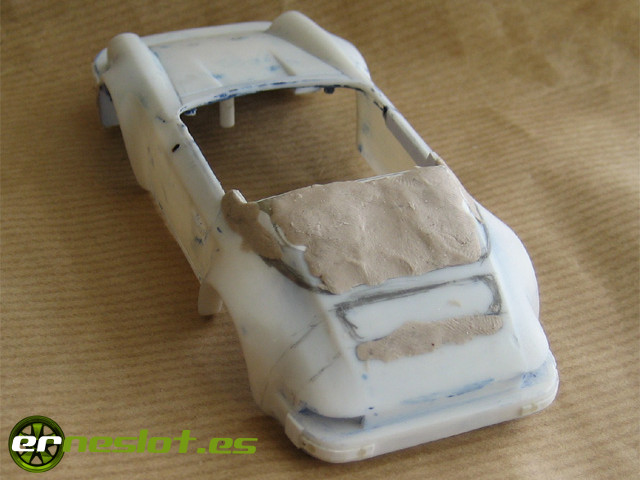
Following the molding of the body, I took the opportunity to reshape the front door, which the front part of the real car doors low-down straighter than in the Altaya reproduction. Covering the front part door grooves with putty and making them again the car improved a lot. Here you can appreciate the change near the front wheel arch.
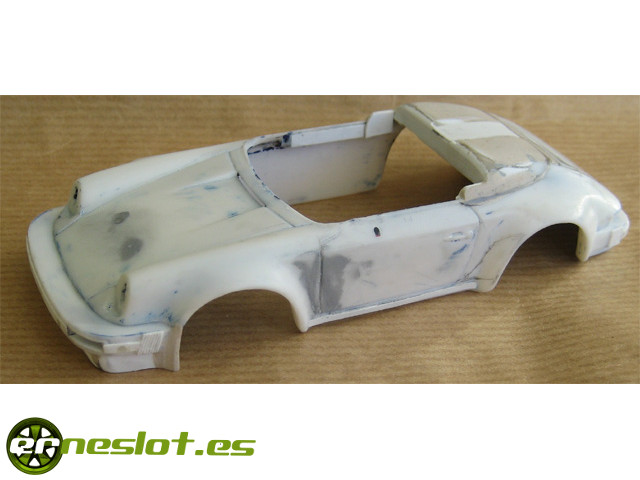
Can also be distinguished the trim under the door, made of a thin evergreen strip that runs from the front to the rear wheel archs. One more picture to appreciate better the cover-hood:
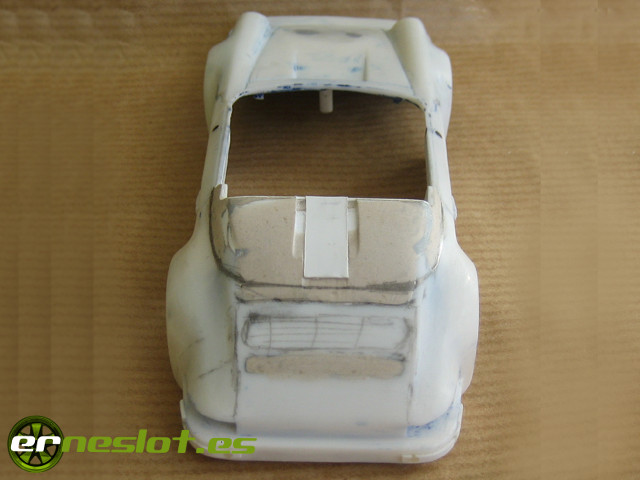
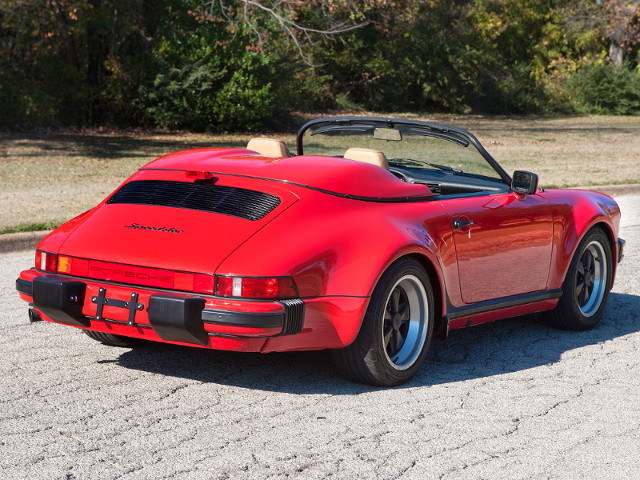
And to finish the work on the rear bumper I had just put the characteristic rubber feets of the model. For the latter there were two versions, for the European models and for the U.S. market targeted models, which was much more wide and left a very small space between them for the plate. In the photo below, taken from internet, you can see in one of the models for the American market:
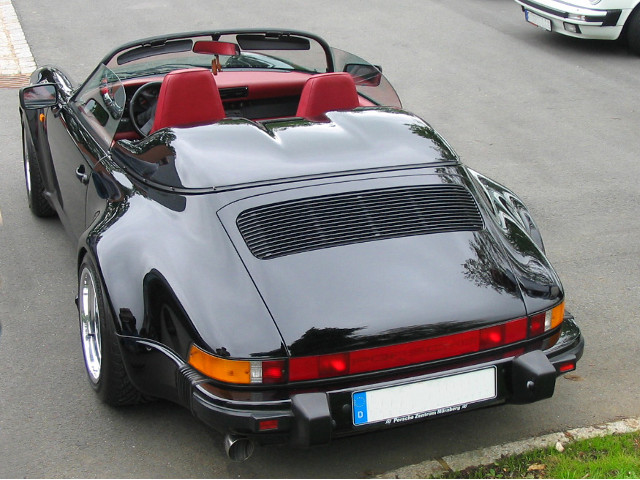
And this is an image of a car for the European market
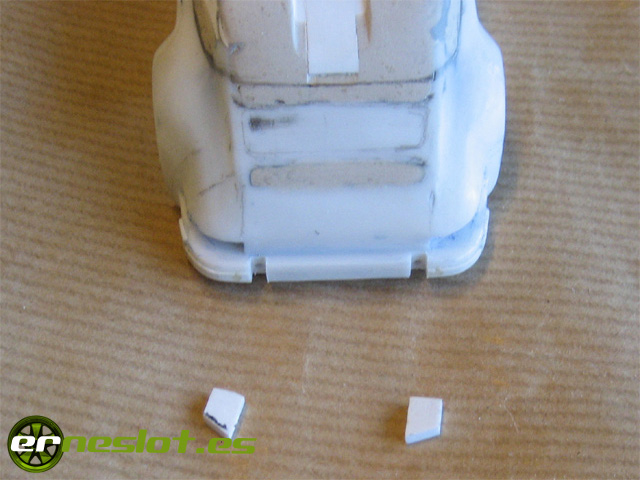
Personally, I don´t like the first version so I made narrower heels, using, of course, a piece of evergreen strip, stucked in a pre-made notches in the bumper of the model:
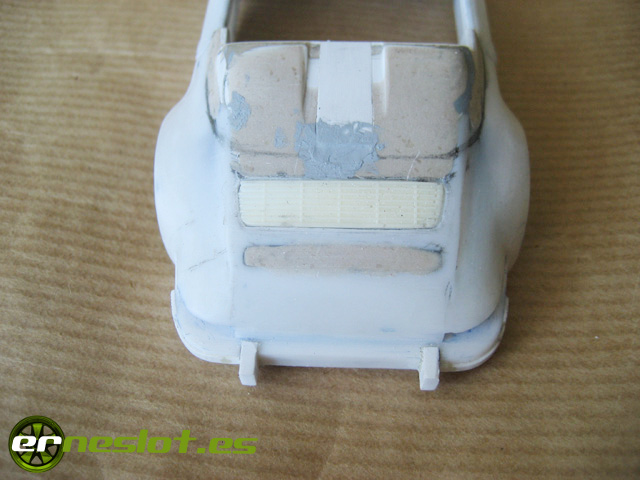
I also took to make the hole where is installed the vent of the engine, which is made of resin and that I have to thank Dario from Unotreintaidos, gives much life to the rear of the car:
Finally, I modified the form of front intermittent lights to make them more narrow and somewhat smaller, as are the original car ones, and the bumper in the area of the wheel arches.
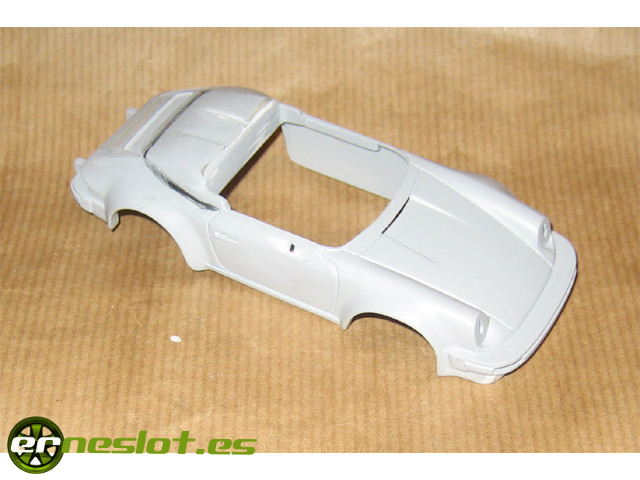
Once finished all part of molding gave him a coat of primer to remove bugs and polish some details with putty, sandpaper and more waterproof sandpaper.
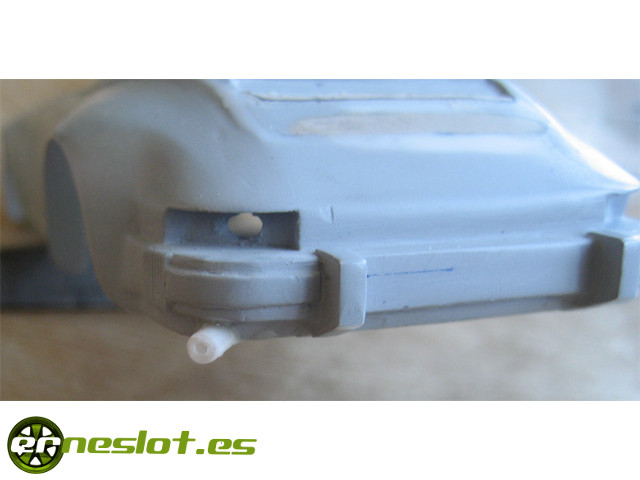
Checking the bodywork I noticed it lacked an exhaust pipe, so I did a notch with a file in the corresponding part of the bodywork and glued a piece of plastic pipe:
... and I also took to make the details such as the steering wheel or mirrors,....
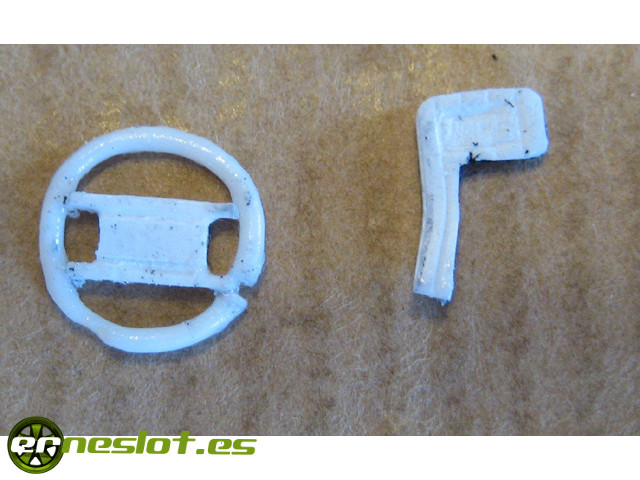
...to place the bow that holds the windshield and mirrors, and to make the petrol cap cover. The arc of the windshield is made from a half-round shaped evergreen rod applying heat with a soldering iron I have for these functions. I approached with care and when the area was unlocked gave it shape, once cold is very consistent, much better than if you simply bend the bar without applying heat, which in most cases weakened and broke... To paste it, and to paste the rearview mirror, I used bicomponent glue.
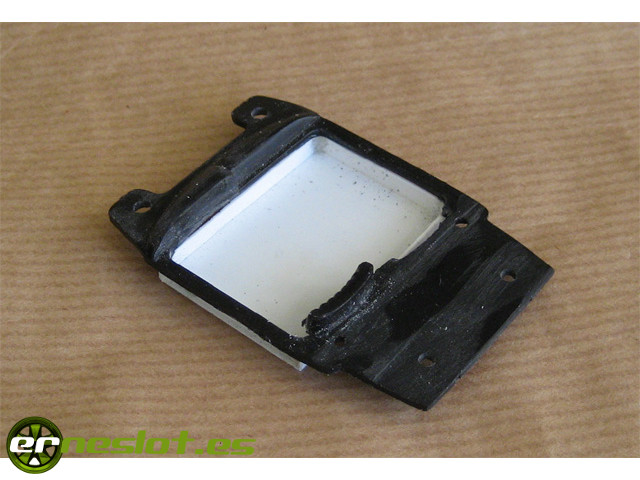
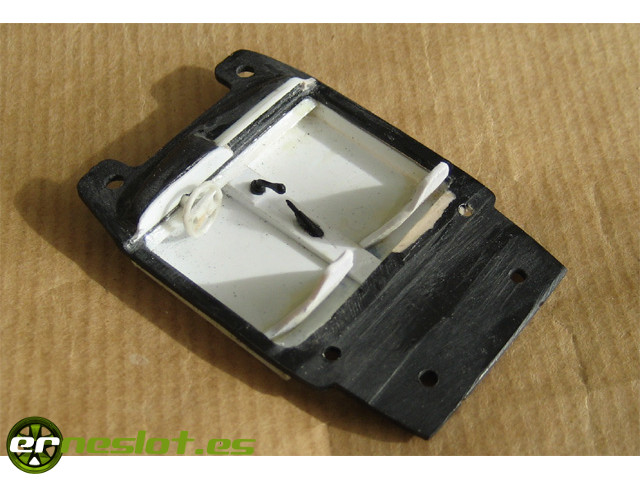
Once finished the bodywork (except for a second coat of primer and polish some faults) I got involved with the interior of the model. The intention was to give a little more life to the model flat drivers tray. Previously, I shortened the tray and prepared in the chassis some new supports for the tray because earlier ones had disappeared when made the hole for the back grill .. Then I gave him a little more depth by making a box with strips of evergreen and the result was this:
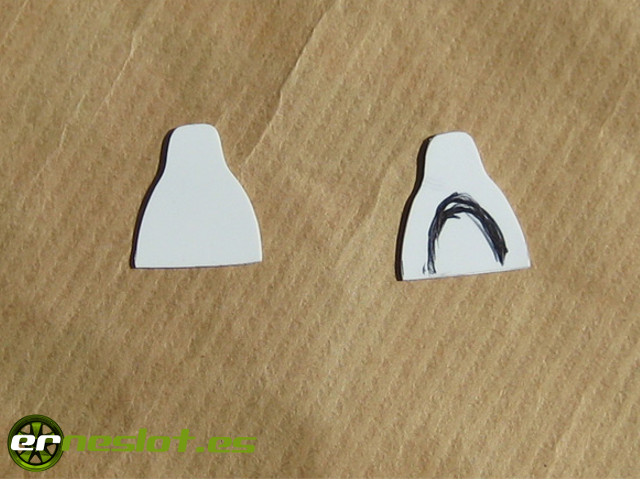
After a few attempts and several drawings I did a seats on card with a shape as close as possible to the original seats:
That after giving them some shape and glued on the tray along with some details of the dashboard the result was as follows:
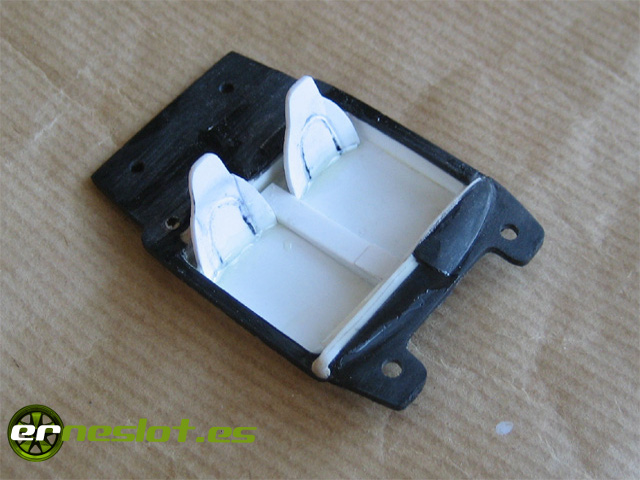
As I said above, I took a little detailing the dashboard and the passenger compartment of a somewhat "sui generis" way because it is not exactly like the real model, so if it is far better than the flat Altaya model tray. Another more photos:
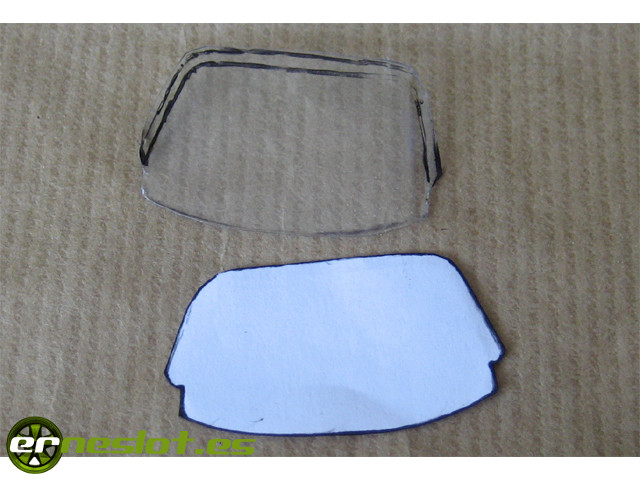
The windscreen was supposed to be the original that came with the bodyshell, but unfortunately was cut in half because it was very weak, so I decided to do from th plastic of a magazine blister. First I copied on paper to give it the right shape, then cut out from the blister plastic and I gave it some shape with the heat from a hair dryer:
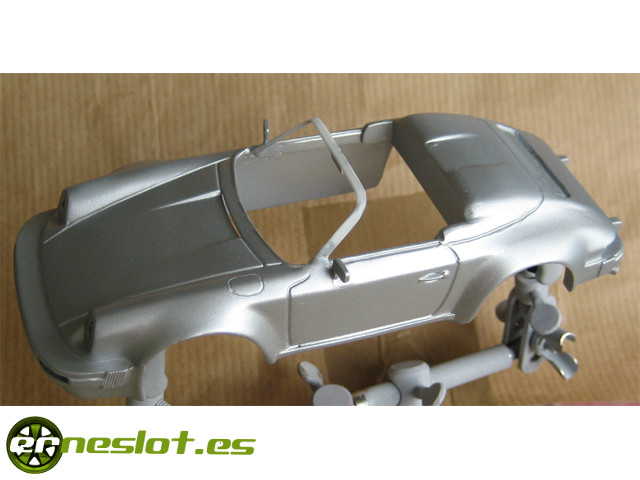
I cut the remaining once it´s glued to the frame for good measure. As the body work was done I proceeded to paint the car with metallic gray acrylic paint from Tamiya, which although is a bit light for my taste but suits fine to the car. The color applies fine with the airbrush and covers phenomenally well. Here´s a photo with the first coat of paint.
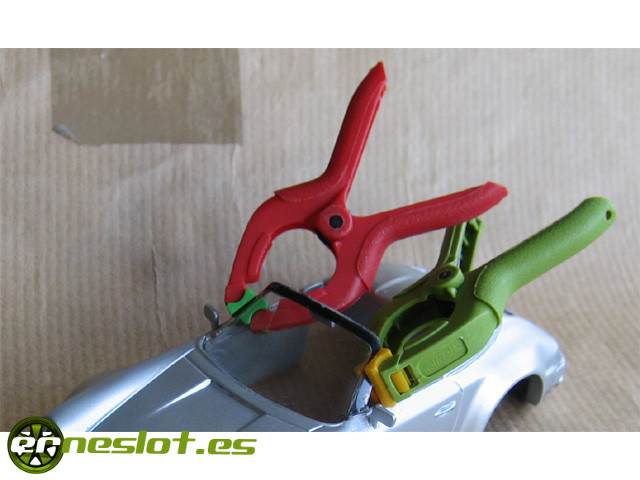
To paste the windshield to the frame I used bicomponent glue for several reasons:
- The union is much more harder than using cyanoacrylate.
- Being a denser glue fill better the gap between the windscreen and its holder frame, because the adjustment was far from perfect (apply heat with a dryer is not sure science ....)
- In order to avoid the fumes of cyanoacrylate ensure the glass and lose the transparency, although it was not much (I could have used a good sheet of acetate) at least the result was more than acceptable.
The paste process was quite laborious and long:
- Sand the windscreen frame with sandpaper for grabbing paint well
- I painted the windscreen frame of black enamel to the glass paste would not be white on the inside. I let it dry a couple of days
- I glued the bottom forcing it with a piece of cardboard wedged in the cockpit for him to take a little rounded shape of the body. While the top was drying I held it with pliers. This stay another day
- Paste the top with the bicomponent glue again and held it with pliers. Another day
- I pressed the sides, more pliers and another of drying.
The result is that the windscreen frame is black and the windscreen is also heavily subject and without any glaze... Just what I wanted.
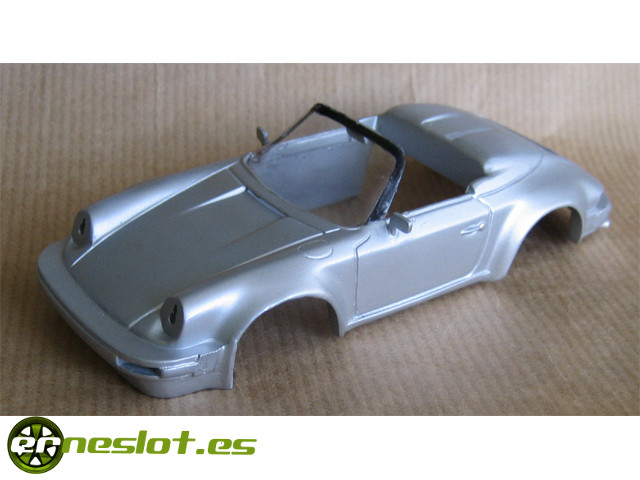
After placing it I gave the second and final coat of paint:
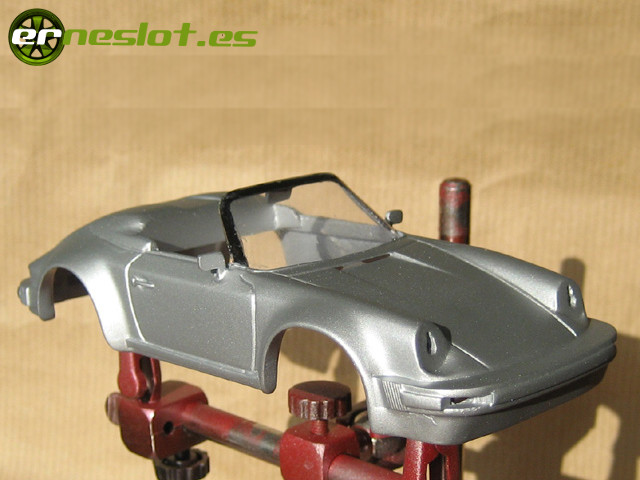
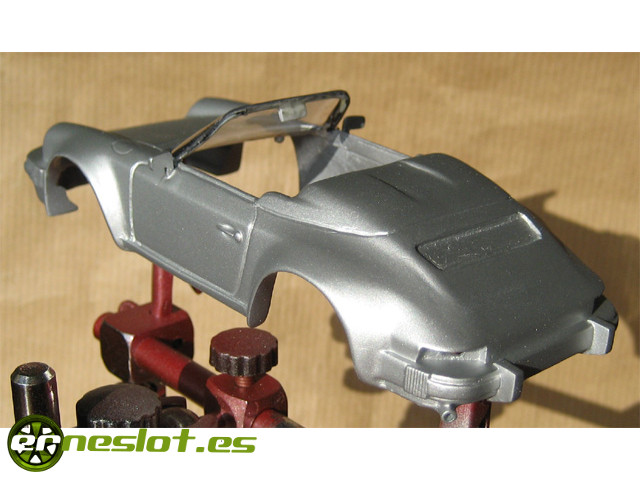
While detailing the model would take the opportunity to paint the fog focus, which had previously cut from a CD case.

I painted its back with Vallejo metalic gray, which suits fine for lights, and after matt black. Once dry I cover them with a drop of cyanoacrylate to protect the paint as I was going to hit them directly to the body
Details of bumpers and trim are painted with matt black Tamiya acrylic, masked with 3M "magic tape", and ensuring that the painting was not too fluid to prevent slinks beneath the tape, although some points was inevitable and had to fix it by scratching with a toothpick and a cotton stick swab moistened with water. Overall I am very satisfied with the work:
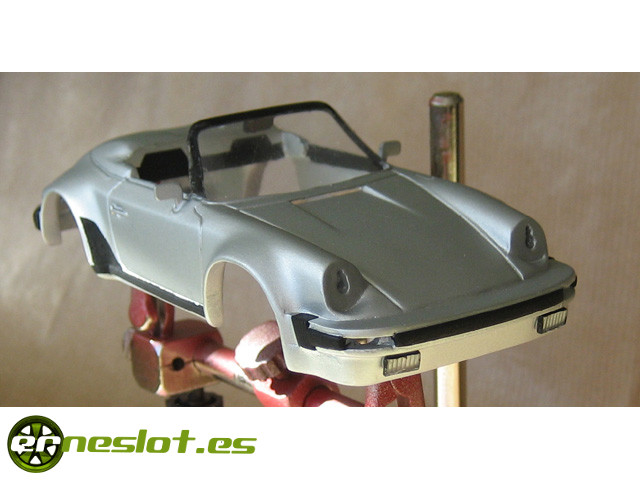
Also the interior of th bodyshell is painted with matt black to match good with the drivers tray. The fog lamps are glued with bicomponent glue to the body.
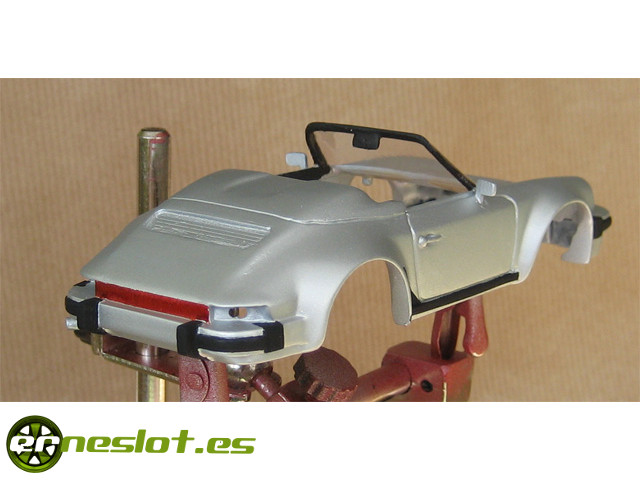
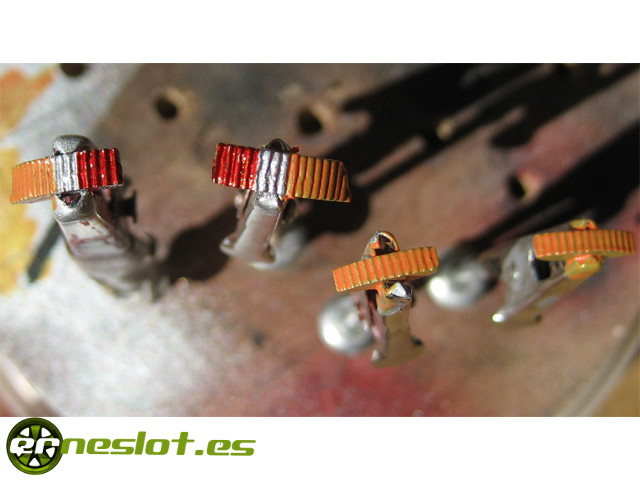
The back light is painted with indelible Eding marker, which gives a metallic look pretty good, especially if there is painted in a single pass .. The tests I did on flat places gave a phenomenal result, but in the back of the model was more complicated and the result wasn´t all good I would have liked. Finally, I detailed the taillights, first painted with metalic gray enamel and then, over the grey, red with indelible marker and transparent Vallejo orange, the result was acceptable, although with a permanent marker orange would have been much better...
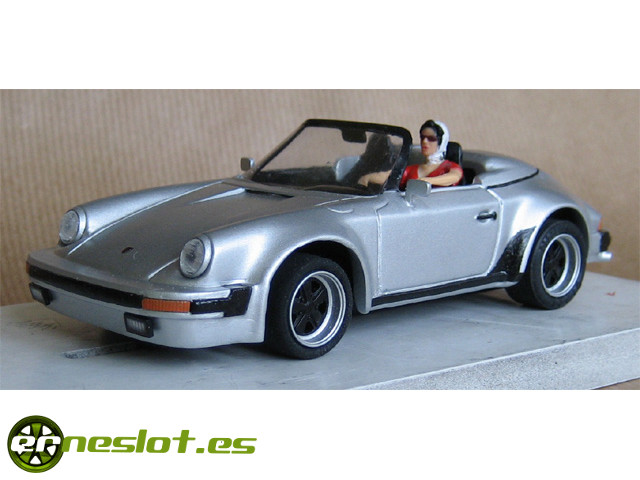
And once varnished the headlights and the vent motor was just to assemble the car and put their driver at the steering wheel, a Fly Car Model figure, such as those that came with the Corvette convertibles, but painted to my taste, because it supposed to be a fully painted figure but when I got in my house I saw that painting was far from perfect. Anyway, with host on board the car was like this:
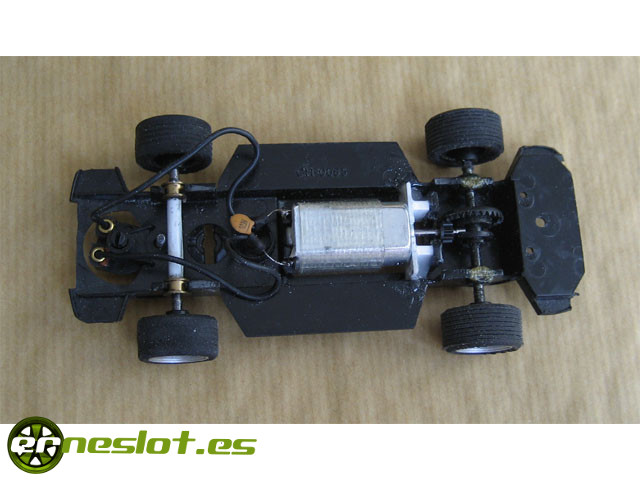
But I did not like the result at all. I left the body a little high because the engine (a long box Fly Racing one) touched with the drivers tray and leave much gap between the wheels and bodywork. To get down the body a little I had to change the engine by a slimmer one, and found the ideal engine, the QX Mabuchi used by Superslot in his formula 1 cars, of similar length than the Fly Racing but much narrower. Besides the changes only affected the chassis, so I set to work. only had to adapt the chassis to place the new engine with some strips of evergreen:
and the car improved greatly by going more low:
In the absence of some decals and the front and rear plate I give the work as complete. Meanwhile our driver can enjoy her 911 Speedster whenever she wants.
| Chassis | Porsche 911 Ninco, adapted |
| Wheelbase | 73 mm. |
| Dimensions (L x W x H) | 131 x 63 x 33 mm. |
| Weigh | 69 gr. |
| Engine | Mabuchi QX (Superslot) |
| Front tires | Scalextric |
| Rear tires | Ninco 19 mm. |
Fortnightly updates, new cars and more in www.erneslot.es


