When the results are not as expected
Not always the works go as we expect despite the expectations that we have created. Below I present two very simple works that for different reasons have not met the expectations I had when I started them.
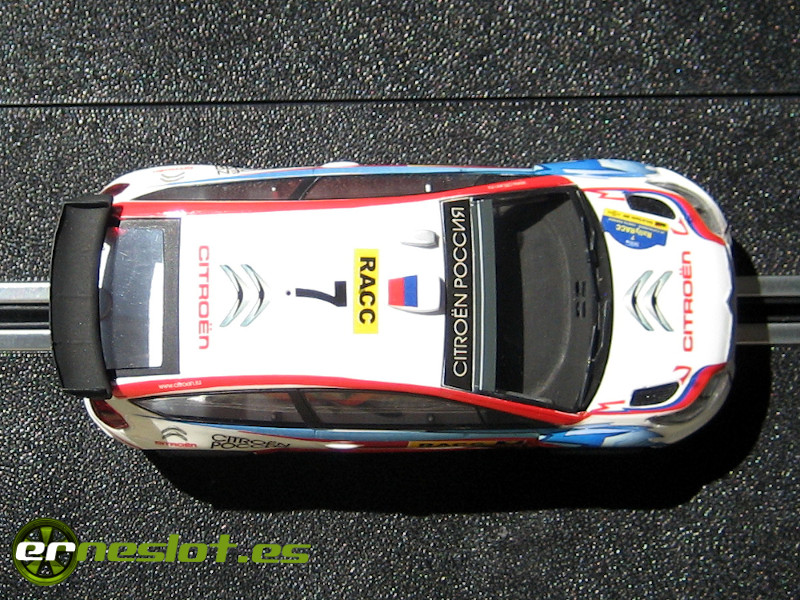
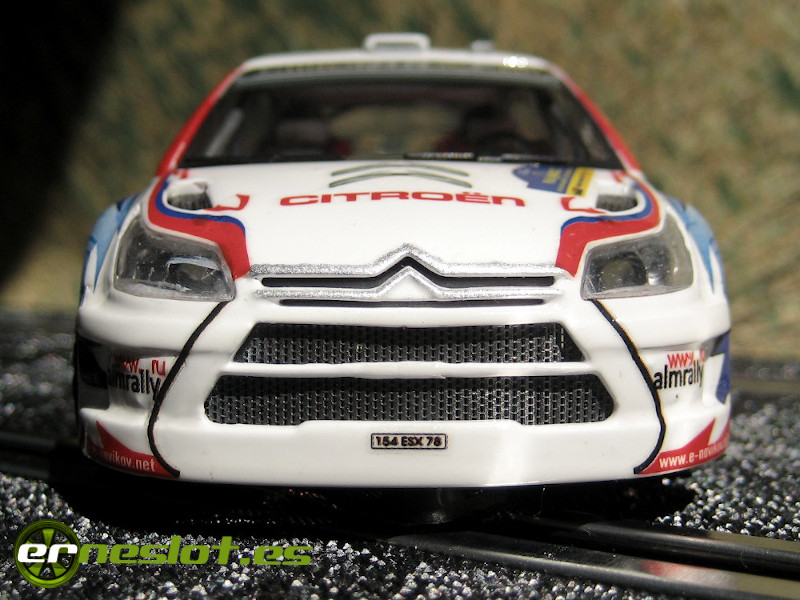
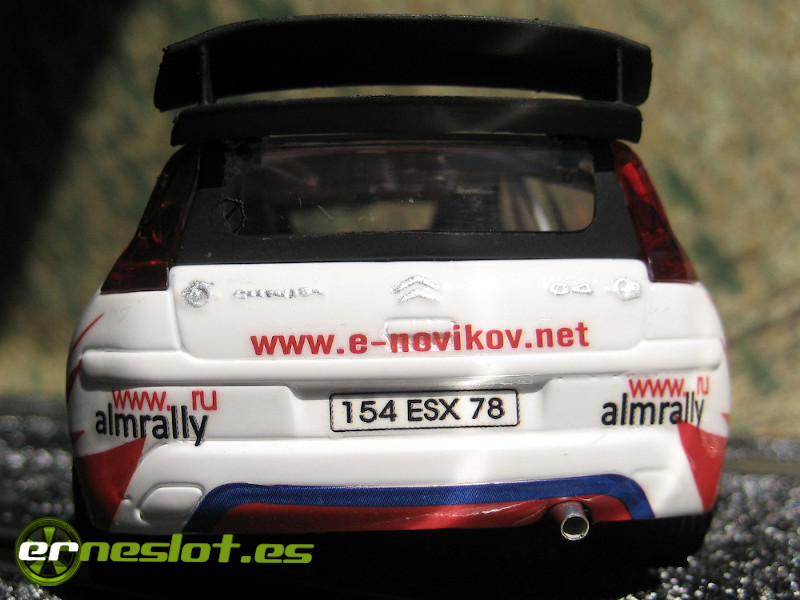
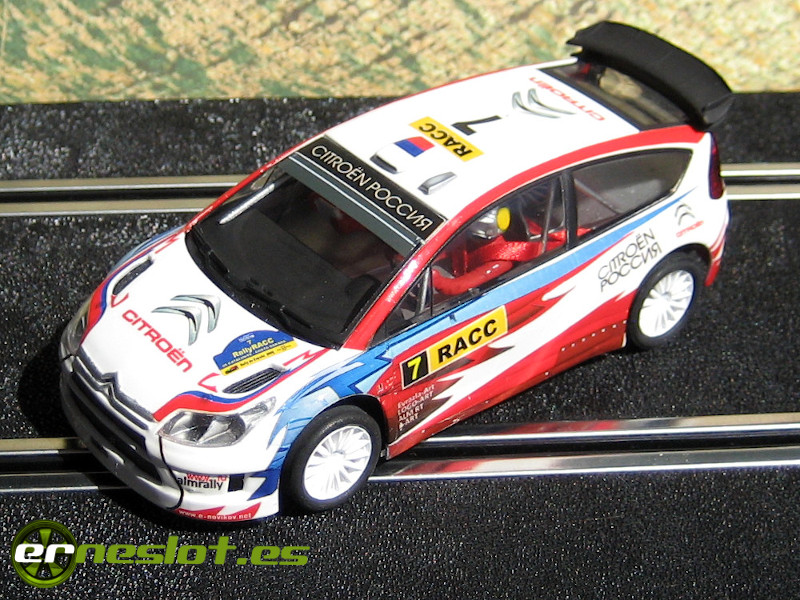
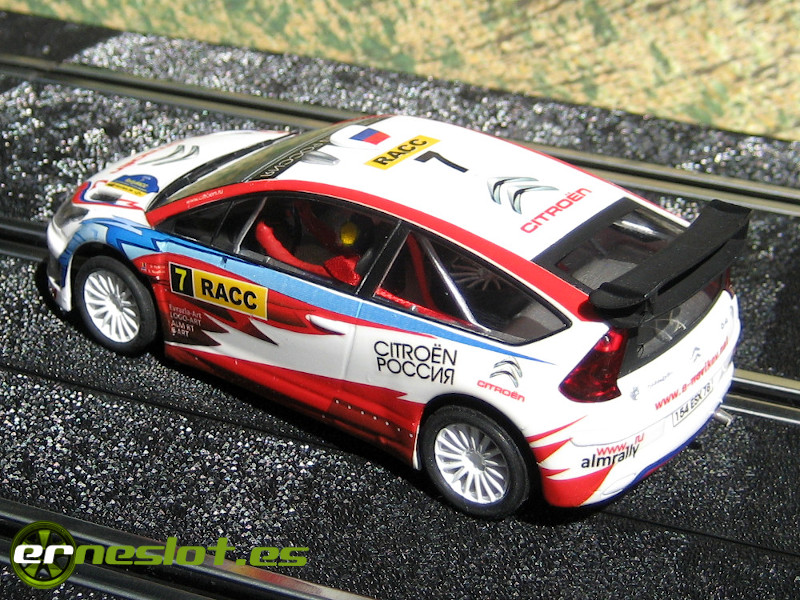
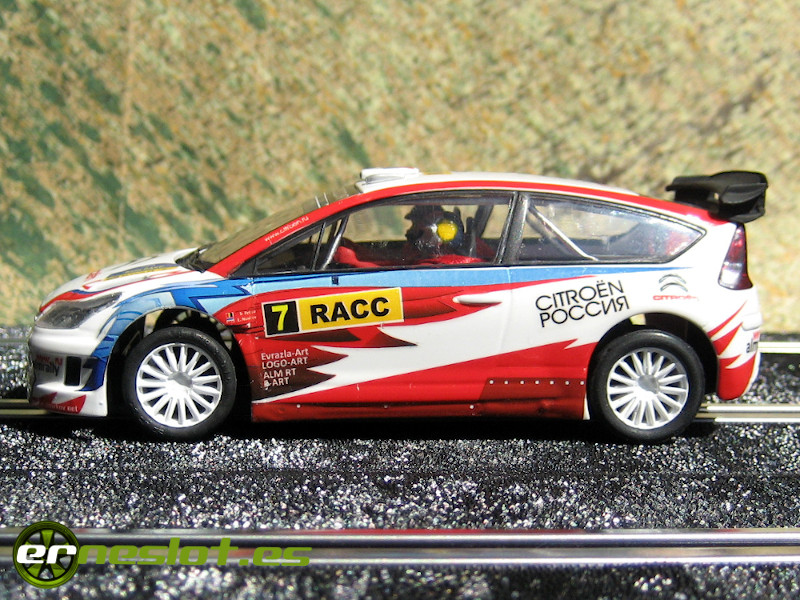
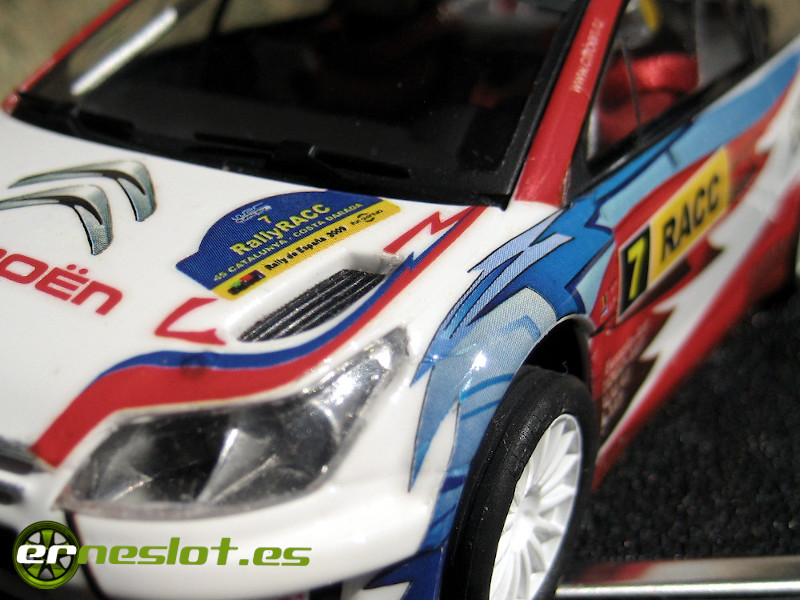
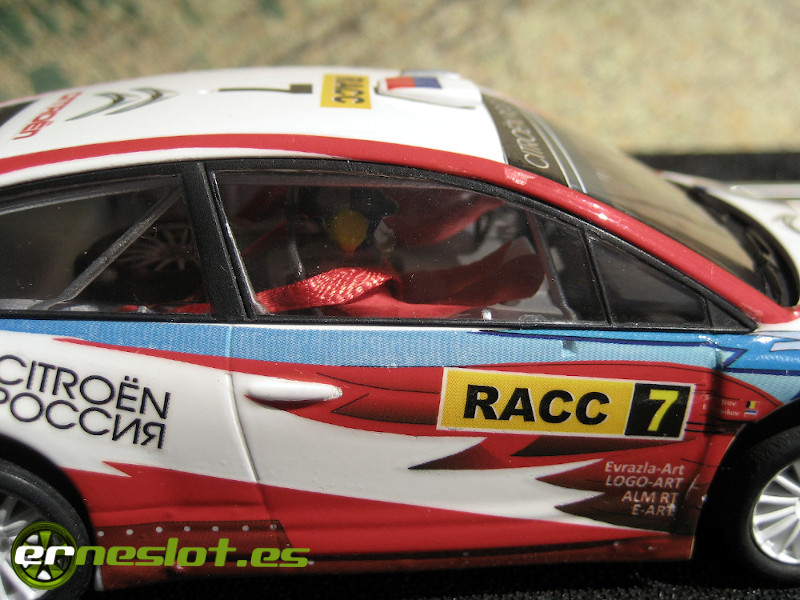
Citroën C4 WRC. Eugeni Novikov - Stephane Prevot. 2009 Rally RACC Catalunya – Costa Daurada
Time ago I got a SCX Citroën C4 WRC bodyshell, from the Altaya issue collections, and I kept it for subsequent work. Sometimes I buy slotcar parts without being clear about the usefulness that I am going to give them and this was one of those cases.
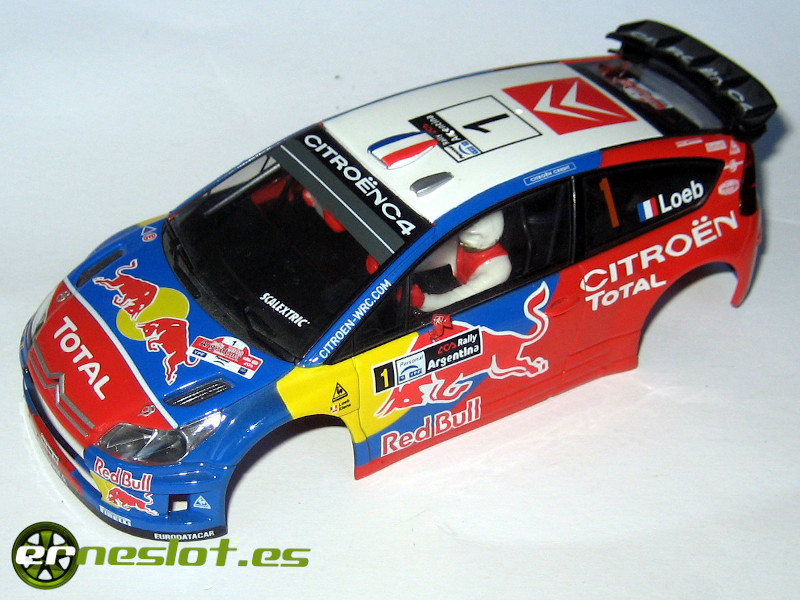
As I really like to match different chassis and bodies to each other, doing tests I realized that the front supports of the SCX C4´s body matched perfectly with the chassis of the Citroën Xsara Pro from the same manufacturer:
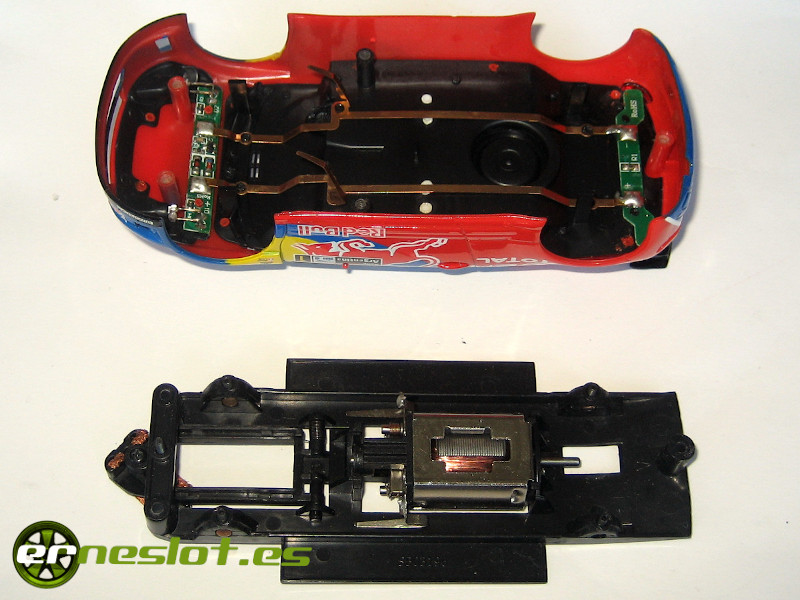
and that the wheelbase was practically the same:
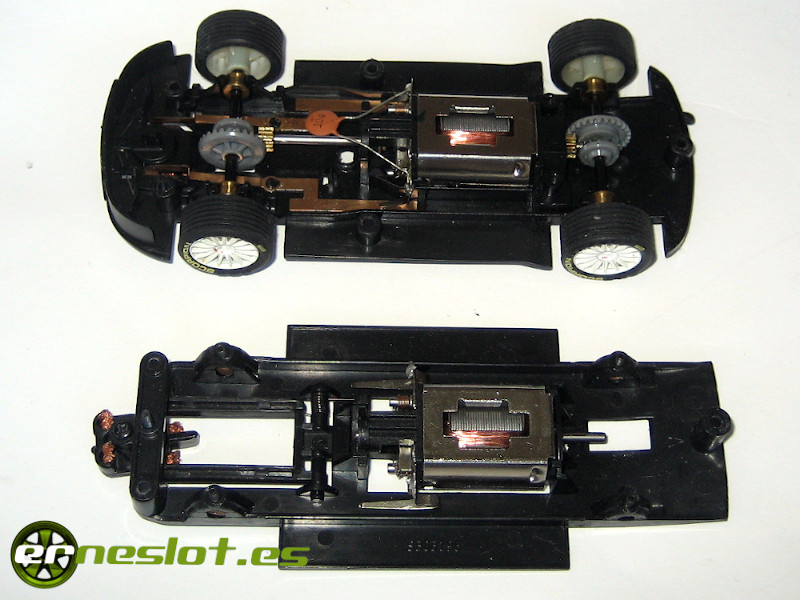
And since adapting the Xsara Pro chassis to the C4 bodyshell only involved changing the position of the rear lug, I did. I cut the back lug and glued it back to the body in the correct position with two-component glue. The arrow indicates the lug that I cut and returned to paste.
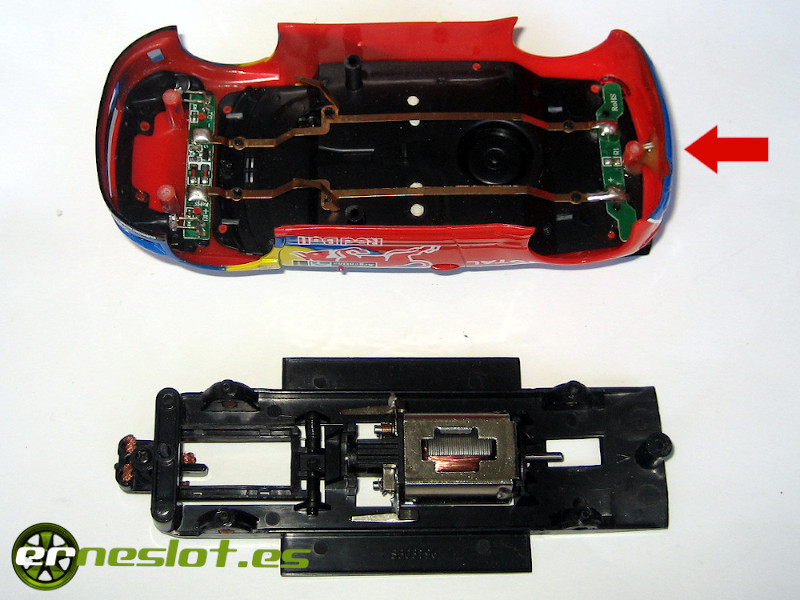
So the chassis fitted perfectly with the body, as you can see in the following image.

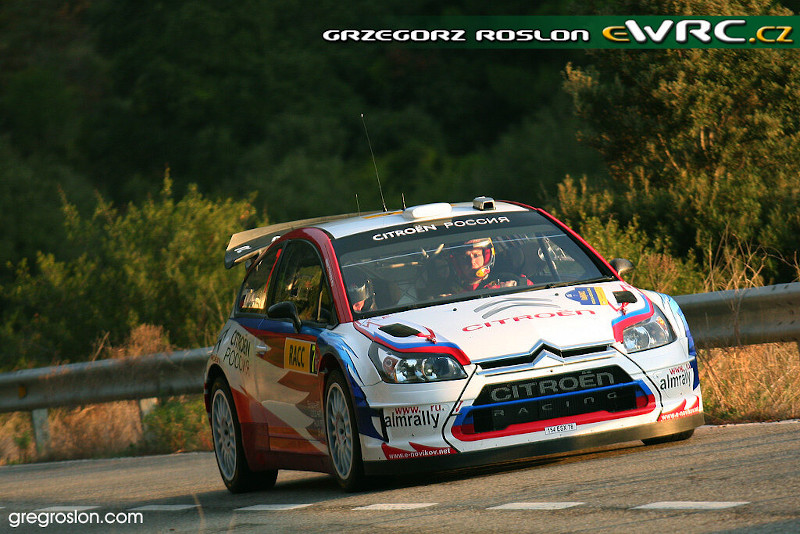
So the body was left standing for a long time, waiting to find a decoration that I liked. And searching the internet I found the decoration of the Citroën C4 with which the Russian Eugeni Novikov competed in the Rally RACC Catalunya – Costa Daurada, which you can see in the following image extracted from the website ewrc-results.com, which is a highly recommended website for those who like rally cars, with a huge quantity of pictures, highly recommended.
Regardless of whether I liked the decoration more or less, which I quite like, I wanted a decoration that I could buy ready-made at 1/32 scale because I did not want to develop the waterslide decals for this car. Searching through the internet I found an eBay seller who had for sale various rally car decorations, basically for SCX models (manufacturer that has always had special interest in reproducing this type of racecars), and I bought a set of decals, which is the one shown in the following image.
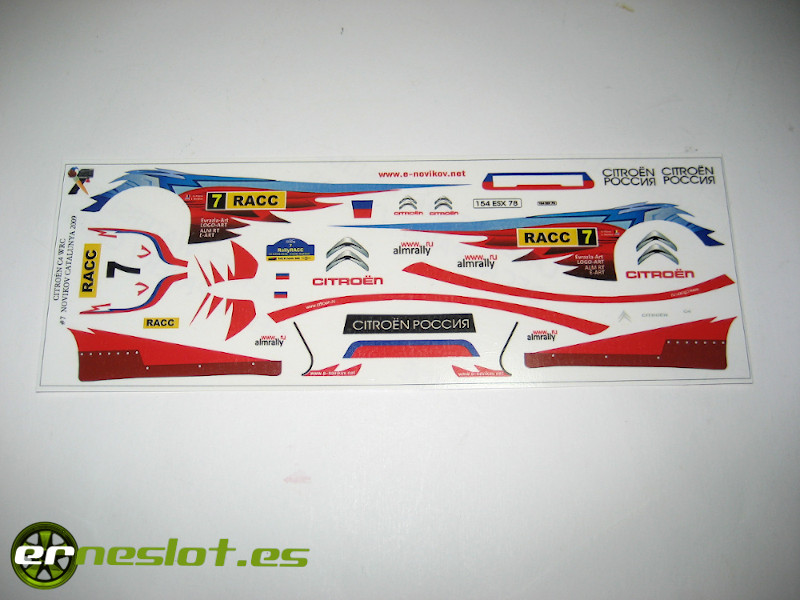
The set had an acceptable resolution although they came with some badly reproduced parts, as I communicated to the seller and manufacturer of the decals, but did not even bother to answer, so I do not know if he will have corrected the problem in subsequent impressions of the decal sheet.
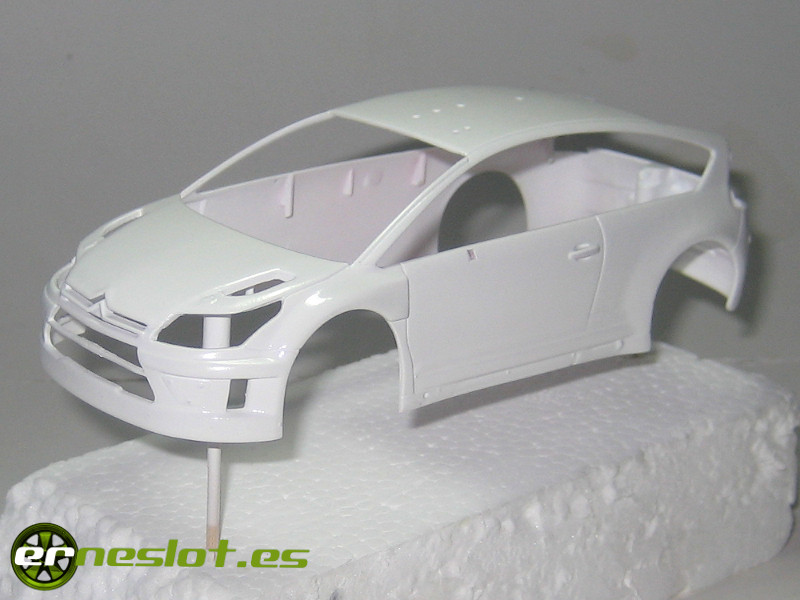
The slotcar decoration process is not a mystery. After disassembling and stripping the bodyshell, I applied a coat of primer (Dupli-Color gray spray) and then four thin coats of Tamiya gloss white acrylic paint X-2 reference applied with the airbrush.
With the paint well dry I proceeded to place the decals. The placement itself did not have an excessive complication since, although some were quite large such as those on the sides, the surfaces where I must to put them are quite smooth and that helps a lot when to place them.
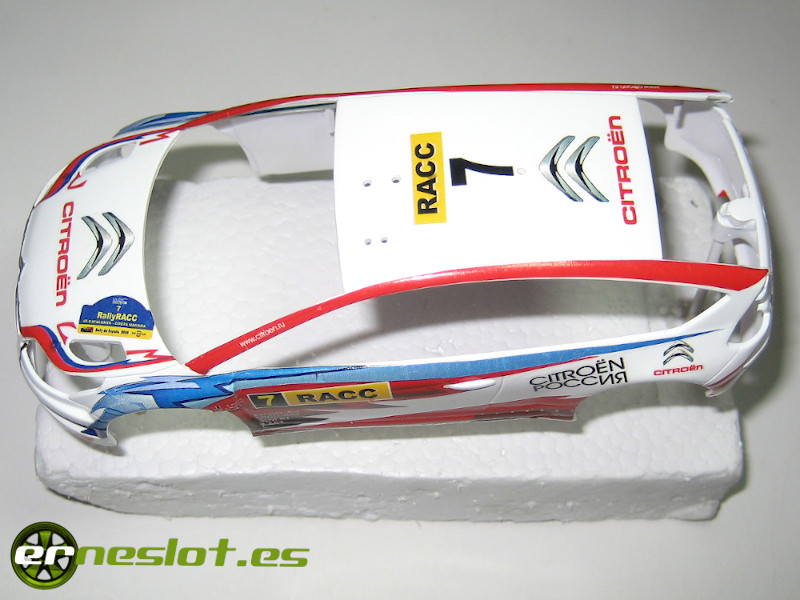
Regardless of the decals resolution, I noticed two main problems to this specific set:
- Some parts were poorly reproduced, specifically the elongated decal of the A-pillar up to the ceiling was wrong, since in the set it came twice the one on the left side, so when I put it on the right side it fitted bad.
- Some decals are poorly scaled, especially the underside of the sides. This is a problem that I have encountered in many commercial decal sets, therefore this problem is not exclusive to this manufacturer. How hard is it to scale the decals correctly to the corresponding body?
It is for the above reasons that I can in no way recommend the purchase of these decal sheets, and for which I make no mention to the manufacturer of the same.
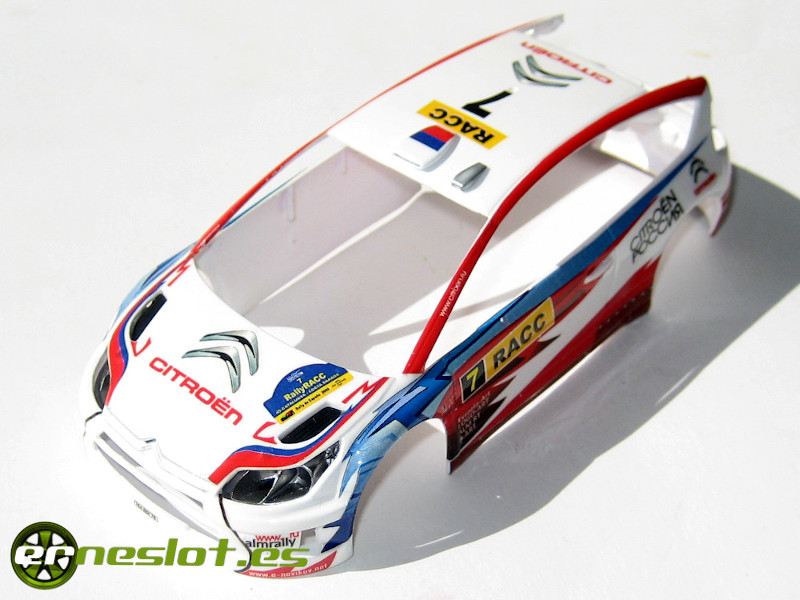
To finish the decoration, I applied a couple of coats of automotive varnish to the bodywork, achieving this result:
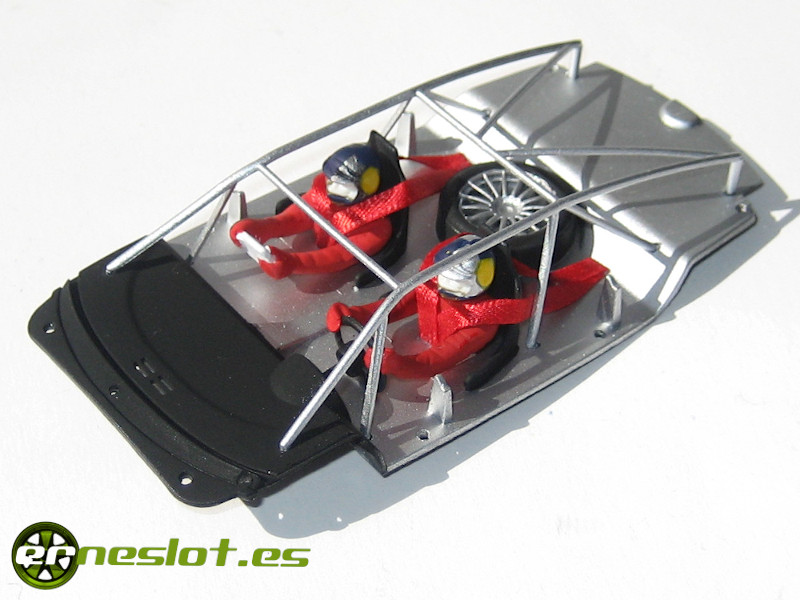
Parallel to the body decoration, I decorated the interior of the car. Instead of leaving a black tray, I painted it silver X-11 Tamiya acrylic, just like the original car, and XF-1 Tamiya matt black dashboard and seats, both applied with the airbrush. The rest of the interior details (driver and co-driver, spare wheel ...) I painted with Vallejo acrylic colors by brush, which for these cases are ideal.
For the mechanical part, I fitted Scalextric RX-4 motor with Avant Slot silicone cable on the chassis, so the car will only have rear wheel drive. On the rear axle I placed a 27-tooth Fly Car Model crown and the multi-spoke SCX wheels, the same wheels for the front axle. I did not want to mess with calibrated material because it was not the intention when making the slotcar, but the axles are calibrated although the rest of the material is not of such high quality.
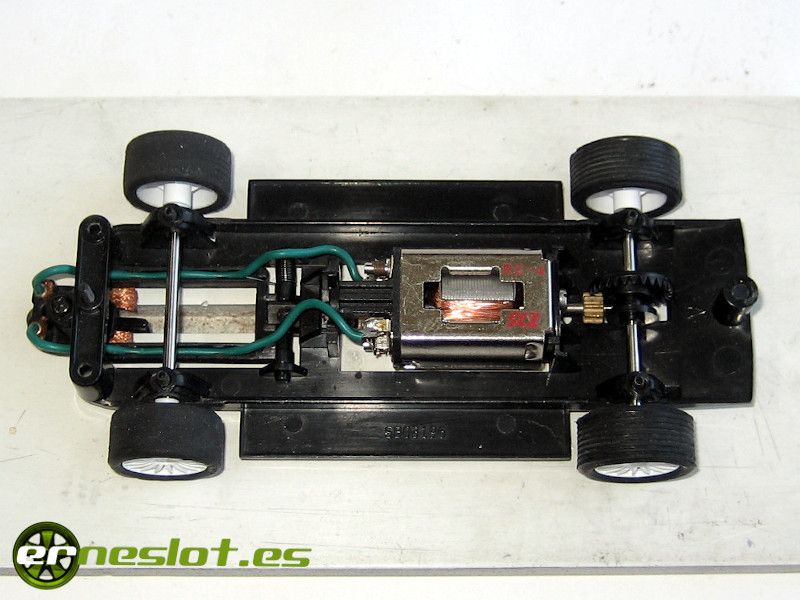
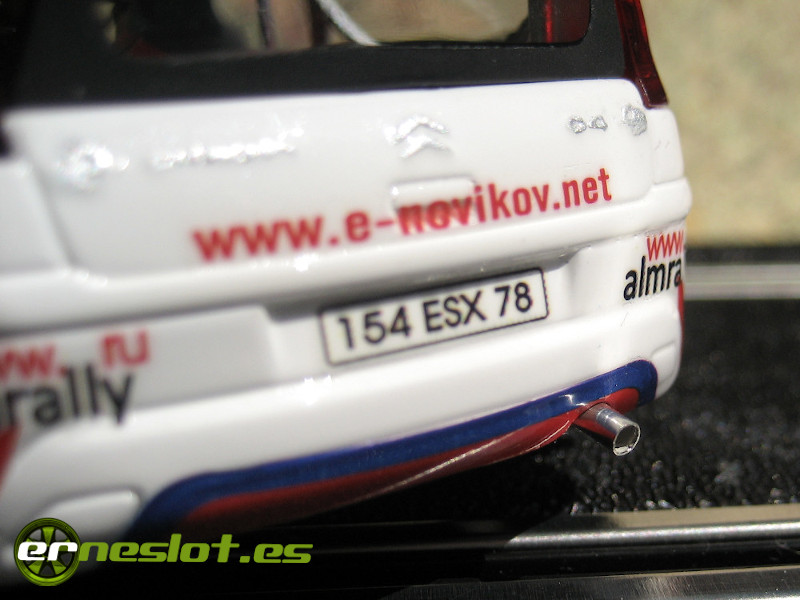
To finish, I painted the rear wing with matte black Humbrol enamel (reference 33). I really like Humbrol matt enamels, they cover very much and leave a very good, very homogeneous finish. I also painted with the same enamel the edge of the windows. It´s boring of apply but the results are great. I placed an electric crimp bootlace ferrule to simulate the exhaust pipe (it looks very real) and the grill front will come from the shadow mask of a CRT monitor that I have used other times.
With all the parts ready I assembled the slotcar and it was like this:
This car has left me with sensations more sour than sweet. I liked the body decoration but the problems with the decal sheet that I have mentioned above bothered me a lot. And in that sense it is a shame because the car is quite beautiful in itself. But the most it has bothered me is that the chosen chassis has not been the most suitable, since the wheelbase is about a millimeter shorter than the original and that is very noticeable on the rear axle, where the wheel is not well centered in the wheel arch as you can see in the images. Really the problem of this car has been to do it without having a minimum planning, and without doing previous tests with the mechanics. Has (obvious) faults and decoration faults, it has chassis and body adjustment problems that could have been solved with relative ease, but it is one of the works where I have learned the most what not to do. You can get good things out of everything.
Go to topCitroën Xsara WRC. Peter Solberg - Phil Mills. Rally Italia Sardegna 2009
From one of the many material changes I have made over time, I received a body of the SCX Citroën Xsara from that I kept along with so many other parts that are sometimes useful and others are simply stored in the spare parts boxes. Many times those parts (bodies, chassis, motors, tires ...) go in other changes but this time the bodyshell had another purpose.

On the other hand, a type 1 rally chassis with the complete rear axle mounted with its corresponding 27 teeth angle crown and 16 mm. aluminum wheels, all from Avant Slot, practically brand new. By placing it on the body of the SCX Xsara body I realize that it fitted quite well, although not perfectly, and I attached it to the body just as I did with the SCX Ford Focus that appears in this link.
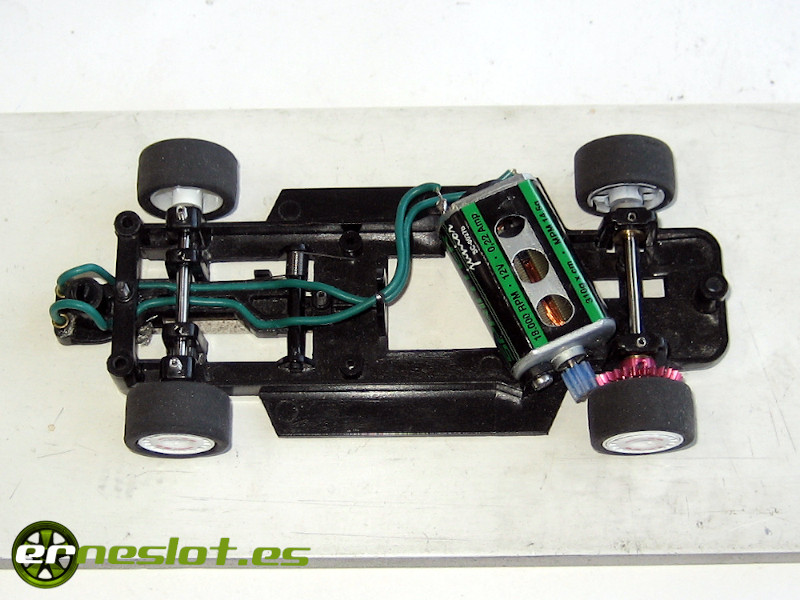
The mechanical components I assembled were calibrated axles, an 18,000 rpm. Scaleauto Sprinter Junior motor, 27 teeth angled crown and Cartrix 9 tooth nylon sprocket. Regarding the rims, the front ones are a plastic SCX OZ, and the rear ones are 16 mm. diameter aluminium Avant Slot to which I placed the interior of the SCX OZ wheels just as I did with the Rui Madeira Ford Focus.
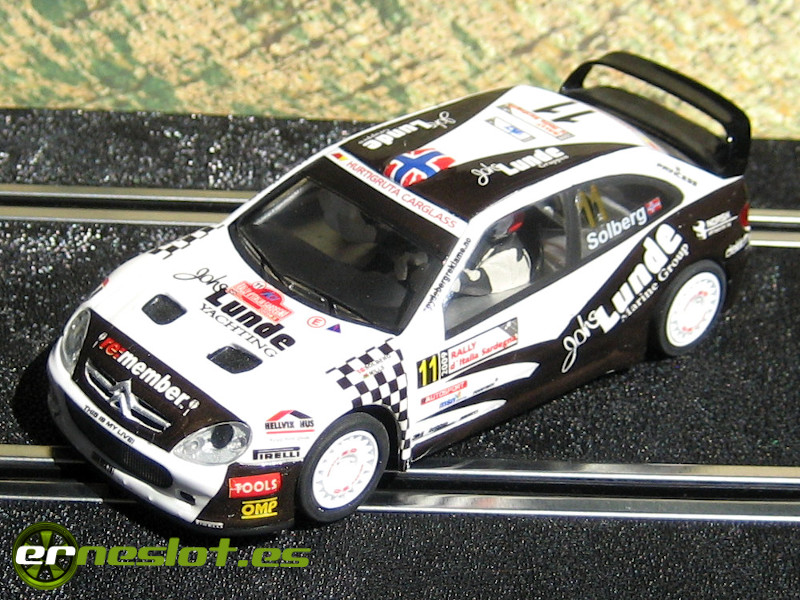
In contrast to Eugeni Novikov´s C4, in this case, I was clear about the decoration I wanted to make for the car. In the Web page "Calcas de rallye" I found the decoration of the Citroén Xsara with which Peter Solberg competed in the 2009 Rally Italia Sardegna. To be honest, I didn´t exactly want that decoration, but the one he raced at the Norwegian rally of the same year, where the base of the car instead of being white was metallic gray but the manufacturer of the decals did not have them available so I opted for the decoration of the 2009 Rally Italia Sardegna. This is the decal set I bought:
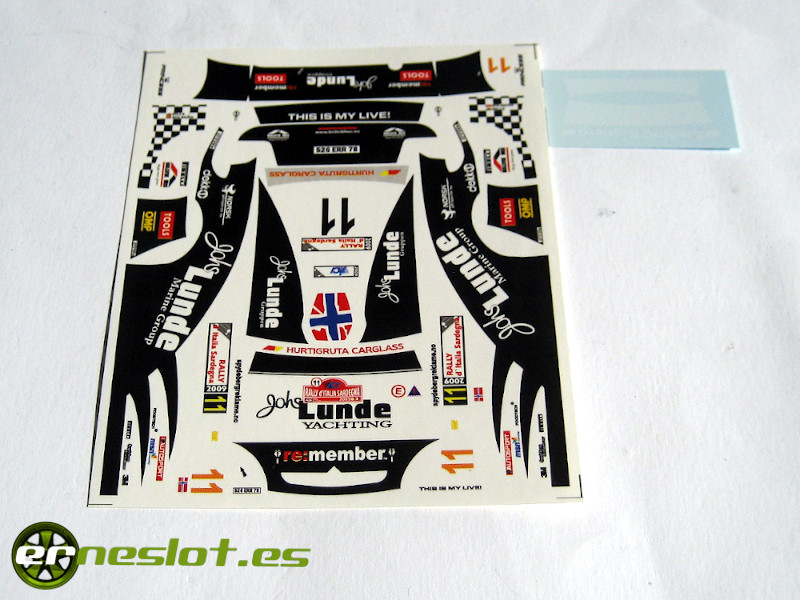
I have already said it several times, but I repeat it, the decals of this manufacturer are quite good and highly recommended, but as later I will explain, the results have not been as expected.
After attaching the Avant Slot chassis to the body, I proceeded to strip the paint by immersing it in 96° alcohol for half an hour. That time is enough for get a completely SCX body unpainted but sometimes it would need to be rubbed off gently with a used toothbrush. At least that was the case with the bodies of that time (those from the Altaya collections). As time has passed, to srtip tje paint a SCX slotcar has become more difficult although the technique of immersing them in alcohol is still valid, but you have to rub more, even in some parts have to be sanded gently to remove all the original paint.
After that we follow the usual processes, a smooth pass of sandpaper where necessary, a couple of coats of spray primer (in this case Dupli-Color gray, which gives very good results with the plastic of these cars) and four thin coats of white acrylic paint Tamiya reference X-2 gloss applied with the airbrush. Before applying the last coat, I usually pass a fine sandpaper, at least 500 grit waterproof sandpaper, to equalize the surface somewhat and remove any possible faults that may have been in the previous coats, with which I get a result like the one shown in the following image.
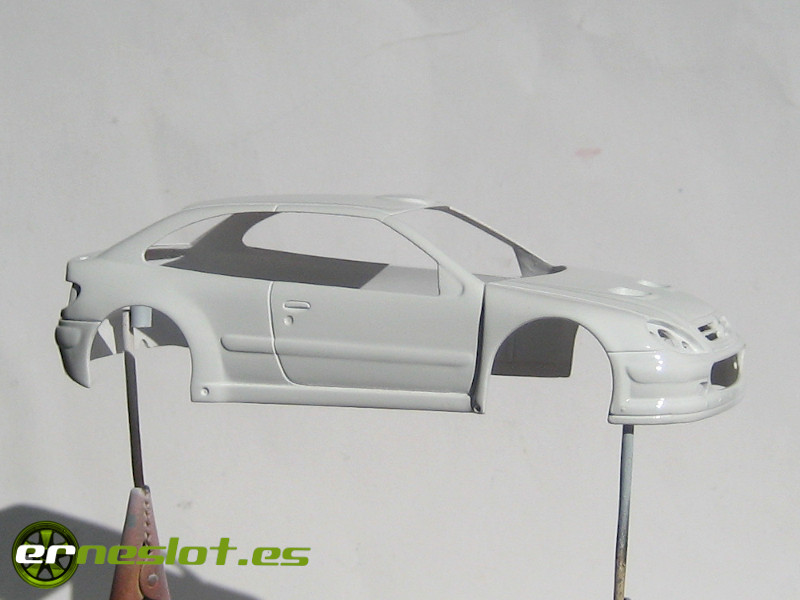
Regarding the application of paint, when I paint cars with light colors, the number of coats is variable, depending on the type of the paint that I use but I always make sure that the primer is applied evenly on the surface of the scale model. This is because the light colors cover worse than dark ones, and more coats are necessary to achieve a homogeneous color throughout the scale model. If we paint a red base slot car, as is the case, where we have applied the primer poorly, and in some places it has not covered well, when we paint white, the tone of the color will be different in the parts where the body is well covered with primer than in the places where the base color of the plastic appears, so more coats of paint would be necessary to homogenize the tone of the model, which can make us have to apply a lot amount of paint that would erase details from the bodywork, and above all giving a bad effect on the scale model once finished. How it happens many times, it is worth it to "waste time" in basic processes, such as the primer, which will then simplify our later work.
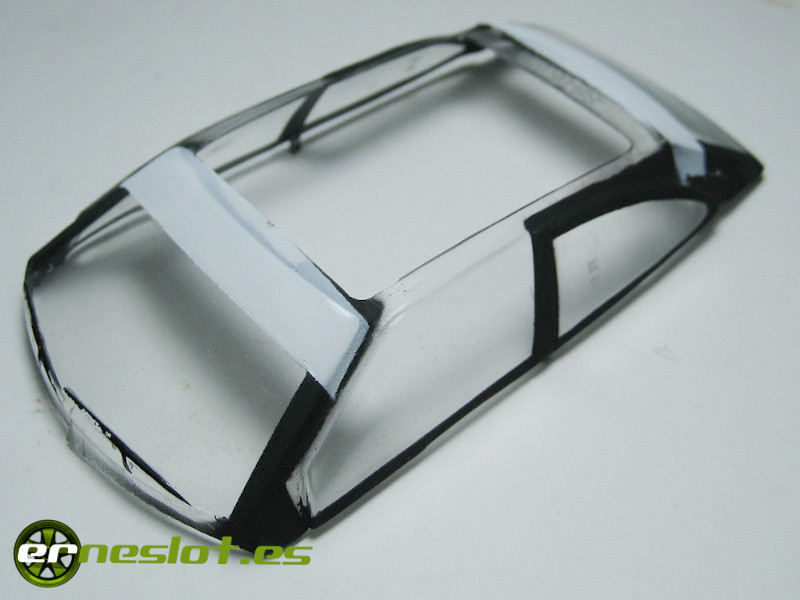
As I have been doing lately, I painted the glass edges with Humbrol reference 33 matt black enamel applied with the airbrush after masking the windows. For the sunshade, after masking carefully, I applied a coat of Tamiya X-2 white acrylic paint by airbrush with what I got the following result:
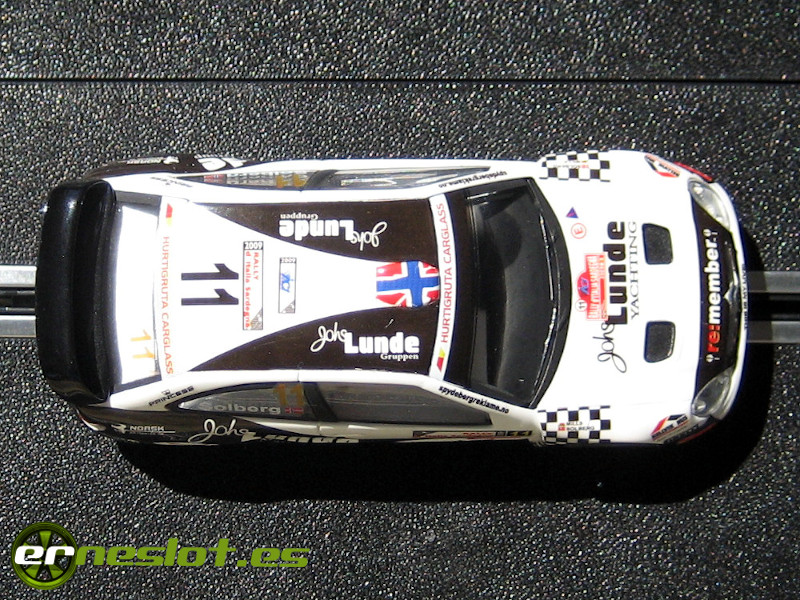
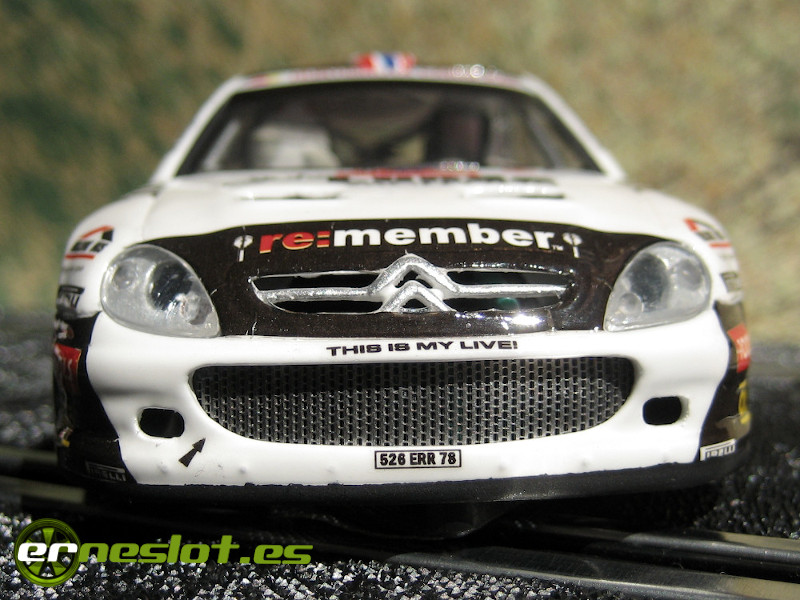
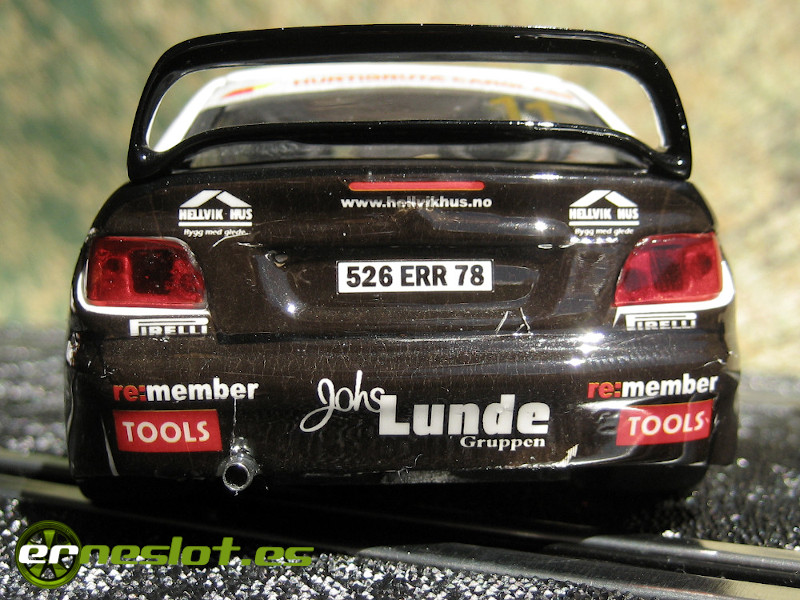
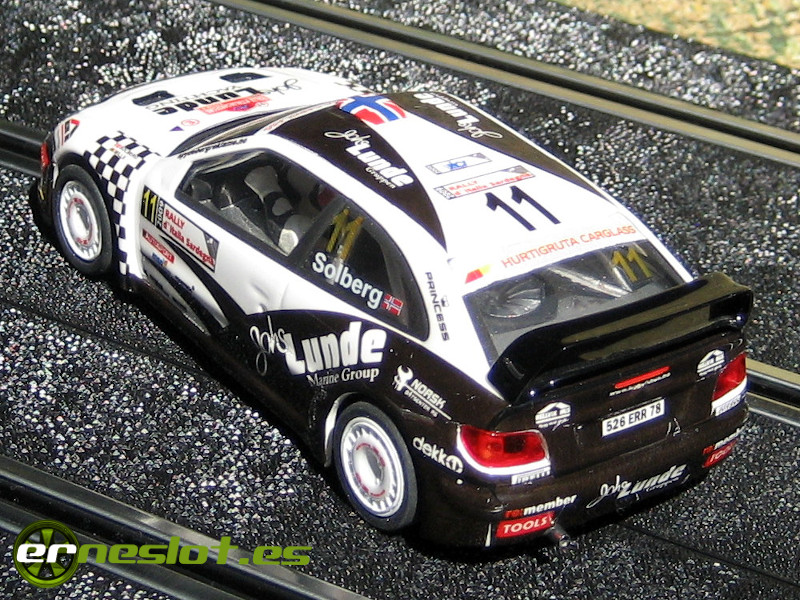
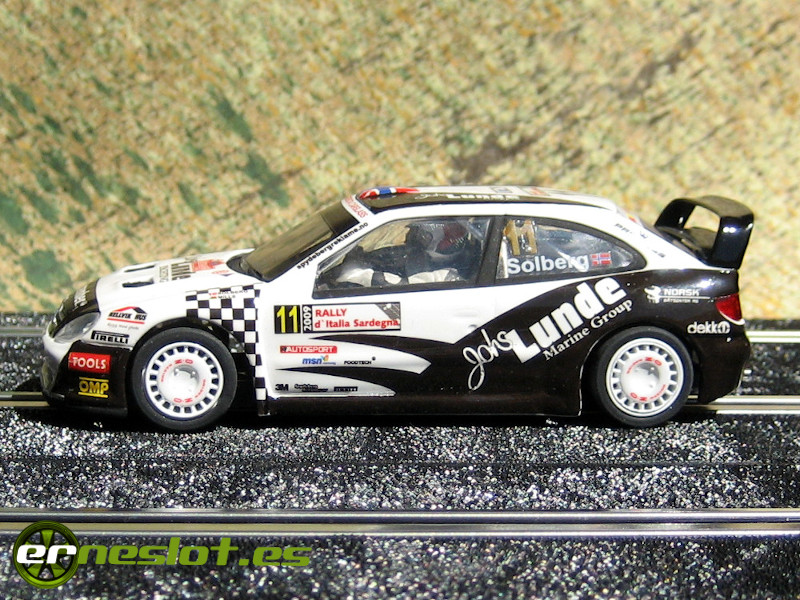
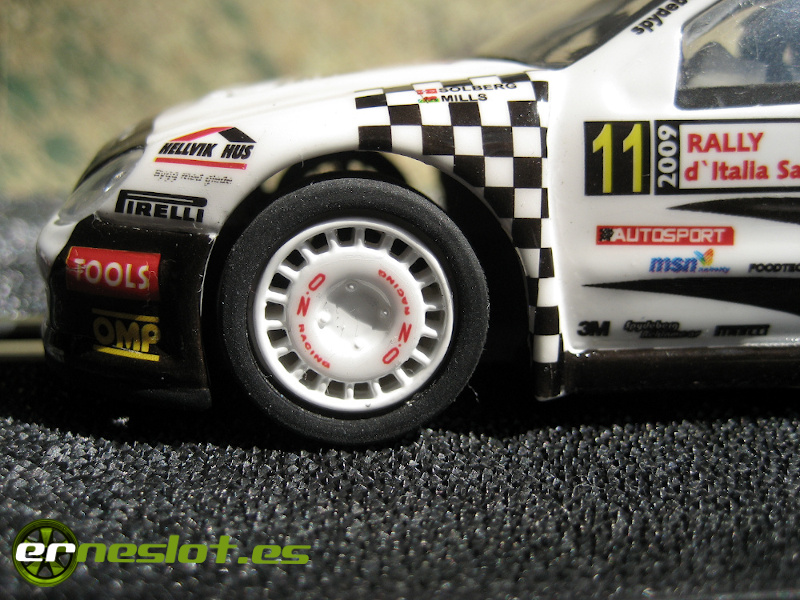
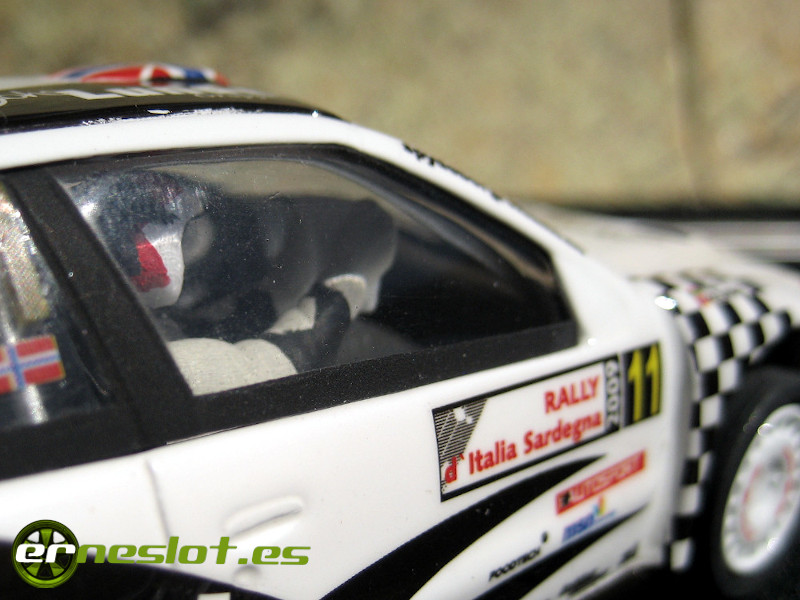
The process of placing decals does not differ at all from what I have done so many other times, and despite the fact that many of them were very large and they covered many surfaces of the car, I had no special problem when placing them. But of course, when you put such large decals always we will have the problem of adjusting to certain corners, and this time it was not going to be any different. At the bottom of the doors I didn´t get the right adaptation of the the decal, despite applying a large amount of Microsol, and they were not correctly placed, at least not for my taste. The loose logos and the decals that were placed on surfaces with less relief, such as the roof, remained perfectly placed and integrated into the decoration because they are very slim decals. After allowing the decals to dry well, I applied two coats of automotive varnish with the results that you can see in the following images where the body appears with the rest of the assembled parts (headlights, rear wing, windows...).
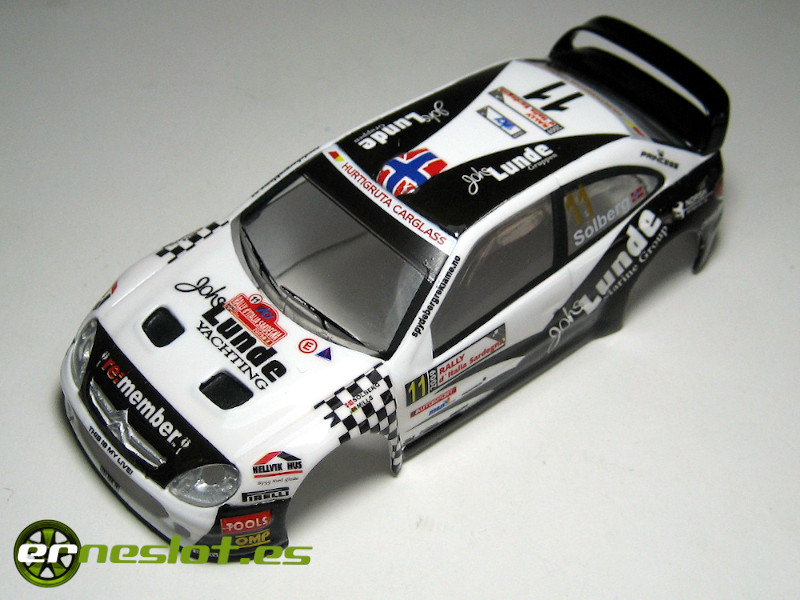
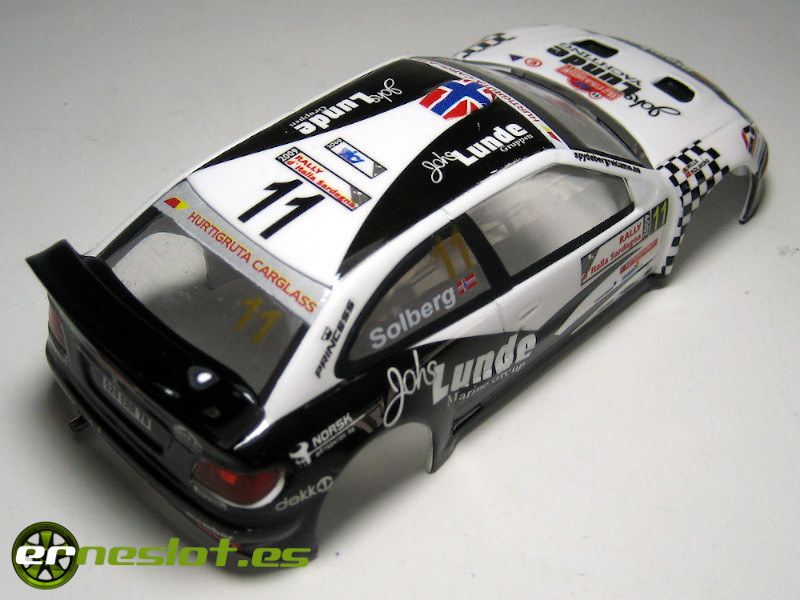
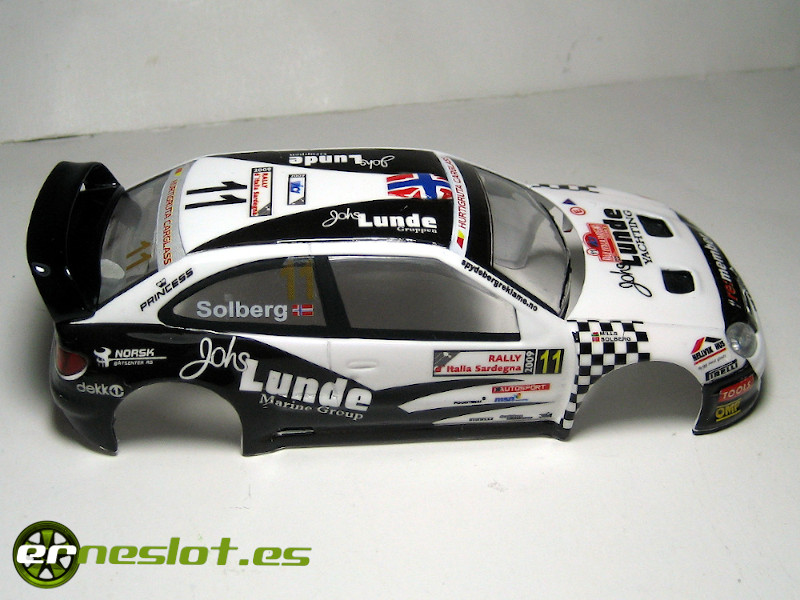
I want to comment about this type of decoration with such large decals. The temptation to use decals to decorate the whole side of a scale model, for example, it is very large because it saves us a huge amount of work, but the results will only be good if the surface where the decals have to be placed has few reliefs. In the case of the Xsara or the previous C4, the decals on the sides are placed relatively well because they are two smooth surfaces (saving parts such as the bottom of the doors, which perhaps with a little more care I could have left much better), but in more modern rally models, for example the SCX Ford Fiesta WRC, placing a decal in the front wheel arch, for example, can be a hell, in case we want to achieve acceptable results, and I say this from experience. In a decoration like this Xsara, it would have been better to mask the entire black part and paint it with the airbrush, to then place the various decals with the corresponding logos. In this case:
- The black tone would be more homogeneous. Decals are mounted over at some points, for example those on the sides with those on the rear, and at the points where they intersect, the black color is much more solid than you can see in the finish of the car (in the car images you can appreciate what I say).
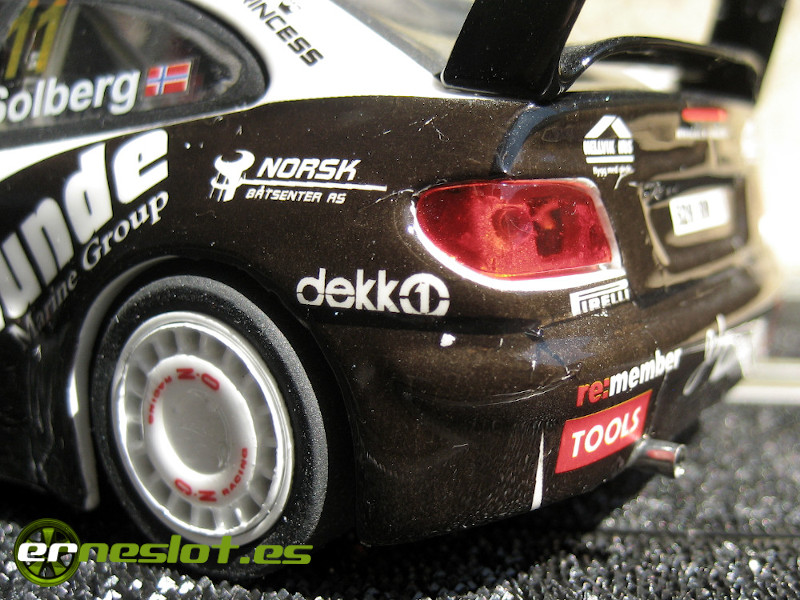
- At some points the decal is gathered up or does not cover, so that there will be parts that are not covered by the decal and in others there are wrinkles which are sometimes very evident, as in this case in the rear bumper area.
- It is very difficult, but not impossible, to make a large decal that perfectly fits the shape of the car, and in some places they just won´t come, such as around the slotcar tail lights.
The case is that after placing the decals the result can only be considered as acceptable, and I acknowledge my part of the blame, because there should be been somewhat more careful in its placement. But in this type of decoration, the decals go as far as they go. And the result with the bodywork discouraged me in such a way that it was reflected in the decoration of the interior, quite poor as you can see in the following image. The tray painted metallic gray with matte black dashboard (Tamiya acrilyc X-11 and XF-1 respectively) applied with airbrush and driver and co-driver painted with Vallejo acrylic colors.
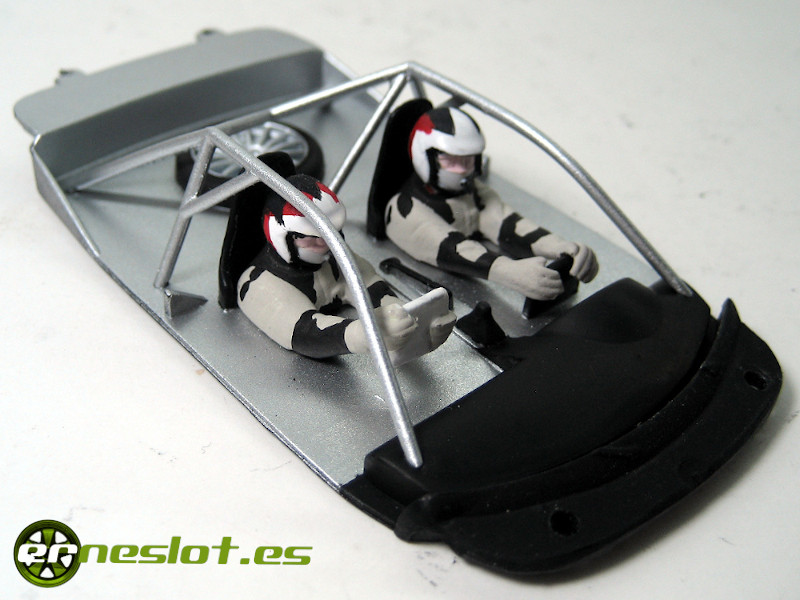
The shortage of body elements made the assembly very simple, with the headlights and spoiler coming from the original body other scratchbuilding pieces were added, such as the simulated exhaust pipe with a crimp bootlace ferrule and the front grille of the same way I did with the C4 and after screwing it to the chassis the car looked like this:
After all that has been said, there is little more to say, the result is in sight. My expectations with this car were higher than the result achieved, which I can describe as mediocre, some things have been good but others not so much. Especially upset am I withthe finish of the decals in the rear, and I like the decoration very much. On the other hand, the fit of the chassis has been quite good. It is not a consolation but something is something.
And here is an image of the two slot cars together:
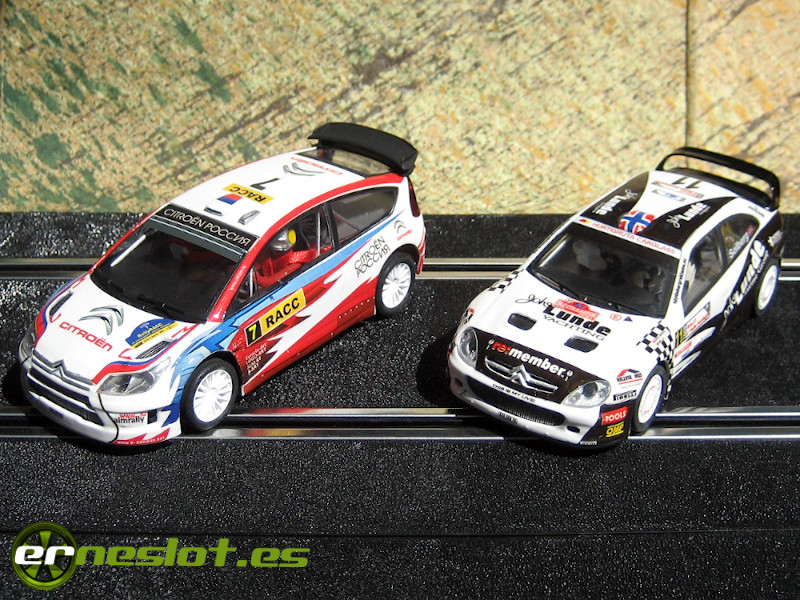
Anyway, not everything in these two works have been bad things. You learn more from mistakes than from successes and in these two cases I have learned that a little extra effort when doing things makes a big difference in the final finish. Just a little more planning and some extra testing when adjusting the chassis would have greatly improved the final result in the case of the C4 and a little more care in placing the decals would have been done with the Xsara. Not that would involve a radical change but sure for better, and it is because that the effort that is put into the works can be shown at the end. For sample, two buttons.
Go to topFortnightly updates, new cars and more in www.erneslot.es


